Team:ArtScienceBangalore/Project
From 2011.igem.org
| (One intermediate revision not shown) | |||
| Line 49: | Line 49: | ||
'''The Project''' | '''The Project''' | ||
| - | Can you repurpose the BioBrick to use it for environmental mapping? What will happen when results from many IGEM projects enter the real world? Would they show up as bands in a gel? | + | Can you repurpose the BioBrick to use it for environmental mapping? Can you use the BioBrick as a baseline measurement tool for measuring presence of other BioBricks?What will happen when results from many IGEM projects enter the real world? Would they show up as bands in a gel? |
We explored answers to these questions through the following: | We explored answers to these questions through the following: | ||
| Line 184: | Line 184: | ||
'''Building a Balloon Mapper''' | '''Building a Balloon Mapper''' | ||
| + | [[File:Baloonmapping.jpg | 800x390px]] | ||
| + | Complete instructions on how to build one can be gotten from [http://publiclaboratory.org/tool/balloon-mapping '''the public laboratory'''] | ||
'''A Sample DIY Map''' | '''A Sample DIY Map''' | ||
Latest revision as of 01:45, 29 October 2011
Project
The BioBrick has been used as an abstraction or template for creating standardized functional parts. This year's ArtScienceBangalore project proposes alternate re-appropriations of the BioBrick by using existing BioBrick primers as random-PCR primers in investigating soil samples. These random PCR primers provide a succinct signature of the biological diversity present in soil samples. Such investigation of soil leads us to ask questions about citizen’s science "performed" by non-institutional actors using accessible tools, and also offers a glimpse into the "post-natural world" where BioBricks may very well end up in our environment as bands in a gel. By imagining a world in which the BioBrick has become the accepted standard for synthetic biology, and where these engineered products are ubiquitous in our lives and environments, the samples we have archived will serve as the baseline from which the subsequent extent of human influence can be measured.
Our project is part speculative. Would it be possible to involve a larger community in a Synthetic Biology project? If yes, what questions would we collectively ask and how would we find answers to these questions together? If we could create an open community of citizen scientists by initiating such investigations in an inexpensive manner, could science become a performative celebration of humanity?
The Project
Can you repurpose the BioBrick to use it for environmental mapping? Can you use the BioBrick as a baseline measurement tool for measuring presence of other BioBricks?What will happen when results from many IGEM projects enter the real world? Would they show up as bands in a gel?
We explored answers to these questions through the following:
Collecting soil samples from contested spaces i.e. environments with high levels of pesticides, background radiation, and chemical pollution
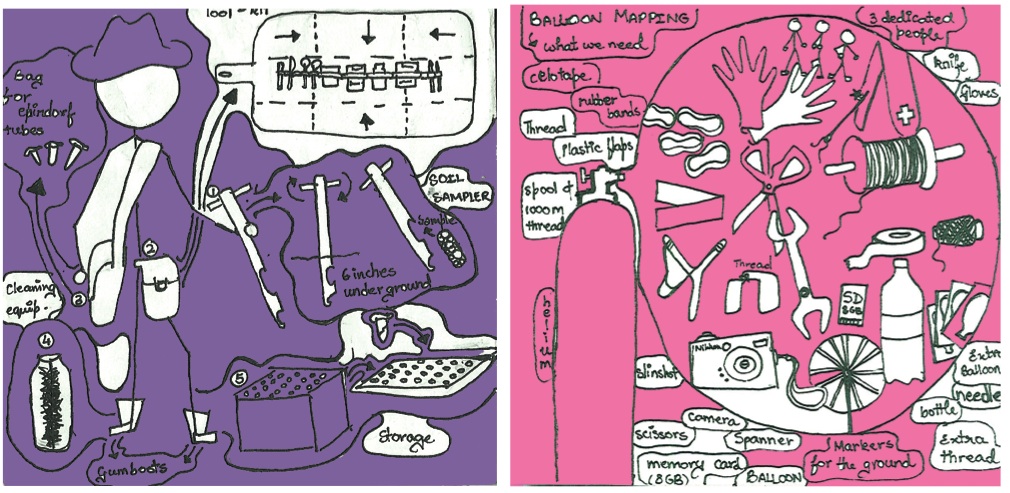
Mapping the various contested spaces from where these soil samples were collected, using grassroots mapping techniques like helium balloon mapping
Extracting DNA from the soil samples and creating an archive of these samples
Amplifying the DNA using BioBricks as PCR primers
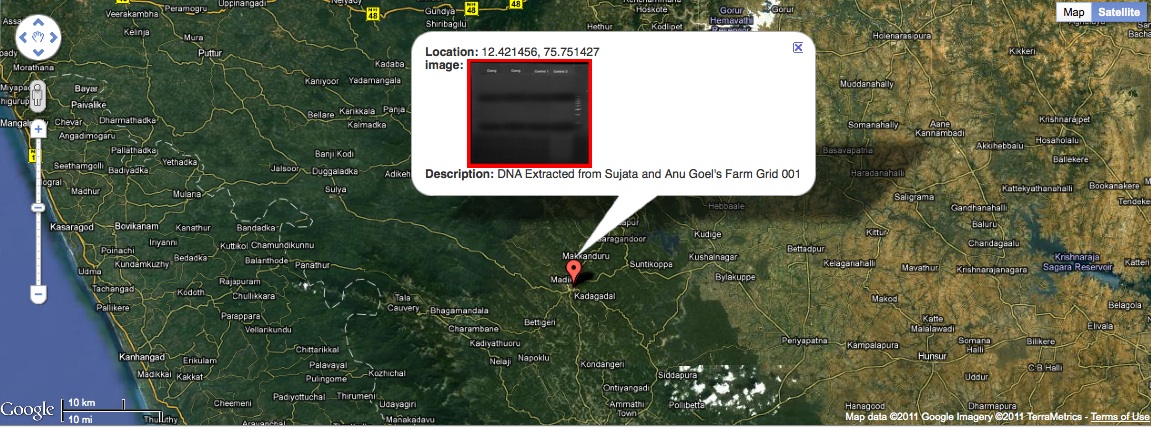
Sharing the PCR gel results of the soil samples on a publically accessible online map
Inviting people to send in their soil samples to participate in a public science-art project
Open Citizen’s Science
Instead of creating BioBricks, as is the IGEM project norm, we focussed on creating novel ways for existing BioBricks to be used by ordinary citizen scientists to investigate their neighborhoods. One of the areas that we chose to focus on was microbial diversity in soil. However, the use of expensive genetic sequencers was out of the question. So we explored a simple way to analyze diversity .i.e. compare PCR gel bands from DNA extracted from various soil samples and use that to compare soil microbial diversity.
Simple hacks for the BioBrick
Since BioBricks are easily available, we used them as primers for PCR. This solves 2 issues: You don’t have to buy primers You can easily map synthetic organisms in the environment (if you find any)
Grassroot mapping of Soil Diversity
We also borrowed some techniques of [http://publiclaboratory.org/tool/balloon-mapping grassroot cartographers] to build our own maps of the soil samples and map GEL bands on to them. We hope to expand this project into a public science project.
Project Process and Protocols
We collected various soil samples from which we extracted DNA and ran it through a PCR machine (using standard Biobrick primers) followed by gel electrophoresis to characterize the combined flora and fauna of a site visually; the ecology’s fingerprint, if you will.
Later we compared the results from various samples in an attempt to find correlations.
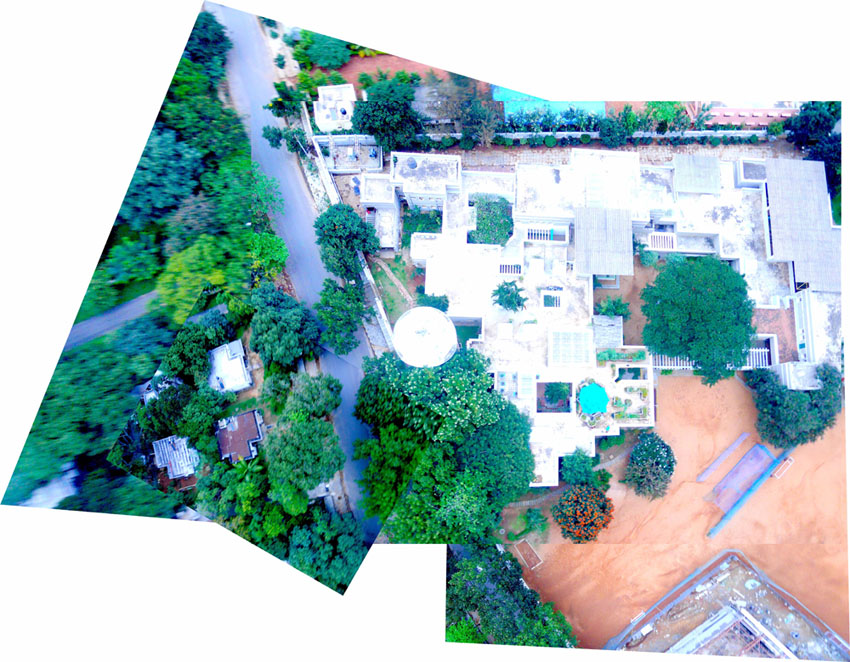
Each soil site was documented through aerial photography. This was achieved by the use of a handmade helium-filled balloon mount and a camera. The photographs from these were sown together to produce a comprehensive map of the immediate surroundings.
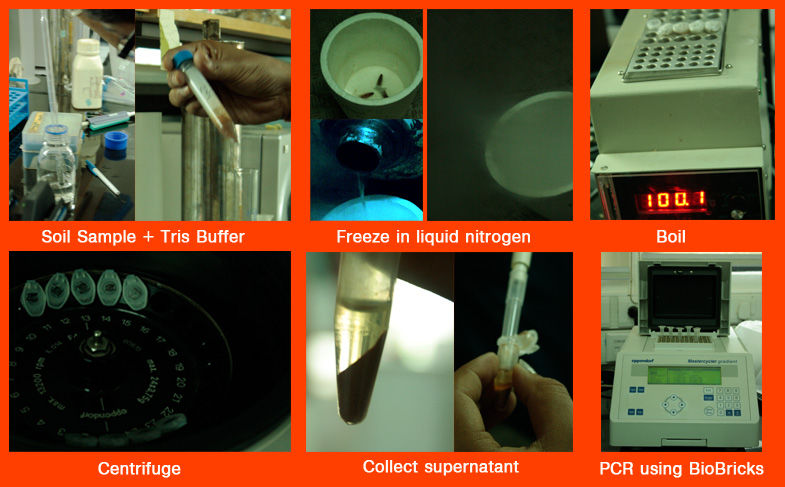
Extraction of DNA from soil samples
Protocol 1
1. Before the DNA can be extracted the cell walls must be broken open. This process is called lysing and the agent used is called a lysosome. We did this by vortexing using phenol-chloroform, and further the addition of SDS (a detergent) to remove the membranes of lipids.
2. Next comes the centrifuging to separate the layers. The DNA lies in the interface between the two phases (proteins and reagents).
3. After the protein is removed the DNA can be precipitated using cold ethanol or isopropanol (propan-2-ol). The DNA, being insoluble in alcohol, will come out of the solution. Additionally the alcohol serves as a wash to remove the added salts.
4. The resulting DNA pellet should be washed with cold ethanol and centrifuged.
5. After drying the pellet the DNA should be resuspended in a Tris buffer solution.
6. Presence of DNA can be confirmed by electrophoresing on an agarose gel containing ethidium bromide, or another fluorescent dye that reacts with the DNA, and checking under UV light.
Protocol 2
1. For dissolving the DNA present in the soil, mix the soil sample (5 g) in Tris Buffer (5 mL of 25 mM buffer) and mix thoroughly.
2. Then in order to separate the cells out of the solution, filter using 5μm cellulose nitrate filter. Most microbial cells are between 0μm & 5μm, and will be a part of the filtrate.
3. In order to separate the different components of the filtrate, it is centrifuged at 13.2 krpm for 10 mins at room temperature(25°C).
4. The pellet, containing the concentrated DNA (after centrifugation) is separated from the supernatant, and dissolved in 100μL autoclaved milliQ water.
5. The resultant mixture is boiled at 100°C for 20 minutes.
6. Presence of DNA can be confirmed by electrophoresing on an agarose gel containing ethidium bromide, or another fluorescent dye that reacts with the DNA, and checking under UV light.
Protocol 3
1. For dissolving the DNA present in the soil, mix the soil sample in Tris Buffer (2 gm soil sample in 2 mL 25mM Tris Buffer) and mix thoroughly.
2. Freeze the eppendorf tubes containing the above mixture in liquid nitrogen, and then boil (at 100°C for 20 mins). This will cause breakdown of the cell, and release the DNA into the mixture.
3. It is then centrifuged at 13.2 krpm for 10 mins at 25°C. This will result in the separation of the DNA from the soil particles.
4. Discard the soil particles, and collect the supernatant.
5. Presence of DNA can be confirmed by electrophoresing on an agarose gel containing ethidium bromide, or another fluorescent dye that reacts with the DNA, and checking under UV light.
Gel Electrophoresis
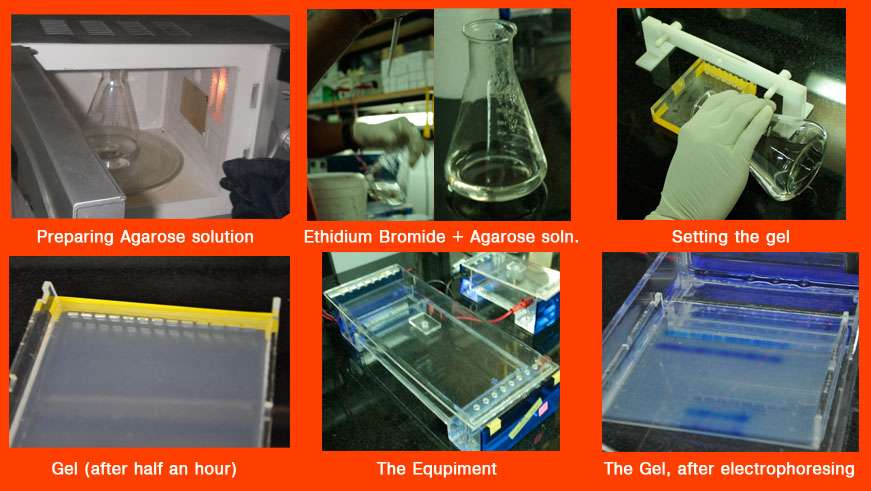
Presence of DNA can be confirmed by electrophoresing on an agarose gel containing ethidium bromide, or another fluorescent dye that reacts with the DNA, and checking under UV light.
Preparing an agarose gel solution
1. Add the tris buffer to the agarose powder, heat at 50 degrees centigrade till you obtain a clear solution and add Ethidium bromide.
2. Pour into the Gel box, add the comb to form wells, get rid of any air bubbles and let it settle for 30 minutes.
3. Load 3 micro litres of the samples in the wells
4. Begin Gel electrophoresis
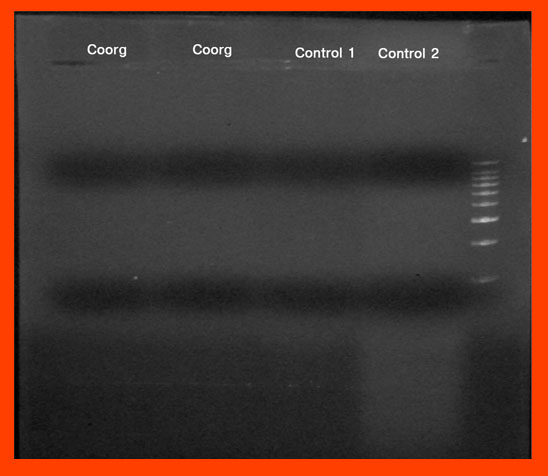
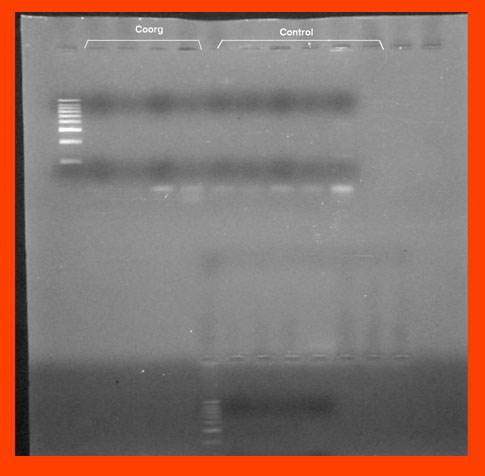
Gel Bands from the rain forests of Coorg
Building a Balloon Mapper
Complete instructions on how to build one can be gotten from [http://publiclaboratory.org/tool/balloon-mapping the public laboratory]
A Sample DIY Map
Use [http://www.google.com/fusiontables/public/tour/index.html Google Fusion Tables] to Plot Gel Bands geographically
 "
"

