Team:BU Wellesley Software/Notebook/EvelynNotebook
From 2011.igem.org
(→Week 7/18-7/22) |
|||
| Line 1: | Line 1: | ||
<html> | <html> | ||
| - | <head> | + | <head> |
| + | <title>BU-Wellesley iGEM Team: Welcome</title> | ||
| + | <meta http-equiv="Content-Type" content="text/html; charset=utf-8"> | ||
| + | <script src="http://cdn.jquerytools.org/1.2.5/full/jquery.tools.min.js?foo"></script> | ||
<style type="text/css"> | <style type="text/css"> | ||
| - | |||
| - | |||
/*hide default igem banner and reformat style into blank slate*/ | /*hide default igem banner and reformat style into blank slate*/ | ||
#globalWrapper {width: 100%;} | #globalWrapper {width: 100%;} | ||
| Line 22: | Line 23: | ||
/*actual content styles*/ | /*actual content styles*/ | ||
| + | body {width: 800px; margin:auto;} | ||
| + | #bu-wellesley_wiki_content {height:auto; line-height:100%;} | ||
| + | /*#bu-wellesley_wiki_content a {color:#69d01d;}*/ | ||
| + | #bu-wellesley_wiki_content a:hover {text-decoration:none; color:#3d3f3c;} | ||
| - | + | .navbar li {color: #ffffff;} | |
| - | + | .navbar li a {color: #ffffff;} | |
| - | + | .navbar li a:hover {background:#69d01d; color: #ffffff;} | |
| - | + | ||
| + | /*only use for current page content header (i.e. Team, G-nomeSurferPro, etc)*/ | ||
| + | H6 { | ||
| + | font-family: Helvetica; | ||
| + | text-transform: uppercase; | ||
| + | text-decoration: none; | ||
| + | text-align: left; | ||
| + | color: #3d3f3c; | ||
| + | font-size: 32pt; | ||
| + | } | ||
</style> | </style> | ||
| - | <link rel="stylesheet" type="text/css" href="http://cs.wellesley.edu/~hcilab/iGEM_wiki/css/ | + | |
| + | <link rel="stylesheet" type="text/css" href="http://cs.wellesley.edu/~hcilab/iGEM_wiki/css/Team.css"> | ||
| + | |||
</head> | </head> | ||
| + | <body class="basiclayout"> | ||
| + | <div id="bu-wellesley_wiki_content"> | ||
| - | <a href="https://2011.igem.org/Team:BU_Wellesley_Software"><img src="http://cs.wellesley.edu/~hcilab/iGEM_wiki/images/banner.png" width=" | + | <p style="text-align:center;"><a href="https://2011.igem.org/Team:BU_Wellesley_Software"><img src="http://cs.wellesley.edu/~hcilab/iGEM_wiki/images/banner.png" width="800px"></a></p> |
| - | < | + | <ul id="nav"> |
| + | <li><a href="https://2011.igem.org/Team:BU_Wellesley_Software/Team">Team</a></li> | ||
| + | <li><a href="#">Project</a> | ||
| + | <ul> | ||
| + | <li><a href="https://2011.igem.org/Team:BU_Wellesley_Software/Project_Overview">Overview</a></li> | ||
| + | <li><a href="https://2011.igem.org/Team:BU_Wellesley_Software/Clotho">Clotho</a></li> | ||
| + | <li><a href="https://2011.igem.org/Team:BU_Wellesley_Software/G-nomeSurferPro">G-nome Surfer Pro</a></li> | ||
| + | <li><a href="https://2011.igem.org/Team:BU_Wellesley_Software/OptimusPrimer">Optimus Primer</a></li> | ||
| + | <li><a href="https://2011.igem.org/Team:BU_Wellesley_Software/Trumpet">Trumpet</a></li> | ||
| + | <li><a href="https://2011.igem.org/Team:BU_Wellesley_Software/Puppetshow">Puppetshow</a></li> | ||
| + | <li><a href="https://2011.igem.org/Team:BU_Wellesley_Software/eLabNotebook">eLabNotebook</a></li> | ||
| + | <li><a href="https://2011.igem.org/Team:BU_Wellesley_Software/Wet_Lab">Wet Lab</a></li> | ||
| + | <li><a href="https://2011.igem.org/Team:BU_Wellesley_Software/Downloads_and_Tutorials">Downloads and Tutorials</a></li> | ||
| + | </ul> | ||
| + | </li> | ||
| + | <li><a href="#">Process</a> | ||
| + | <ul> | ||
| + | <li><a href="https://2011.igem.org/Team:BU_Wellesley_Software/Methodology">Methodology</a></li> | ||
| + | <li><a href="https://2011.igem.org/Team:BU_Wellesley_Software/Safety">Safety</a></li> | ||
| + | <li><a href="https://2011.igem.org/Team:BU_Wellesley_Software/Notebook">Notebook</a></li> | ||
| + | <li><a href="https://2011.igem.org/Team:BU_Wellesley_Software/Outreach">Outreach</a></li> | ||
| + | <li><a href="https://2011.igem.org/Team:BU_Wellesley_Software/Tips">Tips and Tricks</a></li> | ||
| + | </ul> | ||
| + | </li> | ||
| + | <li><a href="https://2011.igem.org/Team:BU_Wellesley_Software/Gold">Medal Fulfillment</a></li> | ||
| + | <li><a href="#">Additional Info</a> | ||
| + | <ul> | ||
| + | <li><a href="https://2011.igem.org/Team:BU_Wellesley_Software/Acknowledgement">Acknowledgement</a></li> | ||
| + | <li><a href="https://2011.igem.org/Team:BU_Wellesley_Software/Social">Fun</a></li> | ||
| + | </ul> | ||
| + | </li> | ||
| + | </ul> | ||
| + | <br> | ||
| + | <h6>Evelyn's Notebook</h6> | ||
| + | </body> | ||
</html> | </html> | ||
Revision as of 16:57, 27 September 2011
Evelyn's Notebook
Contents |
Week 6/1/11-6/3/11
Participated in iGEM bootcamp. For the week we we learned bio-basics, CAD basics, Tuberculosis overview, digital logic design and clotho. For clotho we built an application that would show hello world and then we modified the app so that another user could input a part sequence that would be stored in the clotho database. Finally we had a group outing at Jillian's.
Week 6/6/11-6/10/11
On the last day of bootcamp we learned more information on synthetic biology and gave the Wellesley team a tour of the wetlab and our liquid handling robot. The next day I worked with Kyle Jones to look for constitutive promoters in the MIT Registry of Parts. We decided to use BBa_J23100, BBa_J23101, BBa_J23109, and BBa_I14053. The first three are part of the Anderson Collection and are Amp Resistant. These promoters had RBS inside their plasmids. The last constitutive promoter is Kan resistant. Vanessa Yanez and Alberto looked for induced promoters and Shannon and Margueax looked for RBSs. After locating our parts we transformed them and let them sit over night. Unfortunately the parts that we transformed did not work after the plasmid prep. We had low values for the concentration and realized that the cultures that did grow in the LB and amp solution was not E coli. In order to confirm our suspicions we looked at the culture under a light microscope. My cultures seemed to have string like cells which we concluded to be contamination. Only 1 culture worked out of the 18 that were performed that week. Finally we met together to figure out how we wanted to split up the work and what exactly we wanted to do as a team. Margeaux and Alberto did mini prepreps, restriction digest, gel extraction, ligations, and finally transformations for GFP and terminators. The rest of us redid all the old procedures in search for the reason for the contamination.
Week 6/12/11-6/17/11
In order to decrease contamination we autoclaved the pipet tips and used aseptic techniques where applicable. We redid the plasmid preps for the same parts. This time we grew the Ecoli in just LB solution and then in LB with Amp. The next morning we discovered that the cells in the LB and Amp solutions did not grow while the cells in the LB solution did. This proved our suspicion that the plates were our problem. On Monday we prepped the UV inducible promoter for the QiaCube. The UV promoter was the only transformation and plasmid prep that worked. We did the transformation on the existing Amp plates but this time we used a negative control. After incubating the transformed cells we discovered that the negative control did in fact grow colonies. This lead us to making new Amp plates and redoing transformations and plasmid preps for the chosen parts. For our transformations we had two of our Anderson Constitutive promoters grow red colonies. When we did plasmid preps however they did grow in the LB and AMP solution. These parts had concentrations values ranging from 9.6 to 56.6 ng/microliter. In the meanwhile, Alberto and Margeaux cut and ligated more GFP and terminator B0015.
Timeline
Week 6/19-6/24 Create the various constructs using the parts we have finally made plasmid preps of using GFP. Once we can prove that the construct in fact worked we will test them using the RFP, EYFP, and BFP. This way we will know how to order the various fluorescent proteins using various promoters and RBS.
Week 6/27-7/1 Figure out how to use invertases and figure out how to incorporate them into our various constructs. Trouble shoot any problems we run in to and fix them. Then we can try to flip the gene with the invertase and see if it actually works.
Week 7/4-7/15 Start to organize all the parts in the order in which the comp team has chosen to build them. It will be our task to figure out how the part will work together and what we will need in order to allow the process we want it to do to happen.
Week 7/15-8/1 Finish up the desired construct and possibly explore other forms using the TB gene.
Week 6/20/11-6/24/11
Performed a restriction digest on:
1. EYFP
2. BFP
3. ECFP
4. RBS: BBa_J61124
5. RBS: BBa_J61100
6. GFP and terminator
7. YFPc
8. GFPc
9. promotor: BBa_R2000.
Unfortunately, as I had not used the Qiacube I ended up throwing out the gel extractions of these parts. Therefore, the parts had to be redone. However, from the gel we observed that the EYFP and ECFP were in fact cut in the restriction digest. Unfortunately, it did not seem like our GFP plus terminator worked. We could have better adjusted if we had negative controls with the uncut parts. The next morning we transformed:
1. Ptet which is BBa_R0040 in an AMP plate
2. GFP BBa_J52028 on a KAN plate
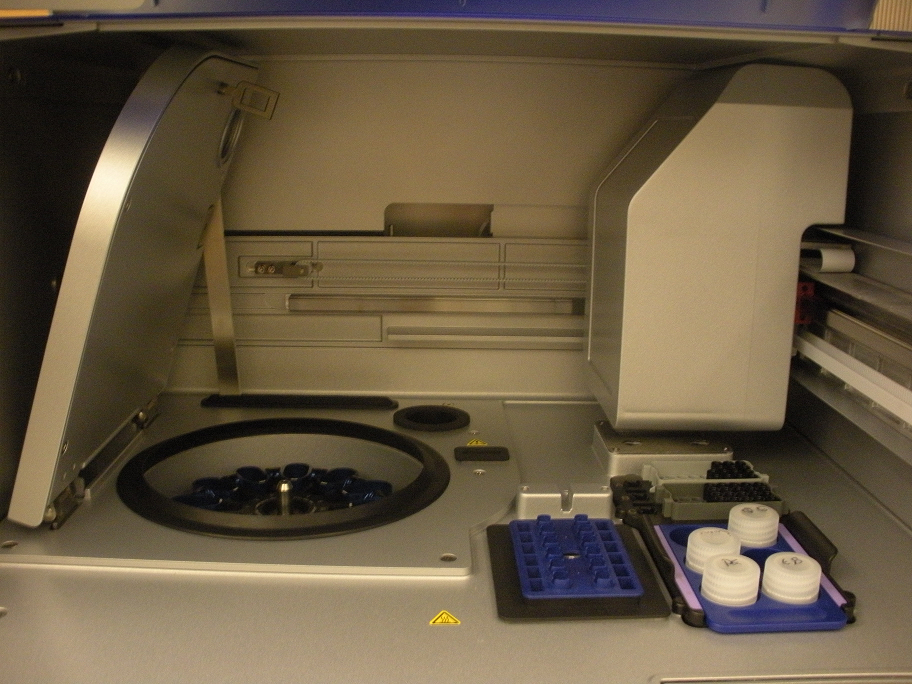
A restriction digest was also preformed on RFP, Pbad, Pcat, Terminator B0015, E0240, and E0430. A plasmid prep was then done on RBS: J61101, constitutive promoter: R2000, YFPc, and GFPc. These were incubated for about 12 hours. The next morning we made more plasmid preps on BFP, RFP, EYFP, ECFP, and finally pTEt. I preformed an mini prep using the Qiacube on the last 5 parts. I was required to centrifuge the 2ml of overnight cultures for 3 mintues for 8,000rpm then remove the supernatent. We ended having good values for the mini preps. Finally, friday the liquid handling robot was suppose to perform a restriction digest on GFP J52028 but was not able to as it could not pipet fractions. This brought the project back but allowed for more bugs to be fixed.
Week 6/27/11-7/1/11
1. Cut constitutive promoter: Pcat: BBa_I14053
2. Cut constitutive promoter: Pcat: BBa_I14053
3. Cut constitutive promoter: Ptet: BBa_R0040.1
4. Cut constitutive promoter: Ptet: BBa_R0040.1
5. Uncut constitutive promoter: Ptet: BBa_R0040.1
6. Cut Terminator: BBa_B0015
7. Cut Terminator: BBa_B0015
8. Uncut Terminator: BBa_B0015
I did a restriction digest on Pcat, Ptet, and another terminator. For this procedure we doubled the amount of enzymes in order to better our results. During the restriction digest I had to incubate the cells 20 extra minutes in the 37 degree and then it was placed in the pcr machine. The bands were very unclear and we were not certain if the plasmids were cut as we did not have enough control. This mistake allowed us to realize that a control is essential as the cut promoters did not differ very much from the uncut plasmid in the number of base pairs. Also, our ladder was very bright compared to the bands and we were informed by Traci that it was the result of it being too concentrated. After cutting the bands out I had to do 3 of the gel extraction by hand. There was not enough space in the qiacube so we did one of each part in the cube and the doubles on the bench.
1. Uncut GFP: BBa_J52028
2. Cut GFP manual:  BBa_J52028.2
3. Cut GFP Robot 1: BBa_J52028.2
4. Cut GFP Robot 2: BBa_J52028.2
5. Cut GFP Robot 3: BBa_J52028.2
6. Cut Terminator: BBa_B0015
7. Uncut Terminator: BBa_B0015
After fixing the issues we had with our procedures we decided to move on and do a restriction digest using our liquid handling robot. It was important to use the same liquid cultures in order to eliminate any variables other then performing the RD by hand or by the robot. Three of the restriction digests were done on the robot in order to make sure the same process could be repeated. I also did a restriction digest on a terminator so the robot could later ligate the GFP with the terminator. In order to cut the GFP we used EcoRI and SpeI while for the terminator I used EcoRI and Xbal. After running the gel, it could be seen that the GFP was cut as it was about 1.2KB on the gel. However, while loading the gel I realized that some of the RD done by the robot had a total volumes less than 50 micro-liters.
7/5/11-7/8/11
In order to continue on with ligation on the robot I decided to do a manual ligation with GFP and a terminator. I used the new protocol which involved a 6 to 1 ratio and a ligation time of 11 hours. Unfortunately, when they were plated nothing grew. This was our final trial with our ligation protocol. This backup restricted us form continuing forward. Therefore, I decided to run the rest of the cut GFP and terminator that I had after doing a restriction digest with the robot and I. After doing a gel extraction and a Nanodrop Quantification I received similar values as the one form the previous week. This was a good sign as they were all from the same colony. However, the first robot trial had a very low yield and it may have been that the robot did a better job at doing the restriction digest for each trial. The next morning I did mini preps on:
1. R0040.A
2. R0040.B
3. R2000.B
4. R2000.D
5. J23100.C
6. R20000.A
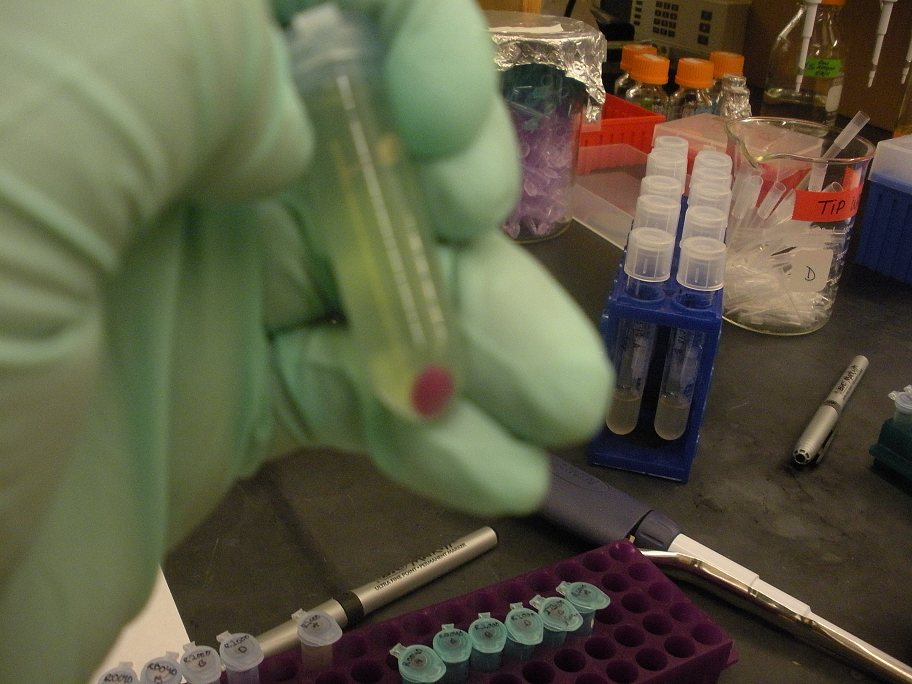
While doing this preps we noticed that the J23100 constitutive promoter had a red liquid culture. This was very exciting as this part did have RFP and should be red. Also during the mini prep the red pellets were also a good indicator that we grew the correct gene. When we finished the mini prep we did a nanodrop quantification and got great values for the Anderson Constitutive promoter J23100.
7/11-7/15
I performed RD this week for various parts. As we still haven't gotten a continuously successful ligation, but have been using a lot of our cut parts we decided to restock. I performed a RD on:
1. BBa_E0240 GFPc
2. BBa_E1010 RFP
3. BBa_I14033 Pcat
4. BBa_K156010 BFP
5. BBa_J52028 GFP
After running the gel it could be seen that the right parts were cut for each RD however the bands were very dull. After doing a gel extraction, I received very low DNA quantification values. All were below 10ng/ul. As the values were so low I reran the samples to make sure that there was in fact DNA. After doing the checks, I verified that there was DNA. However, my values were still very low so I decided to do some more RD with the same parts and to add a larger volume to each well when running the gel. I doubled the amount hoping for a higher concentration value. Unfortunately, doubling the volume did not affect the concentration values. The next day as ligation were still not working I worked on perfecting RD. For our restriction digest various buffers allowed for the cutting of the desired part. However, the buffers we were given were not consistent and as BFP did not cut completely when Buffer 2 was used for 1 hour I decided to test different combinations. The combinations were:
1. Buffer 4 for 2 hours
2. Buffer 4 for 4 hours
3. Buffer EcoRI for 1 hour
4. Buffer 2 for 2 hours
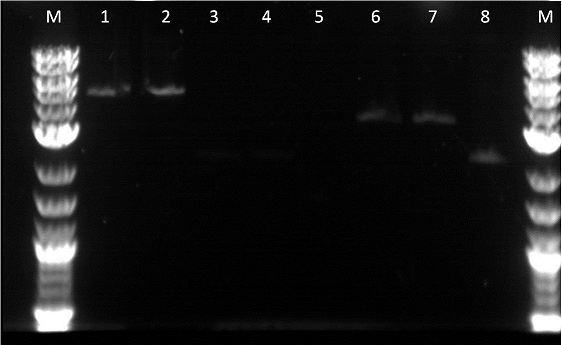
 1. BFP.1 uncut
 2. BFP.1 Buffer 4, 2 hours
 3. BFP.1 Buffer 4, 2 hours
 4. BFP.1 Buffer 4, 4 hours
 5. BFP.1 Buffer 4, 4 hours
 6. BFP.1 EcoRI Buffer, 1 hour
 7. BFP.1 EcoRI Buffer, 1 hour
 8. BFP.1 Buffer 2, 2 hours
 9. BFP.1 Buffer 2, 2 hours
10. BFP.2 uncut
11. BFP.2 Buffer 4, 2 hours
12. BFP.2 Buffer 4, 2 hours
13. BFP.2 Buffer 4, 4 hours
14. BFP.2 Buffer 4, 4 hours
15. BFP.2 EcoRI Buffer, 1 hour
16. BFP.2 EcoRI Buffer, 1 hour
17. BFP.2 Buffer 2, 2 hours
18. BFP.2 Buffer 2, 2 hours
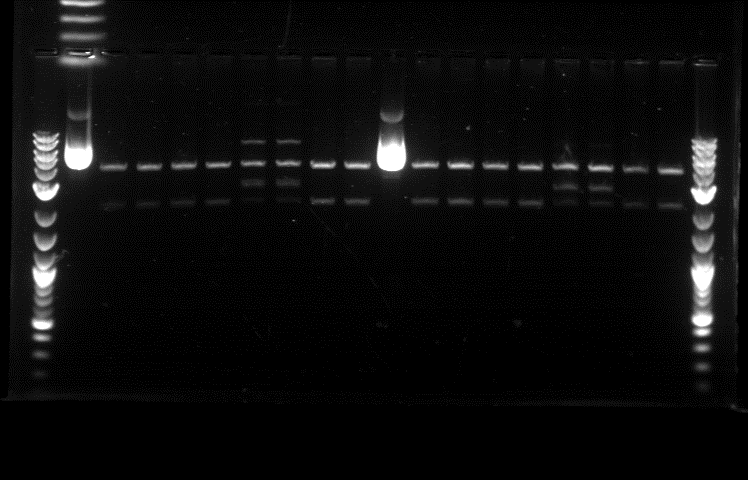
It can be seen that all the buffers allowed for the BFP insert to be cut however, EcoRI Buffer had three bands as it did both a single and double cut. Therefore, 1 hour is not sufficient to properly cut the BFP. For the first BFP concentration had its brightest band for Buffer 2. However, for the BFP with the higher concentration had the brightest band for Buffer 4 at 2 hours. Afterwards, I did a gel extraction and found the concentration values. Unfortunately the values were very low so I decided to mix together the BFPs.
Week 7/18-7/22
In order to continue where I left off from the previous week I decided to do an ethanol precipitation in order to increase the total concentration. As I was finally ready to do ligations I did it using our old TOP 10 competent cells and then I did a 1:3 ratio and 1:2 ratio of RFPc and Pcat. The ligations were transformed but they did not grow the next morning. However, Alberto's cells did grow when he used the alpha competent cells our post doc Traci had bought. There were many colonies and we were certain that this was a positive outcome. Therefore, I did ligations of GFP with terminator and RFP with terminator. Thankfully, the next morning most of the ligations that were made grew with many colonies. A plasmid prep and then a mini prep was done the the ligated GFP+term and RFP+term. After doing a nanodrop, the concentrations looked amazing.
| Tube Name | DNA Concentration | 260/280 | 260/230 |
| E1010_B0015_1 | 269.4 | 1.89 | 2.15 |
| E1010_B0015_2 | 98.3 | 1.89 | 2.25 |
| E1010_B0015_3 | 232.2 | 1.89 | 2.10 |
| E1010_B0015_4 | 108.3 | 1.86 | 2.25 |
| J52028_B0015_1 | 240.6 | 1.91 | 2.29 | J52028_B0015_2 | 108.2 | 1.84 | 2.00 | IJ52028_B0015_3 | 222.9 | 1.90 | 2.02 | J52028_B0015_4 | 130.5 | 1.89 | 2.30 | E0430_B0015_1 | 31.9 | 1.65 | 0.90 | E0430_B0015_2 | 2.70 | 1.39 | 1.30 | E0430_B0015_3 | 12.0 | 1.55 | 0.62 | E0430_B0015_4 | 3.50 | 2.15 | 0.84 |
As I was going on vacation the following week, we decided to try ligations on the robot. We used BBa_J23100(RFPc) and BBa_I14033(Pcat). Margaux had previously tested this ligation manually and as the colonies showed a pink/red tint it was the best way to verify the results. As the robot did not pipet properly when we did restriction digest we added an extra amount to each plate. The values for the final sample after the ligations were not still about 5 ul off. However, when transforming with the alpha cells I had to use contaminated SOC which really affected the outcomes. The manual sample and robot 1 sample worked. However, while I was away the plasmid prep of the robots ligations was not saved.
Week 8/1/11-8/5/11
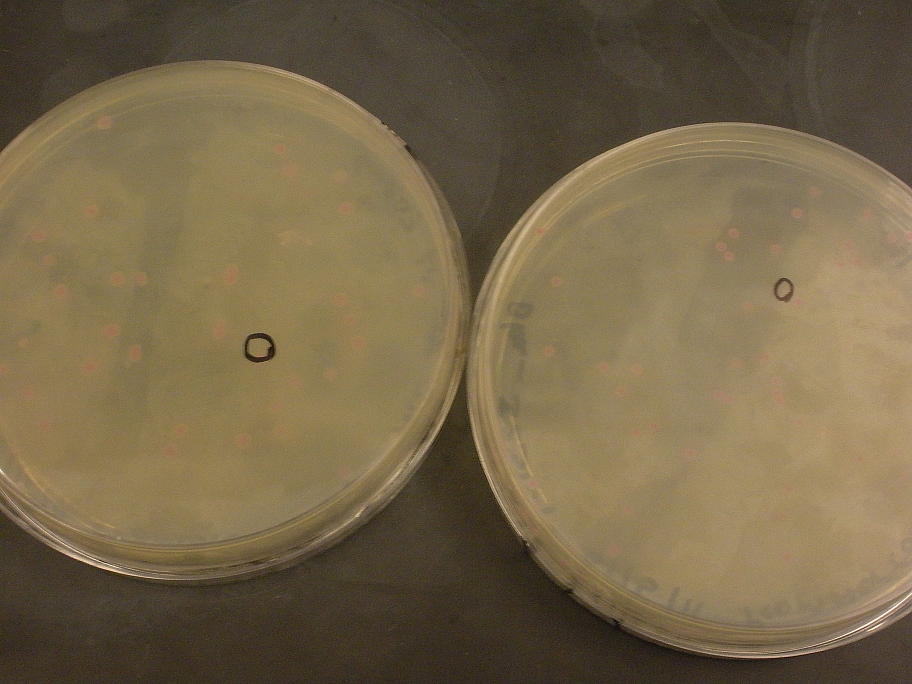
After my vacation, the robot was up and ready to do a ligation. I ligated BBa_J23101 and BBa_I14033(Pcat) manually and the robot did two trials with the same parts. Unfortunately, when the total volume was measured the first robot trial had a total volume of 15.8ul and the second trial had a total volume of 7.7ul. We believe the volume issues are due to bubbles while pipetting. The ligations were then transformed and left overnight in a 37 degree incubator. I then did a restriction digest on Pcat and BBa_J23100 as we were running low. However, when it was run on a gel the pictures were inconclusive so I decided to do restriction mapping. I did a single digest with Xbal and then a double digest with Xbal and PstI. The restriction mapping proved that the ligation did in fact work. The next day the ligations were still not pink and therefore it was necessary to leave it in the incubator longer. It took about two days for the colonies on the plates to turn pinkish and therefore I decided to test a different promoter BBa_R0040(Ptet) before we moved forward with the robot ligations. I also ligated Pcat in order to compare the two promoters. After the transformations, it was obvious that Ptet was a better promoter for BBa_J23100. The transformation for Ptet only needed about 18 hours while Pcat needed about 24 hours.
Week 8/8/11-8/14/11
The coming week, we did new ligations with BBa_J23100 and BBa_R0040. The robot did two trials and I did one manually. However, this time we checked for bubbles before we continued on. When the ligations were done we noticed that there was a huge bubble in both samples. I had to pop each bubble by using a pipet tip. This time however, the volumes were consistent and though they were still off it was not by much. The first robot trial had a total volume of 16.8 ul and trial two had a total volume of 14.9ul. I then transformed them onto ampicillin plates. The next morning there was an obvious difference between the amounts of colonies on each plate. There were about 365 colonies on the manual plate while there were only 27 colonies on the first robot trial and 5 colonies on the second robot trial. The lack of colonies could have been due to pipetting errors and not having the ligase and buffer on ice. Therefore, I tried to do a master mix with the ligase and buffer so pipetting 1 ul would not be so difficult for the robot. Everything continued well until transforming. While transforming I added the 25ul of alpha cells into the ligation pcr tube instead of the 1.5ml empty tube. I still ligated the parts but the likely hood of it working was very low. Surprisingly, some colonies actually grew but the trial was pointless as we could not test it properly. The nanodrop concentrations for the manual and robot rials were the following:
| Tube Name | DNA Concentration | 260/280 | 260/230 |
| R0040_J23100_E_A | 17.1 | 1.76 | 4.53 |
| R0040_J23100_E_B | 29.2 | 1.64 | 1.24 |
| R0040_J23100_E_C | 24.7 | 1.75 | 1.21 |
| R0040_J23100_R1_A | 49.9 | 1.72 | 1.44 |
| R0040_J23100_R1_B | 19.2 | 1.73 | 7.71 | R0040_J23100_R1_C | 23.2 | 1.82 | 1.38 | R0040_J23100_R2_A | 28.2 | 1.75 | 1.32 | R0040_J23100_R2_B | 36.7 | 1.63 | 0.89 | R0040_J23100_R2_C | 29.7 | 1.66 | 0.89 |
Week 8/15/11-8/19/11
I did restriction digest on BBa_J23100 and BBa_R0040 and combined the 40 ul wells in order to gain greater values between 4.9ng/ul to 21.2ng/ul. Afterwards, I did restriction mapping on pTet-RBS-luxR-YFPc-pLuxR to check if the robot actually ligated the two pieces properly. Two of the three robot colonies for the robot trial 1 worked properly and had the right amount of bps. Robot trial 2 was not as conclusive. Two of the three seem to be accurate but the image is blurry. We repeated another ligation with BBa_J23100 and BBa_R0040 in order to check why the colonies did not grow properly. We did a single volume ligation and then a double volume ligation. Then we ligated pTet-RBS-luxR-YFPc-pLuxR as a positive control. We also ligated GFPc-pLuxI-RFPc and RBS-LacI for a separate project. All the transformations grew however this time around the double volume ligation worked properly for all trials. The amount of colonies for the manual and robot amount were about equal. The single ligation did have some discrepancies.
Wet Lab Protocols
These are the downloadable protocols used by the BU Wet Lab team, written in Excel 2003 format (*.xls).
 "
"

