Team:BU Wellesley Software/Notebook/AlbertoNotebook
From 2011.igem.org
| (82 intermediate revisions not shown) | |||
| Line 1: | Line 1: | ||
<html> | <html> | ||
| - | <head> | + | <head> |
| + | <title>BU-Wellesley iGEM Team: Welcome</title> | ||
| + | <meta http-equiv="Content-Type" content="text/html; charset=utf-8"> | ||
| + | <script src="http://cdn.jquerytools.org/1.2.5/full/jquery.tools.min.js?foo"></script> | ||
<style type="text/css"> | <style type="text/css"> | ||
| - | |||
| - | |||
/*hide default igem banner and reformat style into blank slate*/ | /*hide default igem banner and reformat style into blank slate*/ | ||
#globalWrapper {width: 100%;} | #globalWrapper {width: 100%;} | ||
| Line 22: | Line 23: | ||
/*actual content styles*/ | /*actual content styles*/ | ||
| + | body {width: 800px; margin:auto;} | ||
| + | #bu-wellesley_wiki_content {height:auto; line-height:100%;} | ||
| + | /*#bu-wellesley_wiki_content a {color:#69d01d;}*/ | ||
| + | #bu-wellesley_wiki_content a:hover {text-decoration:none; color:#3d3f3c;} | ||
| - | + | .navbar li {color: #ffffff;} | |
| - | + | .navbar li a {color: #ffffff;} | |
| - | + | .navbar li a:hover {background:#69d01d; color: #ffffff;} | |
| - | + | ||
| + | /*only use for current page content header (i.e. Team, G-nomeSurferPro, etc)*/ | ||
| + | H6 { | ||
| + | font-family: Helvetica; | ||
| + | text-transform: uppercase; | ||
| + | text-decoration: none; | ||
| + | text-align: left; | ||
| + | color: #3d3f3c; | ||
| + | font-size: 32pt; | ||
| + | } | ||
</style> | </style> | ||
| - | <link rel="stylesheet" type="text/css" href="http://cs.wellesley.edu/~hcilab/iGEM_wiki/css/ | + | |
| + | <link rel="stylesheet" type="text/css" href="http://cs.wellesley.edu/~hcilab/iGEM_wiki/css/Team.css"> | ||
| + | |||
</head> | </head> | ||
| + | <body class="basiclayout"> | ||
| + | <div id="bu-wellesley_wiki_content"> | ||
| - | <a href="https://2011.igem.org/Team:BU_Wellesley_Software"><img src="http://cs.wellesley.edu/~hcilab/iGEM_wiki/images/banner.png" width=" | + | <p style="text-align:center;"><a href="https://2011.igem.org/Team:BU_Wellesley_Software"><img src="http://cs.wellesley.edu/~hcilab/iGEM_wiki/images/banner.png" width="800px"></a></p> |
| - | < | + | <ul id="nav"> |
| + | <li><a href="https://2011.igem.org/Team:BU_Wellesley_Software/Team">Team</a></li> | ||
| + | <li><a href="#">Project</a> | ||
| + | <ul> | ||
| + | <li><a href="https://2011.igem.org/Team:BU_Wellesley_Software/Project_Overview">Overview</a></li> | ||
| + | <li><a href="https://2011.igem.org/Team:BU_Wellesley_Software/Clotho">Clotho</a></li> | ||
| + | <li><a href="https://2011.igem.org/Team:BU_Wellesley_Software/G-nomeSurferPro">G-nome Surfer Pro</a></li> | ||
| + | <li><a href="https://2011.igem.org/Team:BU_Wellesley_Software/OptimusPrimer">Optimus Primer</a></li> | ||
| + | <li><a href="https://2011.igem.org/Team:BU_Wellesley_Software/Trumpet">Trumpet</a></li> | ||
| + | <li><a href="https://2011.igem.org/Team:BU_Wellesley_Software/Puppetshow">Puppetshow</a></li> | ||
| + | <li><a href="https://2011.igem.org/Team:BU_Wellesley_Software/eLabNotebook">eLabNotebook</a></li> | ||
| + | <li><a href="https://2011.igem.org/Team:BU_Wellesley_Software/Wet_Lab">Wet Lab</a></li> | ||
| + | <li><a href="https://2011.igem.org/Team:BU_Wellesley_Software/Downloads_and_Tutorials">Downloads and Tutorials</a></li> | ||
| + | </ul> | ||
| + | </li> | ||
| + | <li><a href="#">Process</a> | ||
| + | <ul> | ||
| + | <li><a href="https://2011.igem.org/Team:BU_Wellesley_Software/Methodology">Methodology</a></li> | ||
| + | <li><a href="https://2011.igem.org/Team:BU_Wellesley_Software/Safety">Safety</a></li> | ||
| + | <li><a href="https://2011.igem.org/Team:BU_Wellesley_Software/Notebook">Notebook</a></li> | ||
| + | <li><a href="https://2011.igem.org/Team:BU_Wellesley_Software/Outreach">Outreach</a></li> | ||
| + | <li><a href="https://2011.igem.org/Team:BU_Wellesley_Software/Tips">Tips and Tricks</a></li> | ||
| + | </ul> | ||
| + | </li> | ||
| + | <li><a href="https://2011.igem.org/Team:BU_Wellesley_Software/Gold">Medal Fulfillment</a></li> | ||
| + | <li><a href="#">Additional Info</a> | ||
| + | <ul> | ||
| + | <li><a href="https://2011.igem.org/Team:BU_Wellesley_Software/Acknowledgement">Acknowledgement</a></li> | ||
| + | <li><a href="https://2011.igem.org/Team:BU_Wellesley_Software/Social">Fun</a></li> | ||
| + | </ul> | ||
| + | </li> | ||
| + | </ul> | ||
| + | <br> | ||
| + | <h6>Alberto's Notebook</h6> | ||
| + | </body> | ||
</html> | </html> | ||
| Line 42: | Line 94: | ||
<h2>Timeline</h2> | <h2>Timeline</h2> | ||
| + | |||
| + | {| style="width:800px;background:#F5F5F5;text-align:justify;font-family: helvetica, arial, sans-serif;color:#333333;margin-top:5px;" cellspacing="18" | ||
| + | |style="font-family: helvetica, arial, sans-serif;font-size:1em;color:#ea8828;"|<h3>8/22/2011-8/29/2011</h3> | ||
| + | |- | ||
| + | | | ||
| + | |||
| + | '''Summary''' | ||
| + | *The Bba_I0500_xFPc parts did not contain the expected fragment since their backbone self-ligated | ||
| + | *A new method is used to induce the pBad promoter from the Bba_I13458_I13453_xFPc parts | ||
| + | *THE INDUCTION WORKS! | ||
| + | |||
| + | xFPc = fluorescent protein composite (+RBS +terminator) part<br> | ||
| + | x = green/yellow/red<br> | ||
| + | |||
| + | [[File:Overnightcultures.jpg| 250px]] | ||
| + | [[File:Arabinose.jpg| 140px]] | ||
| + | |||
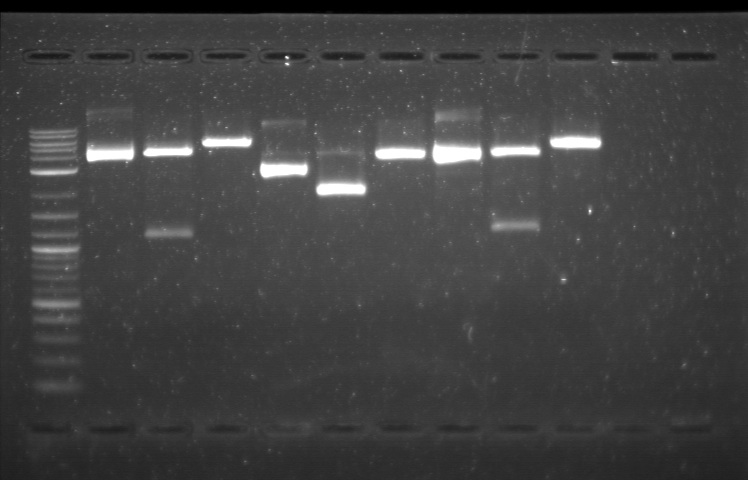
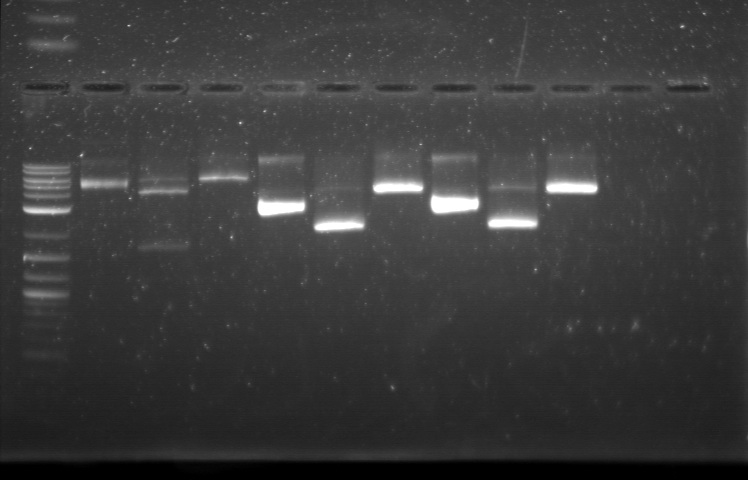
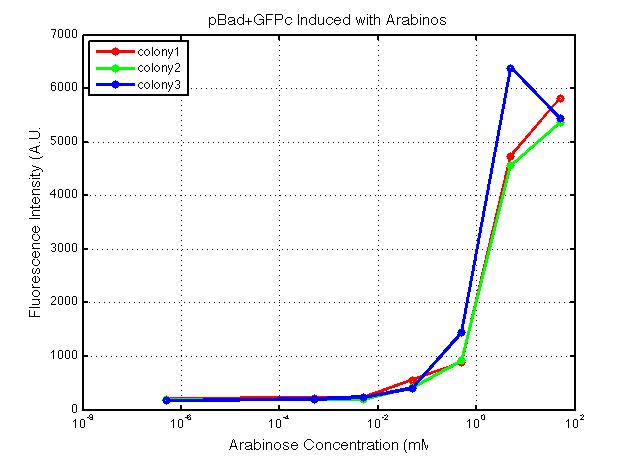
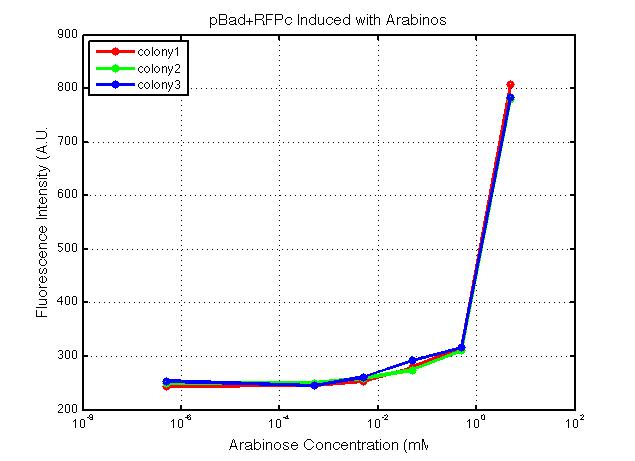
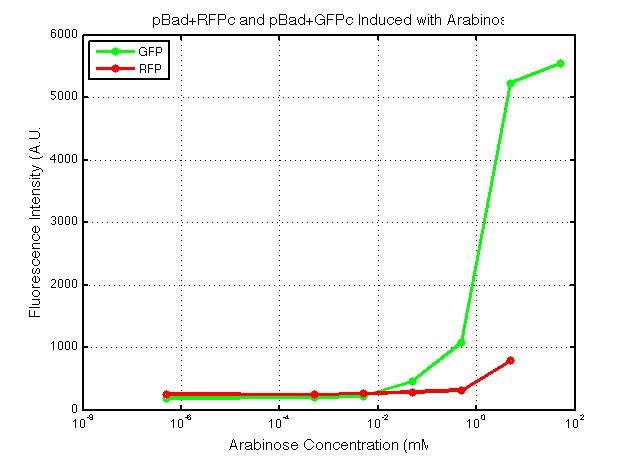
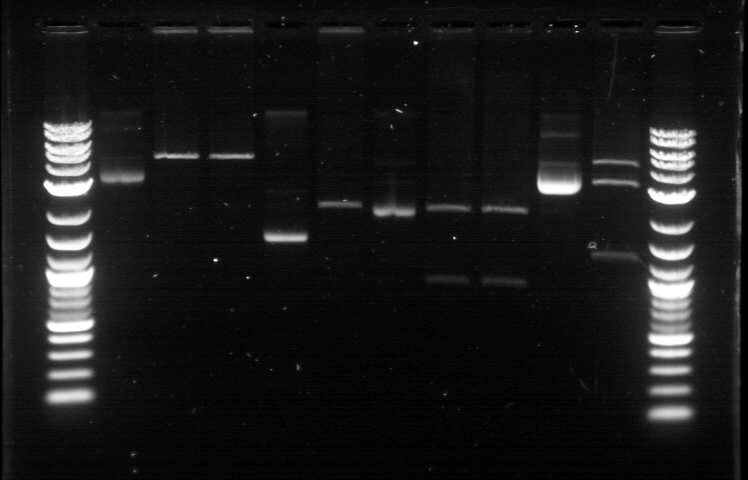
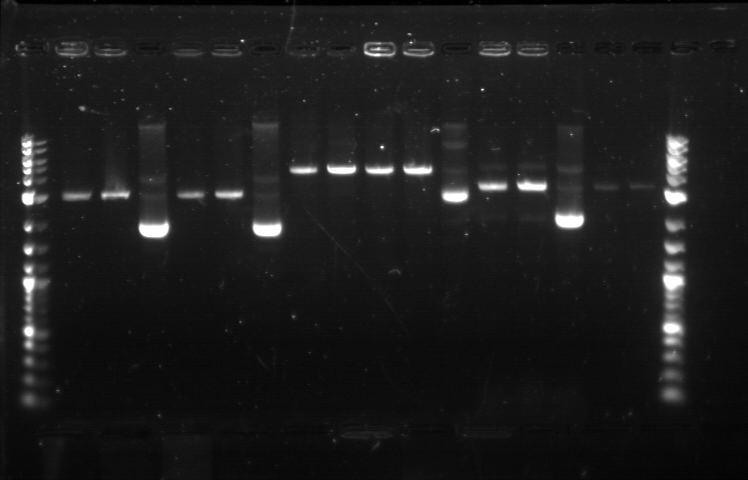
| + | From the restriction mapping, it appears that the use of BBa_I0500 in constructing the AraC-pBad device do not yield the expected device due to self-ligation. The use of BBa_I13458 seems to produce fragments with the correct size, even though the size similarity between the backbone and insert (approx. 2000 bp) prevent us from seeing the cut part. Because the pC+AraC+pBad+GFPc (BBa_I13458_I13453_E0240) and the pC+AraC+pBad+RFPc (BBa_I13458_I13453_J23101) seem to produce the correct DNA fragments, I decided to proceed with induction using them.<br> | ||
| + | |||
| + | [[File:APRD821top.jpg| 350px]]<br><br> | ||
| + | 1. DNA Ladder | ||
| + | 2. I0500_E0240 (uncut) | ||
| + | 3. I0500_E0240 (double cut) | ||
| + | 4. I0500_E0240 (single cut) | ||
| + | 5. I13458_I13453_E0240 (uncut) | ||
| + | 6. I13458_I13453_E0240 (double cut) | ||
| + | 7. I13458_I13453_E0240 (single cut) | ||
| + | 8. I0500_E0430 (uncut) | ||
| + | 9. I0500_E0430 (double cut) | ||
| + | 10. I0500_E0430 (single cut) | ||
| + | <br> | ||
| + | [[File:APRD821BOT.jpg| 350px]]<br><br> | ||
| + | 1. DNA Ladder | ||
| + | 2. I13458_I13453_E0430 (uncut) | ||
| + | 3. I13458_I13453_E0430 (double cut) | ||
| + | 4. I13458_I13453_E0430 (single cut) | ||
| + | 5. I0500_J23100 (uncut) | ||
| + | 6. I0500_J23100 (double cut) | ||
| + | 7. I0500_J23100 (single cut) | ||
| + | 8. I13458_I13453_J23101 (uncut) | ||
| + | 9. I13458_I13453_J23101 (double cut) | ||
| + | 10. I13458_I13453_J23101 (single cut) | ||
| + | |||
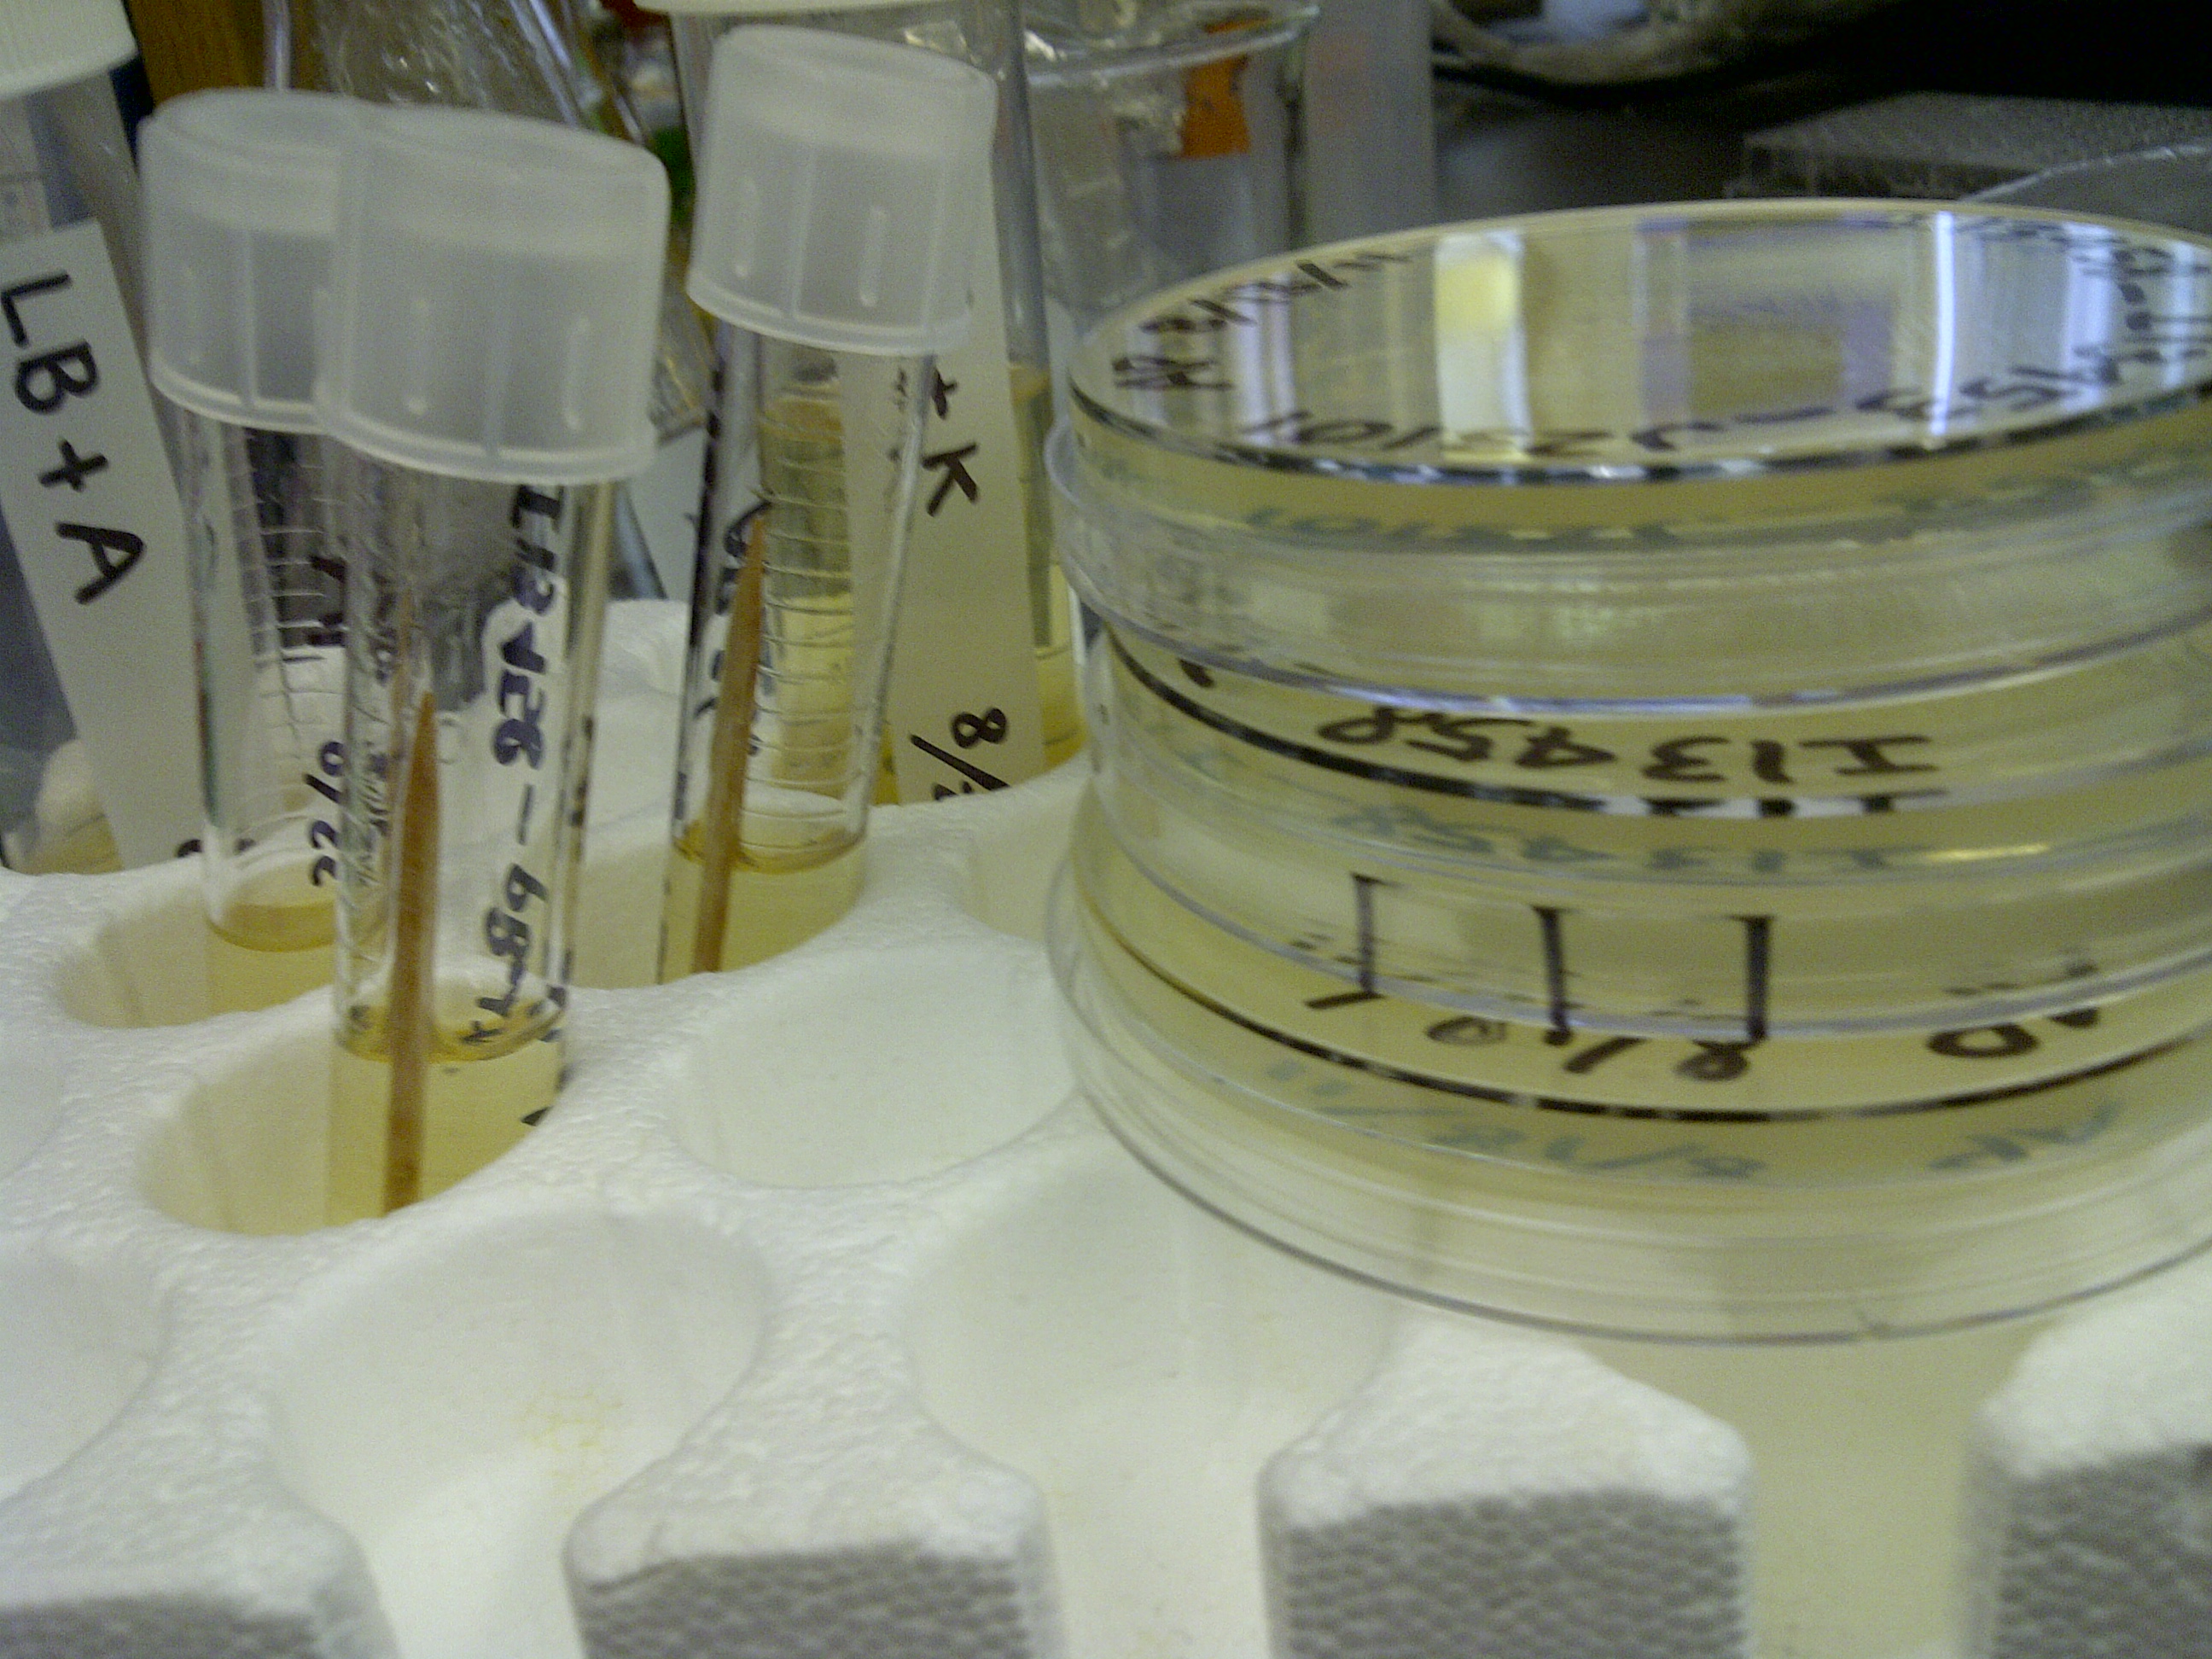
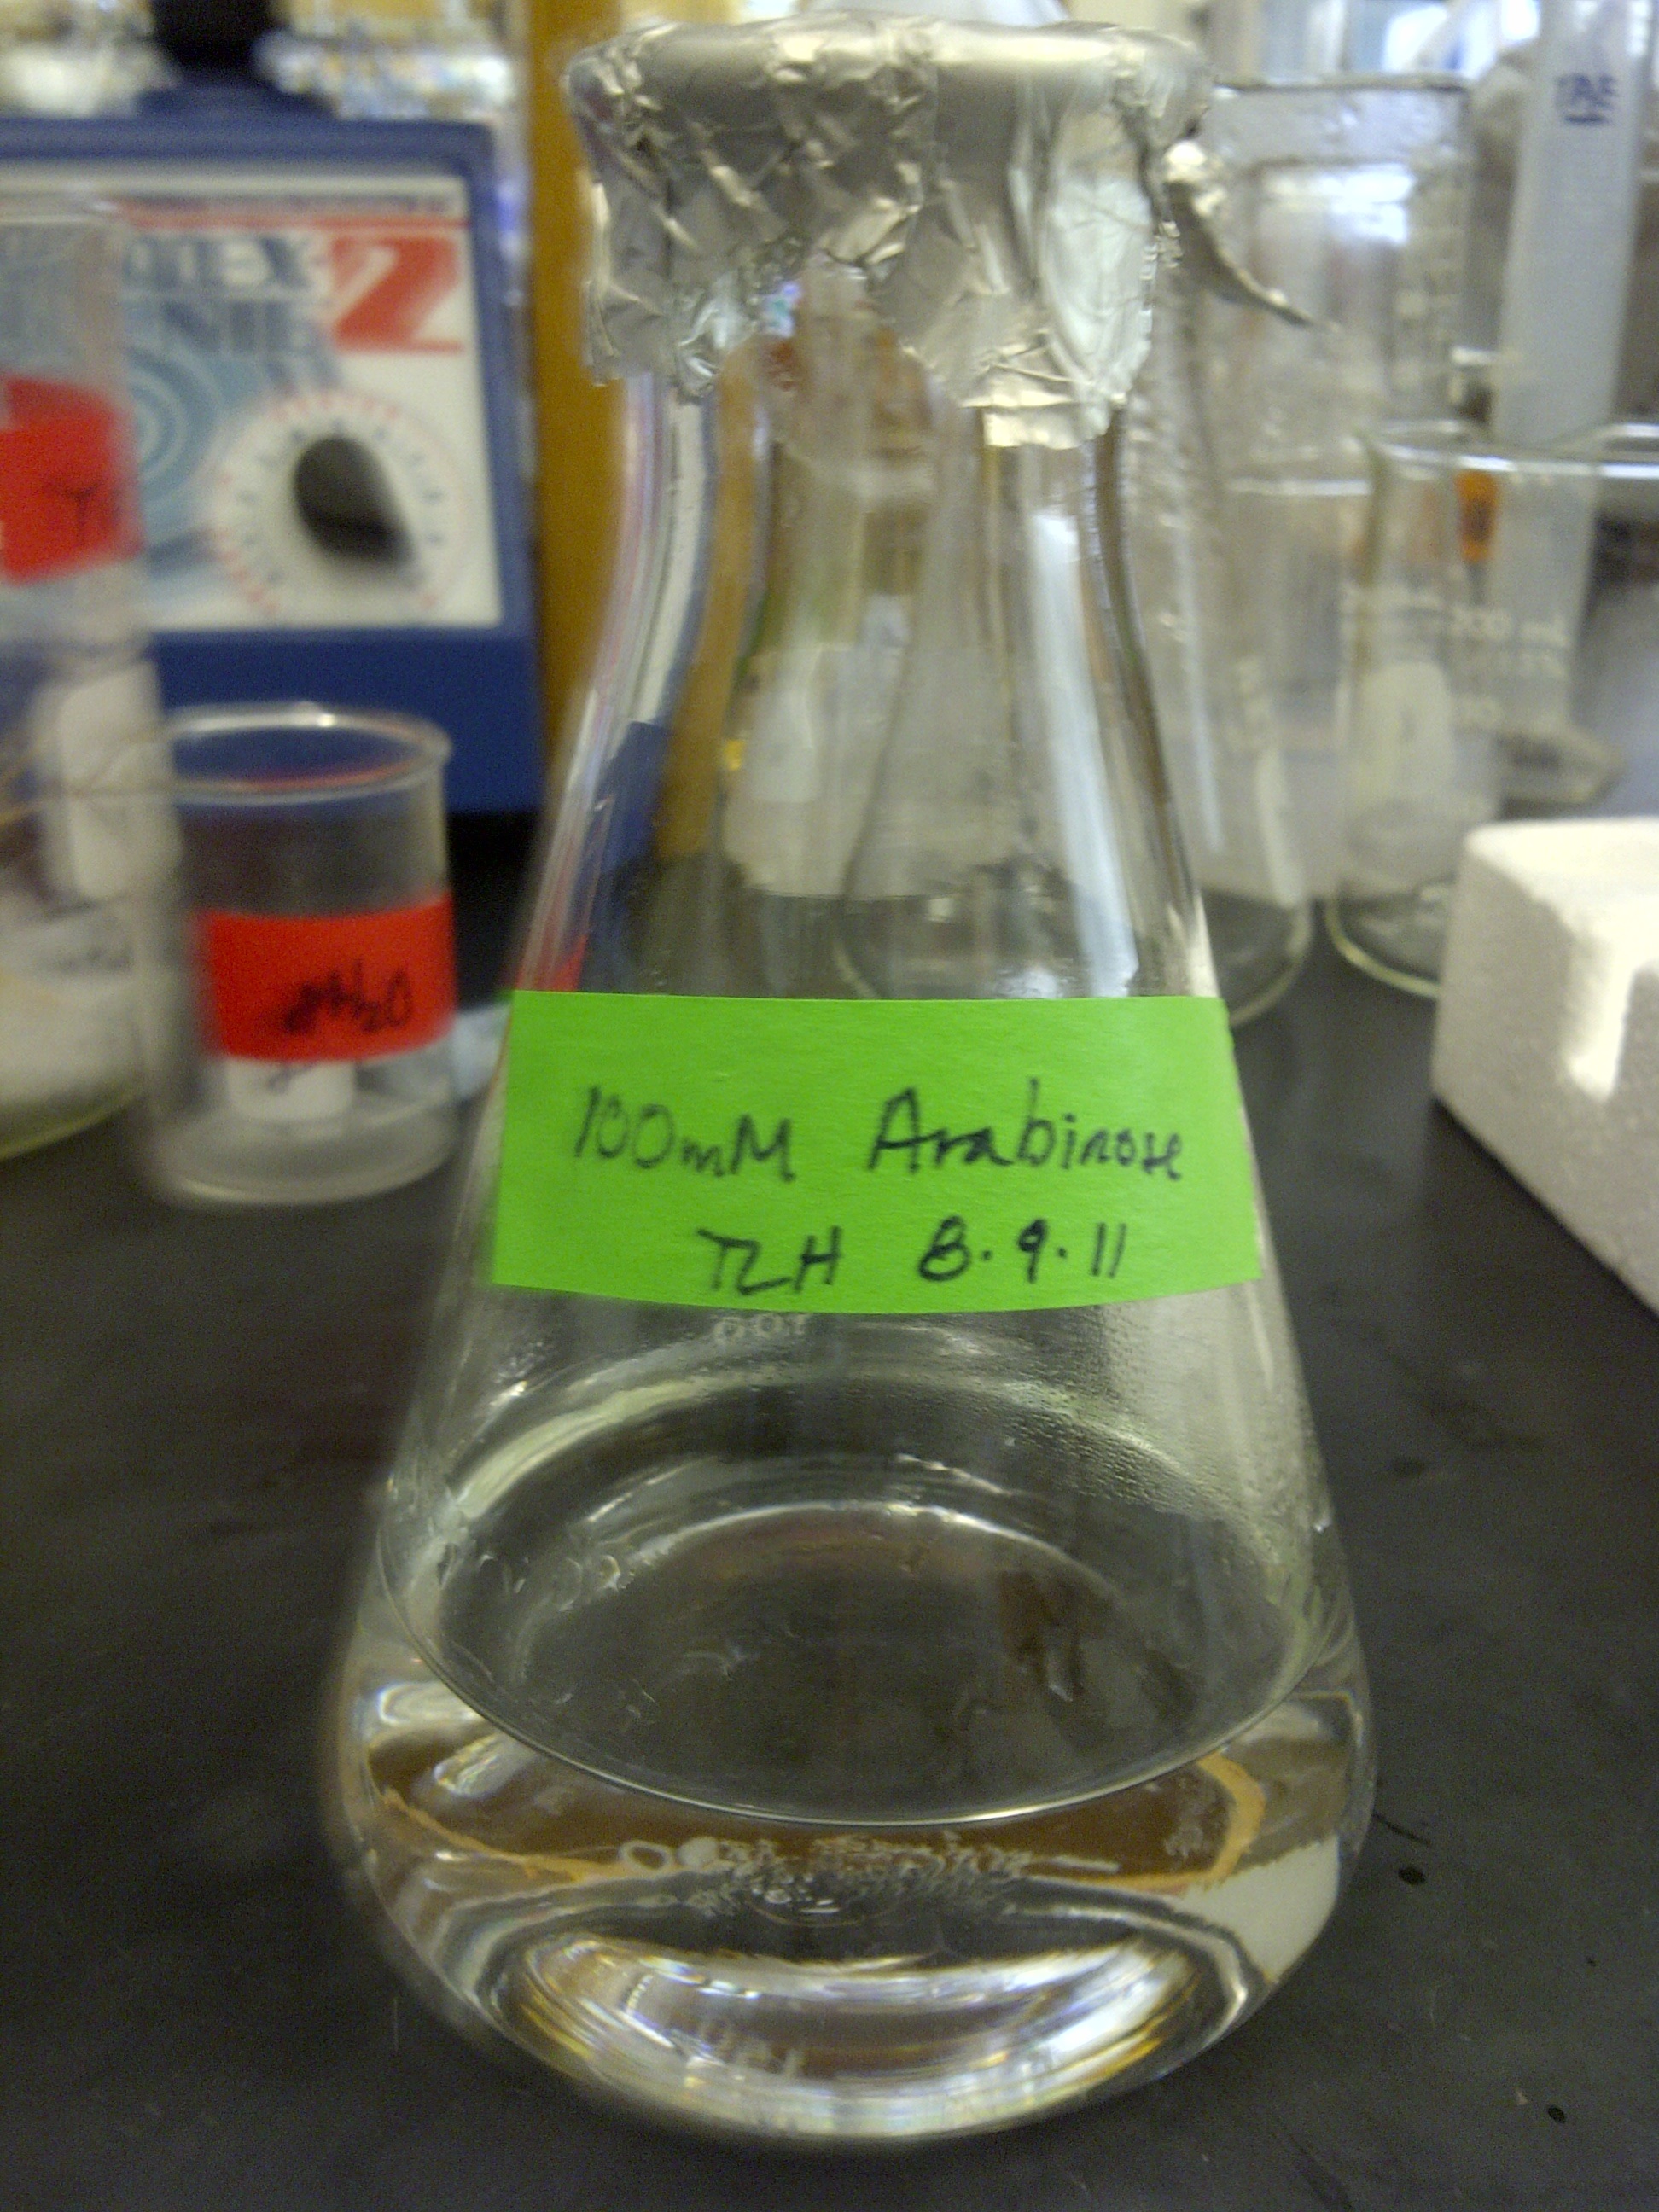
| + | A new method was then used to induce these AraC-pBad devices by having the overnight cultures dilute 200-fold into 1 mL solution. I also added various arabinose concentrations: 2.5 uM, 10 uM, 100 uM, 1 mM, and 5 mM. It was expected that overnight incubation would result in the induced fluorescence, but no such behavior was observed under the UV light on the next day.<br> | ||
| + | |||
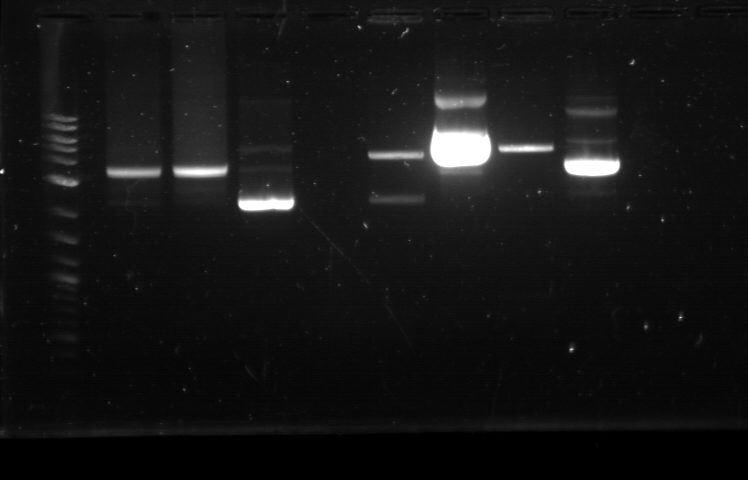
| + | <i>Note: I left on 8/24 evening for my summer break and nothing seemed to work. But a few days later I heard that (thanks to Traci and Evan!) the induced fluorescence from these devices could be detected using the FACS machine. Maybe the produced fluorescence was simply too sensitive and therefore could not be seen under the UV light. I put the characterization for my inducible genetic devices and I plan on submitting these parts to Parts Registry. Check out our iGEM wiki page for more information! Anyway, it's been a great summer. Thanks for reading my lab notebook! - Alberto</i><br> | ||
| + | |||
| + | [[File:Ap1.jpg| 500px]]<br><br> | ||
| + | [[File:Ap2.jpg| 500px]]<br><br> | ||
| + | [[File:Ap3.jpg| 500px]] | ||
| + | |} | ||
| + | |||
| + | {| style="width:800px;background:#F0FFF0;text-align:justify;font-family: helvetica, arial, sans-serif;color:#333333;margin-top:5px;" cellspacing="18" | ||
| + | |style="font-family: helvetica, arial, sans-serif;font-size:1em;color:#ea8828;"|<h3>8/15/2011-8/21/2011</h3> | ||
| + | |- | ||
| + | | | ||
| + | |||
| + | '''Summary''' | ||
| + | *Several devices that contain pBad promoter, AraC gene, and various fluorescent protein gene were ligated | ||
| + | *The transformed ligation succeeded in producing numerous colonies on the plate | ||
| + | *Some backbones possibly self-ligated | ||
| + | |||
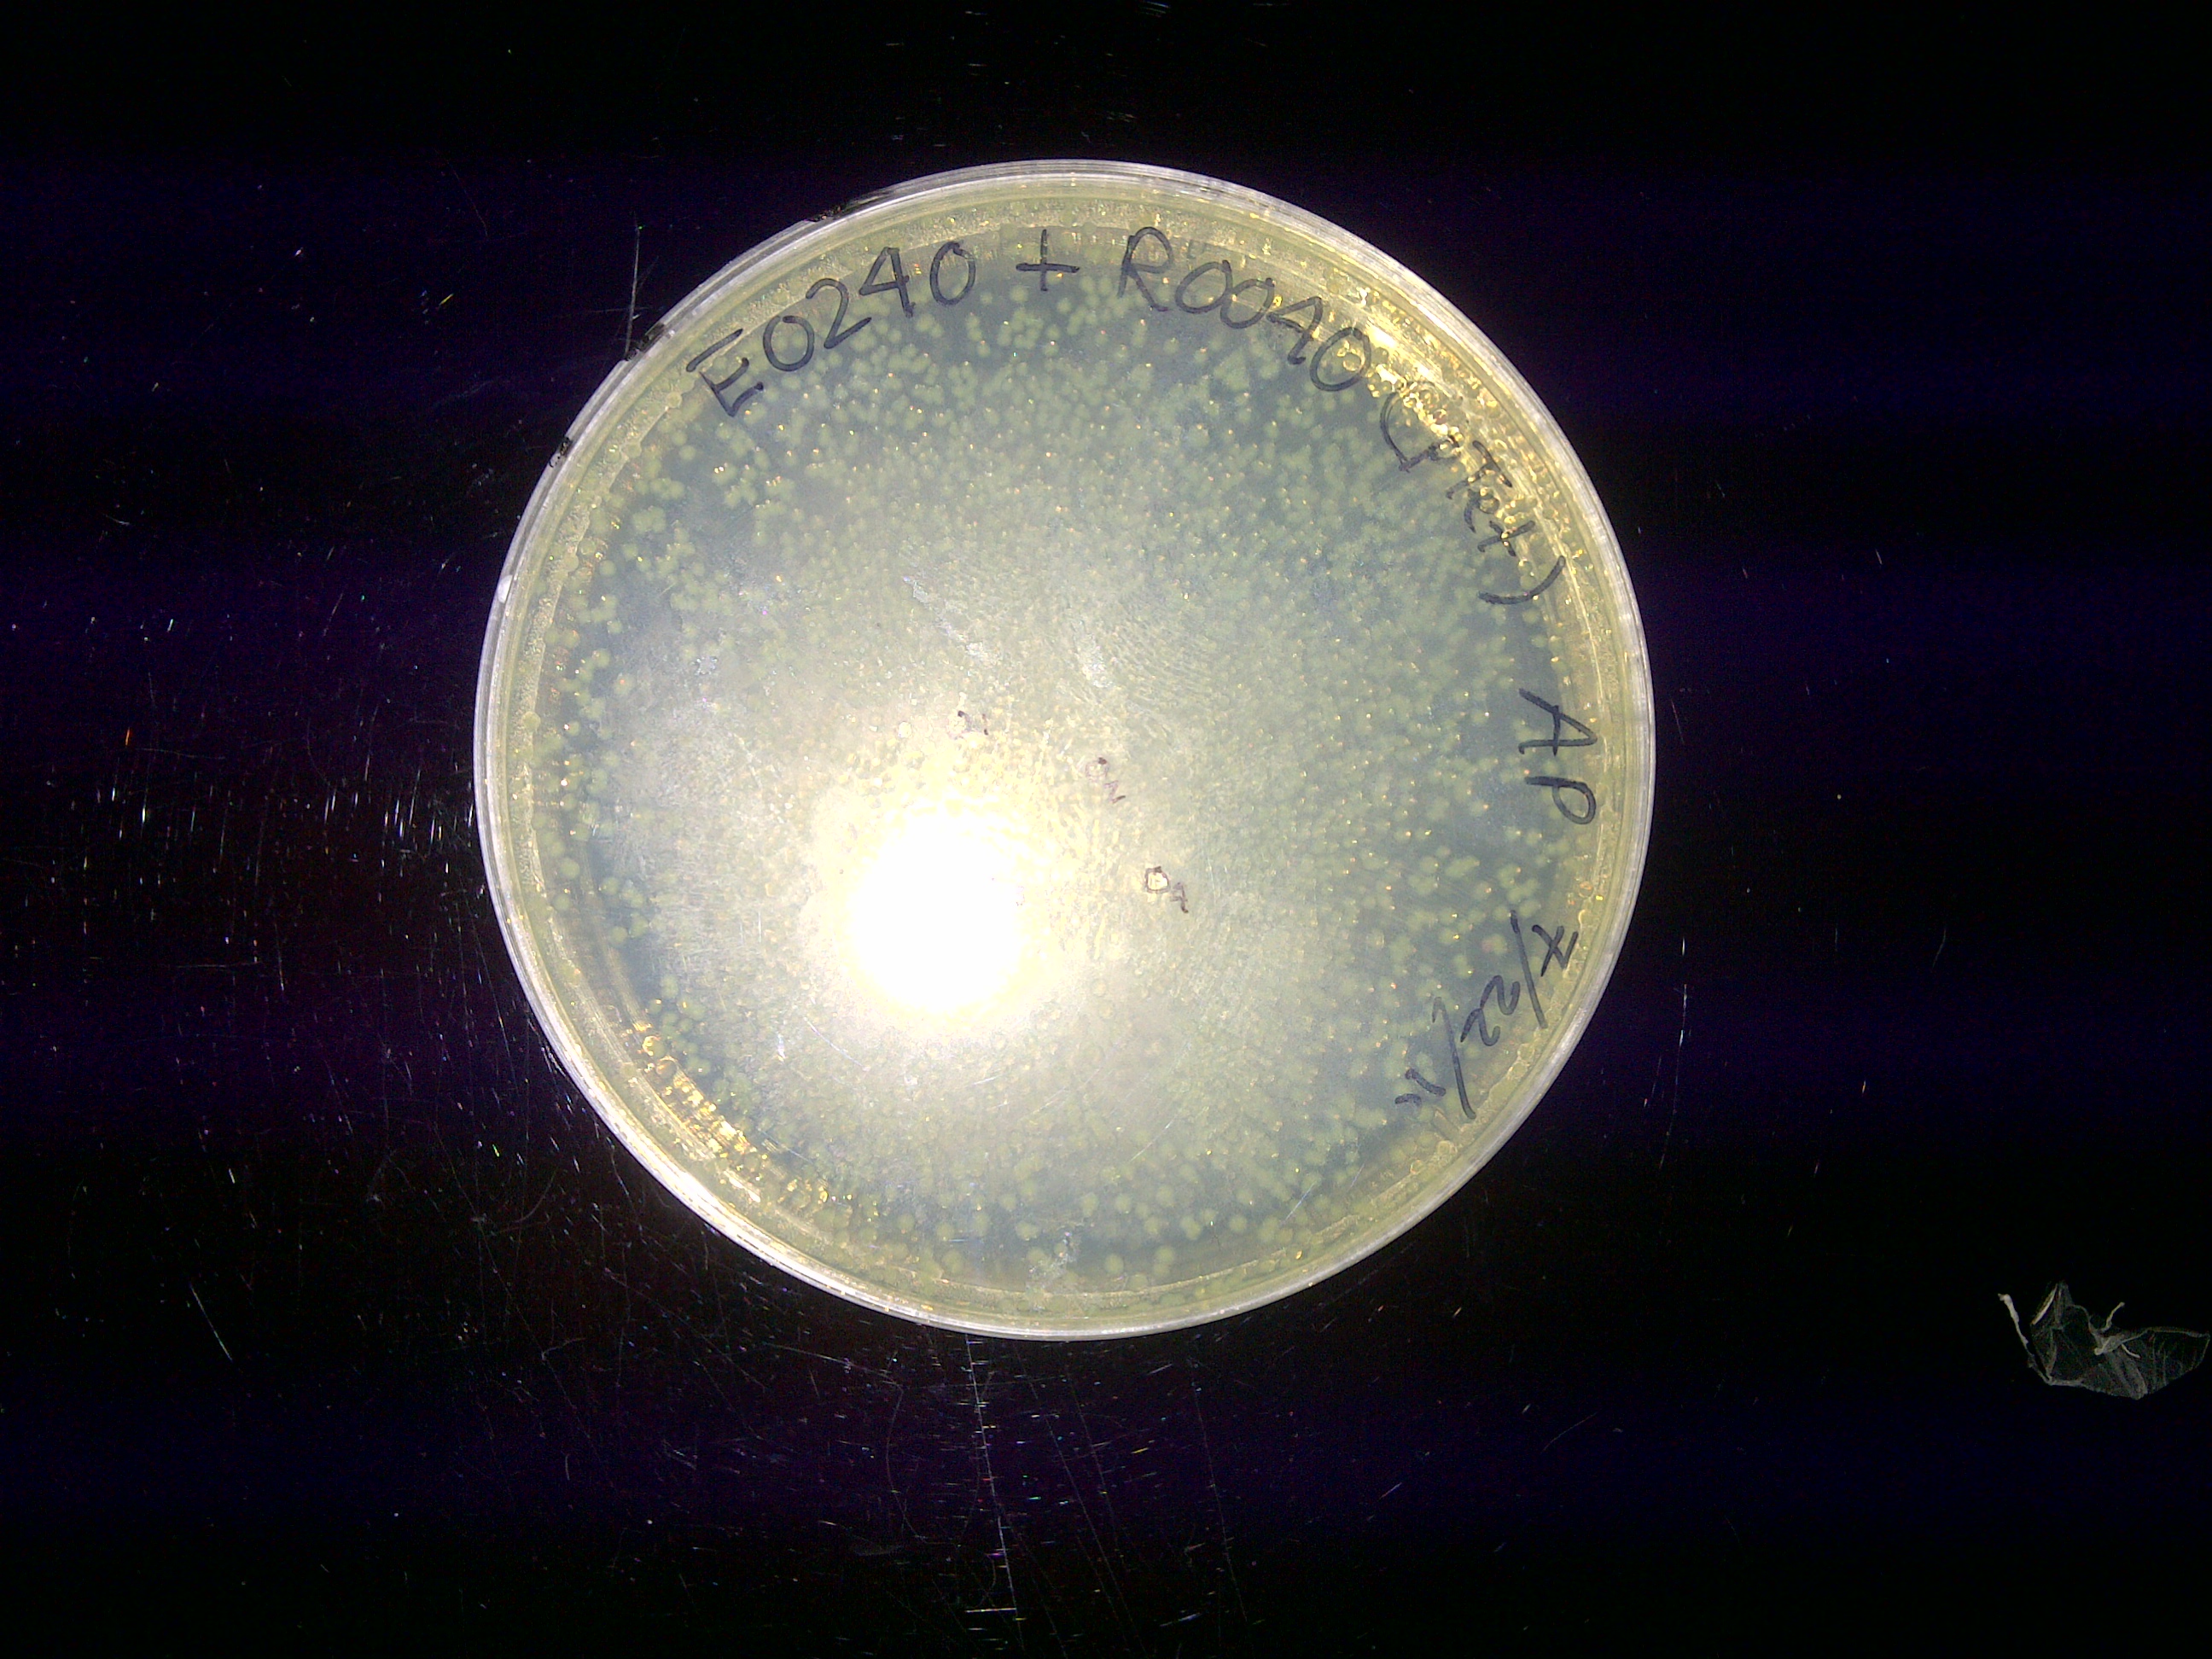
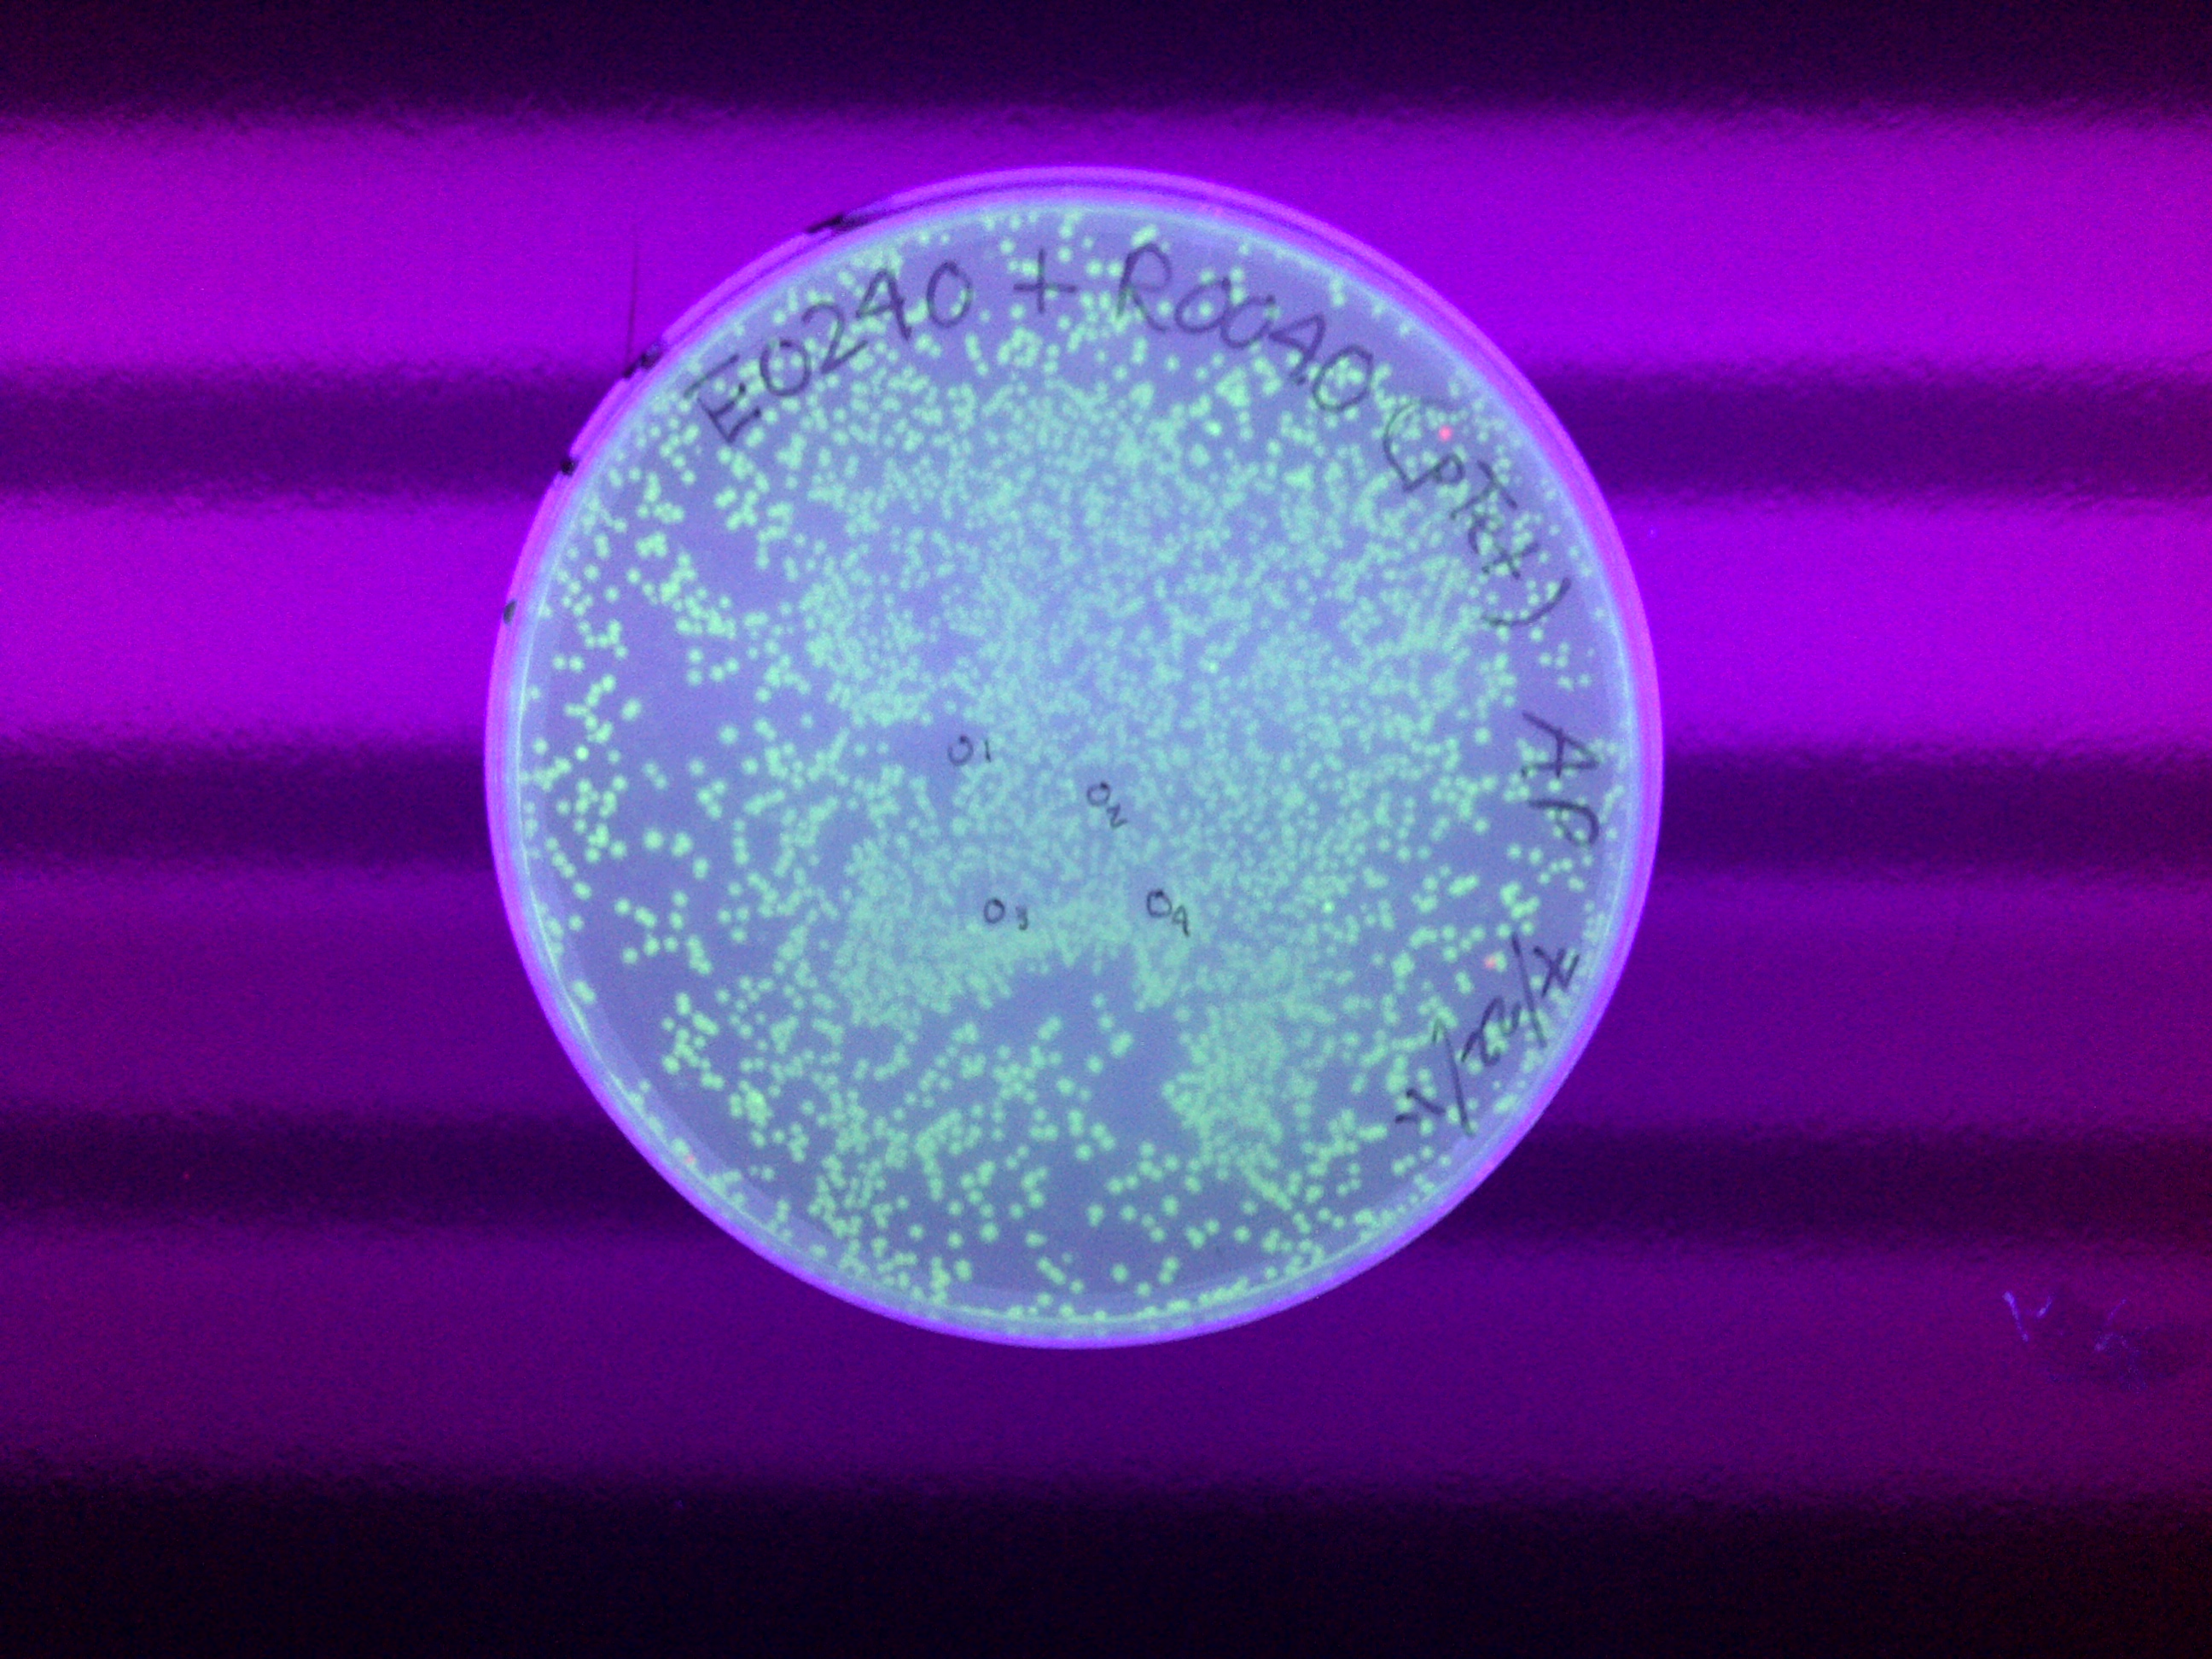
| + | From analyzing the transformed plates, it appeared that the transformed plates for I0500_E0240 and I0500_E0430 devices were filled with colonies. In contrast, the colonies that grew on the transformed plates for I13458-equipped devices were very sparse. Nobody knew for sure if this represented an inherent problem with the part itself and whether this would affect the subsequent steps (restriction digest, ligation, etc). Some overnight cultures were then prepared using these transformed colonies so that restriction mapping could be done.<br> | ||
| + | |||
| + | <h4>Final BU iGEM Meeting: Wet Lab Team</h4> | ||
| + | The main objectives for the wet lab team consist of the following: | ||
| + | a. Evidence collection: gel, picture, FACS data <br> | ||
| + | b. Present the TB genes, invertase recognition site, expression vector, and non-expression factor in the biobrick format.<br> | ||
| + | c. Prepare wet lab tips and tricks <br> | ||
| + | d. Build the normal and flippable genetic devices<br> | ||
| + | e. Prepare primers for the recombinase sites and other biobricking preparations<br> | ||
| + | f. Add the constructed parts into the registry<br> | ||
| + | g. Complete the online notebook<br> | ||
| + | |||
| + | <h4>Final BU iGEM Meeting: Computational Team</h4> | ||
| + | The following summary aims to mention briefly the current objectives for the computational team. The stated goals are organized based on their respective projects. Since I may not be completely familiar with the technical details presented at the meeting, please revise or change my summary to better reflect what actually happened with your project. | ||
| + | |||
| + | <h5>Clotho</h5> | ||
| + | - Eliminate bugs: Try to prevent error messages from appearing when certain buttons are pressed. The bugs should be handled with Bugzilla as soon as possible to improve the overall usability of Clotho.<br> | ||
| + | - Fab Dash: Prepare it for the deployment into the wet lab environment. A new interface is being developed, in which the left side is going to be more tab-like, and opening "file, new, ..." will allow a more direct way to create new parts.<br> | ||
| + | - Plug-in manager<br> | ||
| + | - Batterboard integration: Some works are still needed on its bugs.<br> | ||
| + | - Sequence view integration and improvement: This app will allow the import of Genbank file and the uptake of its features, which are written in the header, into the database.<br> | ||
| + | - Drag & drop to Clothocore and Optimus Primer: This upgrade will allow part to be dragged and dropped to some applications.<br> | ||
| + | - Guide to Clotho Apps<br> | ||
| + | - New projects will probably be used for next year's iGEM | ||
| + | |||
| + | <h5>Trumpet</h5> | ||
| + | - Craig has developed this application with good usability and interface<br> | ||
| + | - A paper will be written based on Trumpet's documentation<br> | ||
| + | |||
| + | <h5>Puppeteer</h5> | ||
| + | - Resource manager: This program aims to increase the efficiency of resource allocations. While the main goal is to make it function well, its parallelism problem (i.e. how to optimally use pipet in general cases/protocols) must be solved because it needs to be ready for demonstration. The flexibility of this program also needs some improvement by removing all hard-coded information so that it can be used in other robot. <br> | ||
| + | - Puppeteer: Work on allowing restriction digest and ligation. Complete Gateway Gibson assembly method for MIT cross compatibility. <br> | ||
| + | - Chenkai should inform Viktor about working with the video plan (screen capturing the computational work)<br> | ||
| + | - Film 30-minutes footage of the wet lab.<br> | ||
| + | - Outreach plan: Prepare powerpoint presentation, determine the proper material for each of the targeted schools, write about the outreach plan, and help Shannon with the wiki.<br> | ||
| + | |||
| + | <h5>Puppet Show</h5> | ||
| + | - Database: This program houses the samples and wet lab protocols in a format that can be read by the liquid-handling robot. Each sample contains its own history that can be seen in the graph protocol format. | ||
| + | - Prepare the written and graph protocols for restriction digest, ligation, Gibson Gateway assembly method. | ||
| + | - Prepare the Database setup files for its deployment | ||
| + | - Prepare the generalized version of the protocol graph and its viewer | ||
| + | - Sample history: Allow the user to see past actions done on a specified part | ||
| + | - Do a follow up with Avi | ||
| + | |||
| + | <h5>General Objectives</h5> | ||
| + | |||
| + | <html> | ||
| + | <table class="wikitable" > | ||
| + | |||
| + | <tr> | ||
| + | <td width="100" align="center"> <b>Jenhan</b> | ||
| + | </td><td width="100" align="center"> <b>Chenkai</b> | ||
| + | </td><td width="100" align="center"> <b>Janoo</b> | ||
| + | </td><td width="100" align="center"> <b>Doug</b> | ||
| + | </td><td width="100" align="center"> <b>Swapnil</b> | ||
| + | </td></tr> | ||
| + | <tr> | ||
| + | <td>Clotho deployment | ||
| + | </td><td>Video plan | ||
| + | </td><td>Follow up with Avi | ||
| + | </td><td>Clotho Core integration decision | ||
| + | </td><td>Project Vegas | ||
| + | </td></tr> | ||
| + | <tr> | ||
| + | <td>Sequence view | ||
| + | </td><td>Film the wet lab | ||
| + | </td><td>Online notebook | ||
| + | </td><td>Outreach slides | ||
| + | </td><td>Craig | ||
| + | </td></tr> | ||
| + | <tr> | ||
| + | <td>Feature chomp | ||
| + | </td><td>Outreach | ||
| + | </td><td>Plan at BU? | ||
| + | </td><td>- | ||
| + | </td><td>MIT | ||
| + | </td></tr> | ||
| + | <tr> | ||
| + | <td>Plan at UCB? | ||
| + | </td><td>Work for 10-15 hours a week | ||
| + | </td><td> | ||
| + | -</td><td> | ||
| + | -</td><td> | ||
| + | -</td></tr> | ||
| + | <tr> | ||
| + | <td>Online notebook | ||
| + | </td><td>Online notebook | ||
| + | </td><td>- | ||
| + | </td><td>- | ||
| + | </td><td>- | ||
| + | </td></tr> | ||
| + | </table> | ||
| + | </html> | ||
| + | |||
| + | |||
| + | |} | ||
| + | |||
| + | {| style="width:800px;background:#F5F5F5;text-align:justify;font-family: helvetica, arial, sans-serif;color:#333333;margin-top:5px;" cellspacing="18" | ||
| + | |style="font-family: helvetica, arial, sans-serif;font-size:1em;color:#ea8828;"|<h3>8/8/2011-8/14/2011</h3> | ||
| + | |- | ||
| + | | | ||
| + | |||
| + | '''Summary''' | ||
| + | *Higher concentrations of Arabinose were used in induction, but nothing | ||
| + | *The failure in induction was caused by the lack of AraC gene | ||
| + | *Two biobricks (Bba_I13458/AraC and Bba_I0500/pBad_AraC) were successfully transformed | ||
| + | *The parts that contain AraC gene were successfully digested, producing ligation-ready gel extraction samples | ||
| + | |||
| + | [[File:Arabinosediagram.jpg| 250px]] | ||
| + | |||
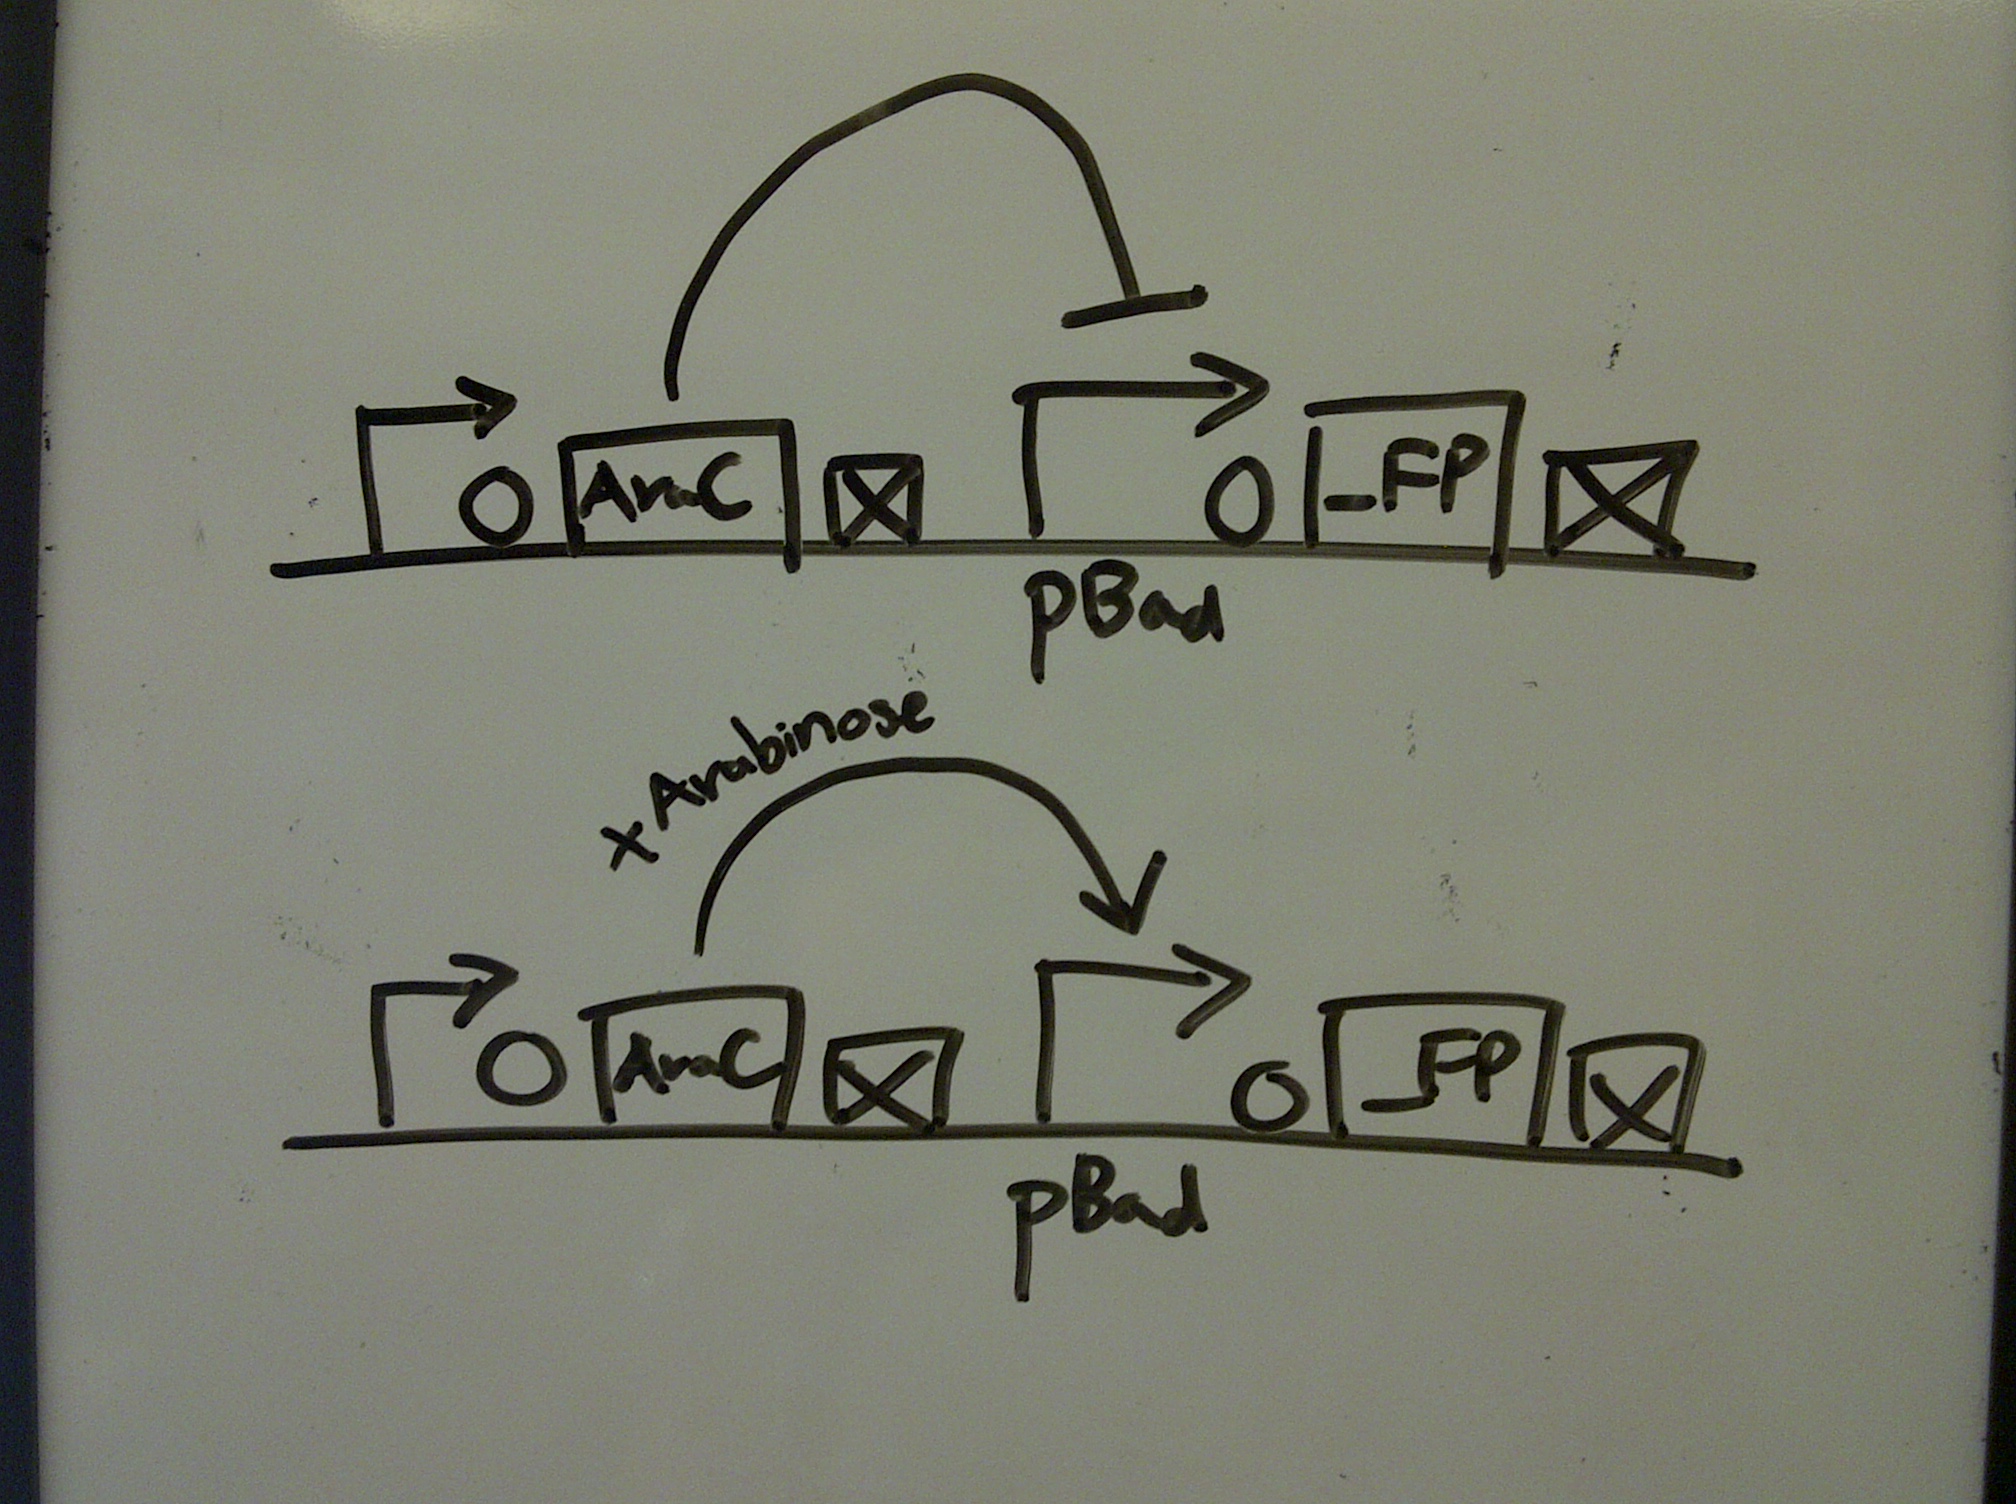
| + | Using the old protocol, I tried to induce the 3 fluorescent proteins under the pBad promoter. But this time, I added 2mM and 5mM into the 2 liquid culture from each fluorescent protein color group, while keeping 1 culture for control. It turned out that the induction still did not work. With additional research on the pBad operon and talking to Chris Anderson, I found out that AraC gene is important in allowing the DNA to form a specific conformation that can be induced with arabinose. I looked up the Parts Registry website and found 2 interesting parts: Bba_I13458 and Bba_I0500. The first one only contains the AraC gene, so I can combine it with the existing pBad devices. The second one contains both pBad and AraC, so it has to be ligated with fluorescent protein composite part. I decided to utilize both parts because I didn't know which method works the best. | ||
| + | |||
| + | I conducted the typical set of protocols to isolate the biobricks from the iGEM plate. While both biobricks yielded colonies on the plate, their numbers differed by a huge margin. The plate for Bba_I0500 only contained a single colonies while the plate for Bba_I13458 was almost covered by colonies. Because there were other similar problems, in which kanamycin plate simply did not yield enough colonies, the new kanamycin plates were made with less amount of antibiotic. But further transformation attempts showed that no difference existed between those two types of plates (higher versus lower concentration of kanamycin). | ||
| + | |||
| + | |} | ||
{| style="width:800px;background:#F0FFF0;text-align:justify;font-family: helvetica, arial, sans-serif;color:#333333;margin-top:5px;" cellspacing="18" | {| style="width:800px;background:#F0FFF0;text-align:justify;font-family: helvetica, arial, sans-serif;color:#333333;margin-top:5px;" cellspacing="18" | ||
| Line 49: | Line 278: | ||
'''Summary''' | '''Summary''' | ||
| - | * | + | *pCat (Bba_I14033) is not compatible with GFPc (Bba_E0240) |
| - | * | + | *A new protocol and a range of arabinose concentration (0, 5, 10, 50 uM) were used in inducing pBad. |
| - | * | + | *The new induction method still did not result in any fluorescence |
| + | |||
| + | [[File:Newinduction.jpg |250px]] [[File:Thickergel.jpg |250px]] | ||
| + | |||
| + | The ligated parts Bba_I14033_E0240 has proven to be problematic because it does not fluoresce. Furthermore, additional verification through gel electrophoresis either show a wrong band size or nothing at all. Therefore I tried to create this composite part using entirely new I14033 (pCat) and E0240 (GFPc). While this new combination ended up producing the correct band size during restriction mapping, its colonies still did not fluoresce. Additional verification was done using 1.2% agarose, where pCat_GFPc was run alongside GFPc. A higher agarose concentration was used to visualize a <100bp difference and the result successfully showed the difference between the 2 parts. I figure out that maybe pCat is simply not compatible with GFPc. During the restriction mapping for pCat_GFPc, I tried varying the digestion time (2 hours versus 4 hours) to understand its effect on ligation efficiency. I found out later that such variation did not affect restriction digest efficiency. | ||
| + | |||
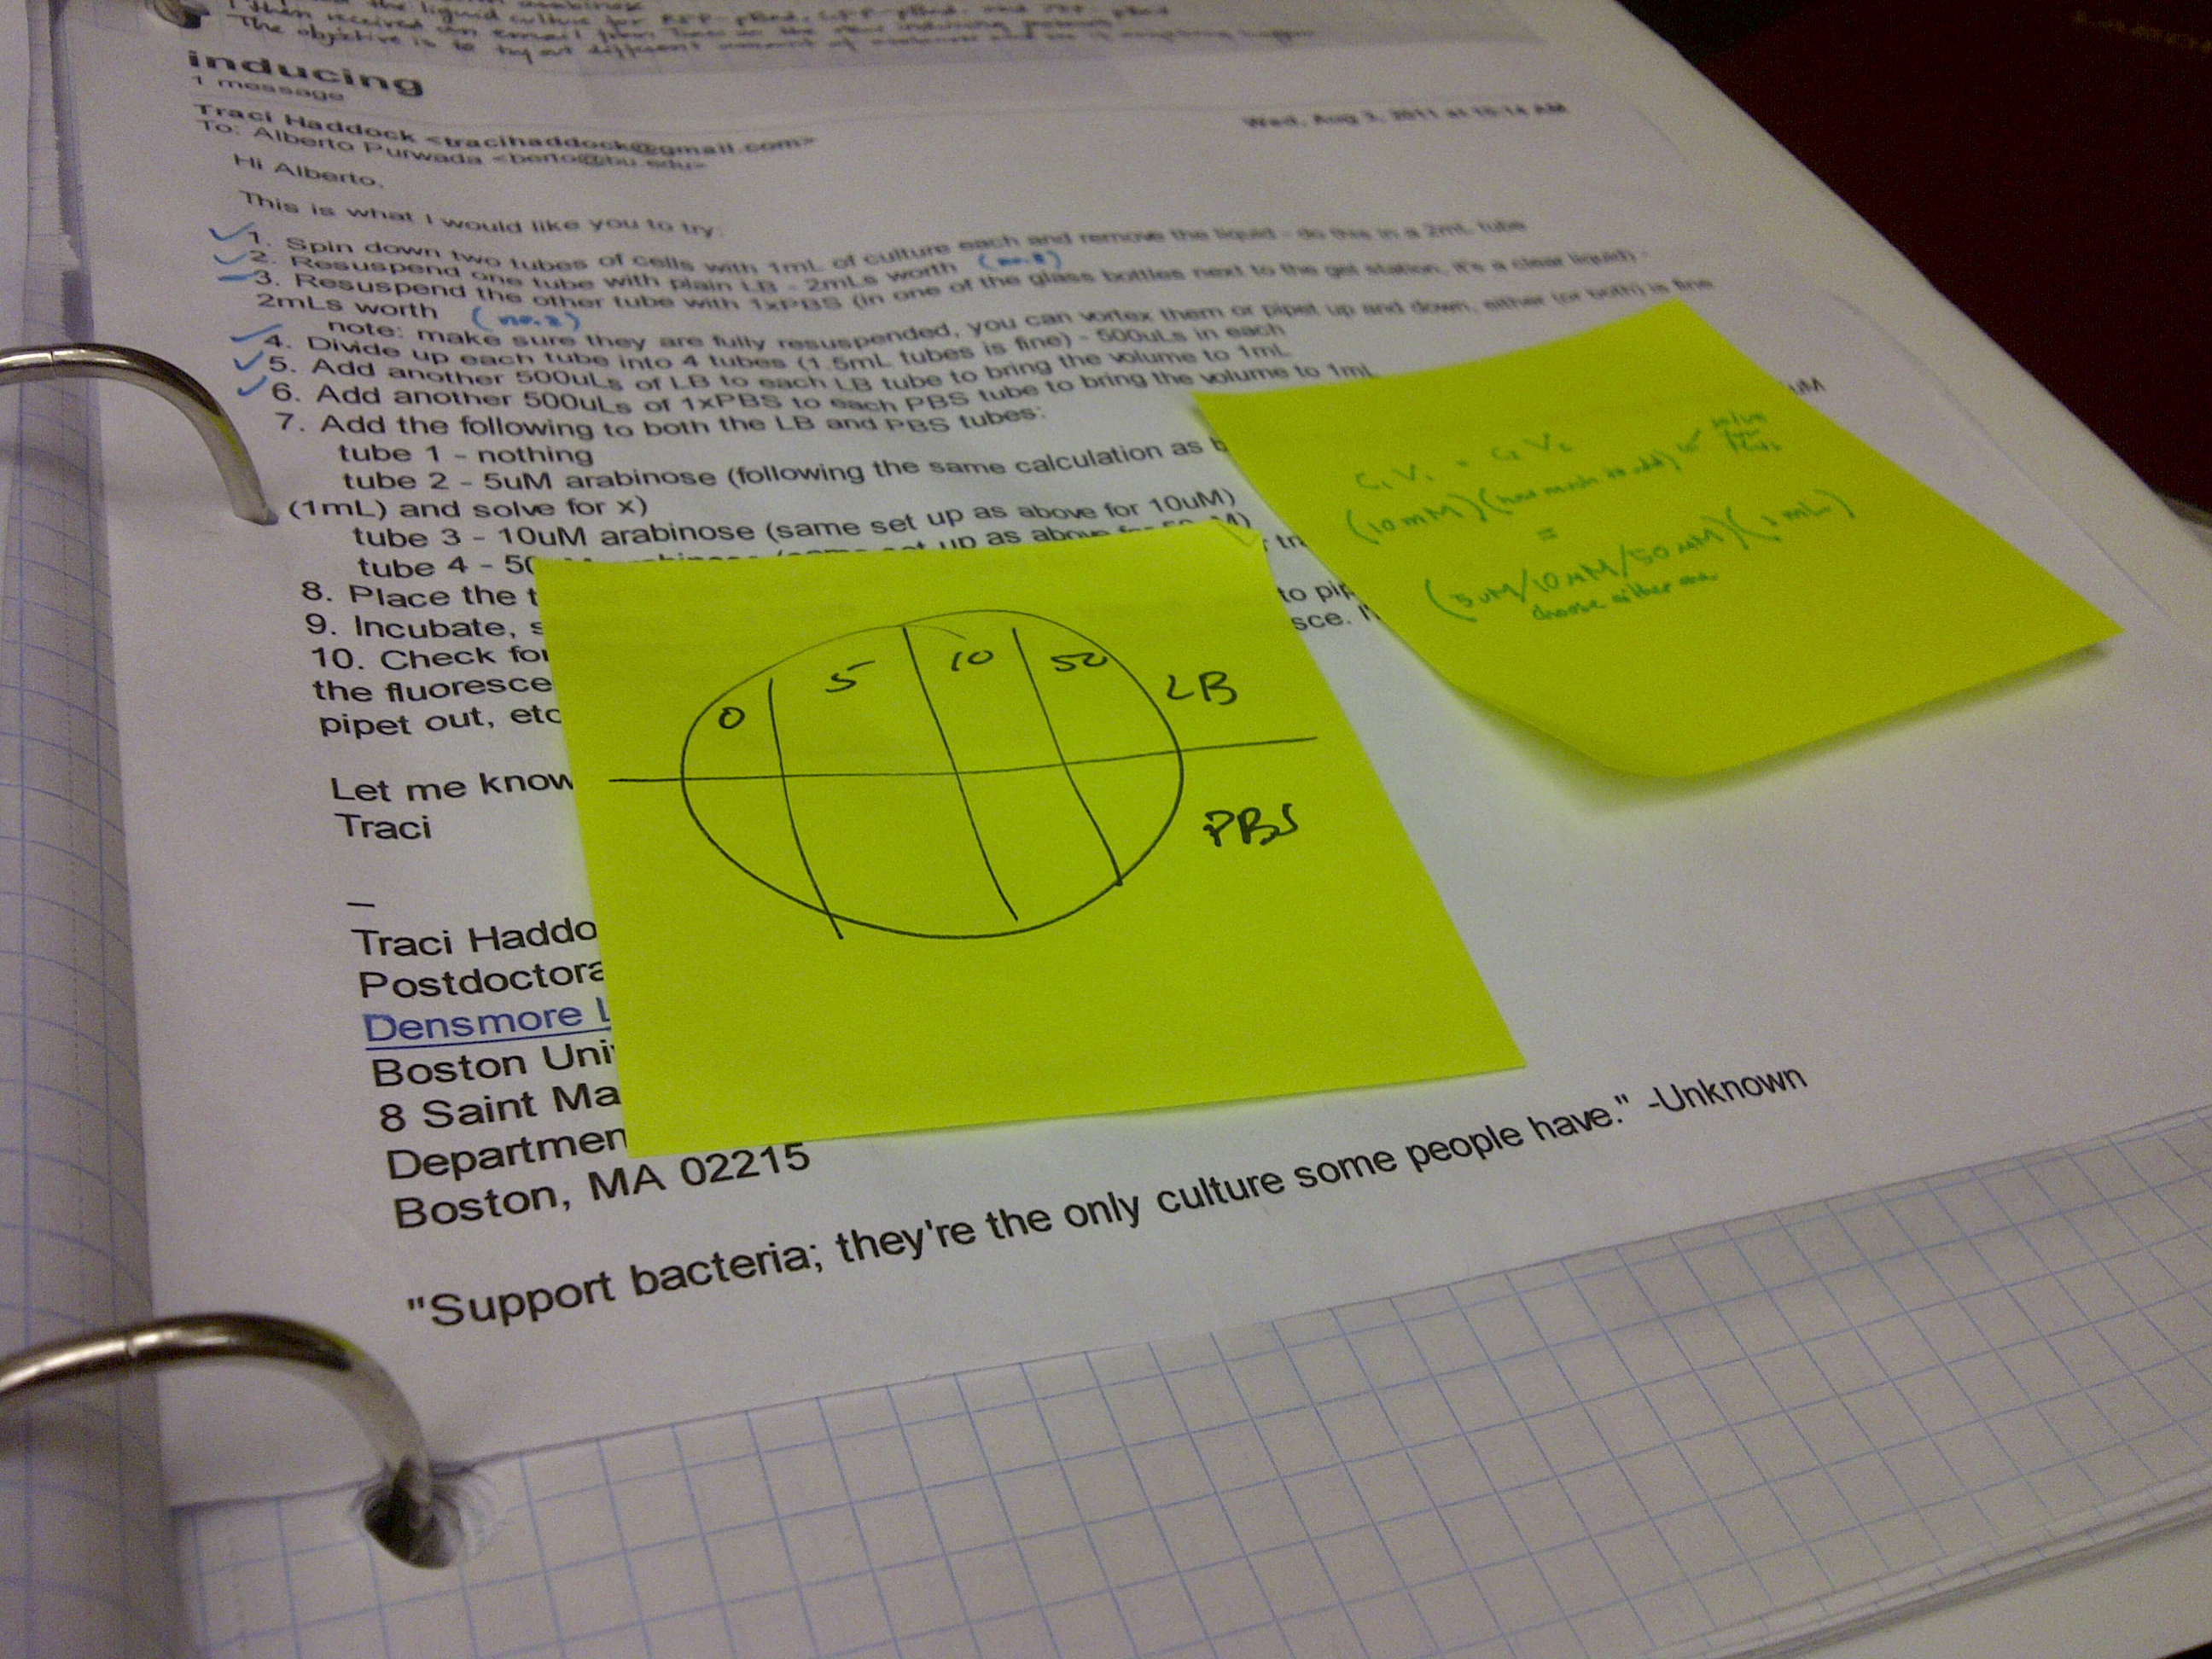
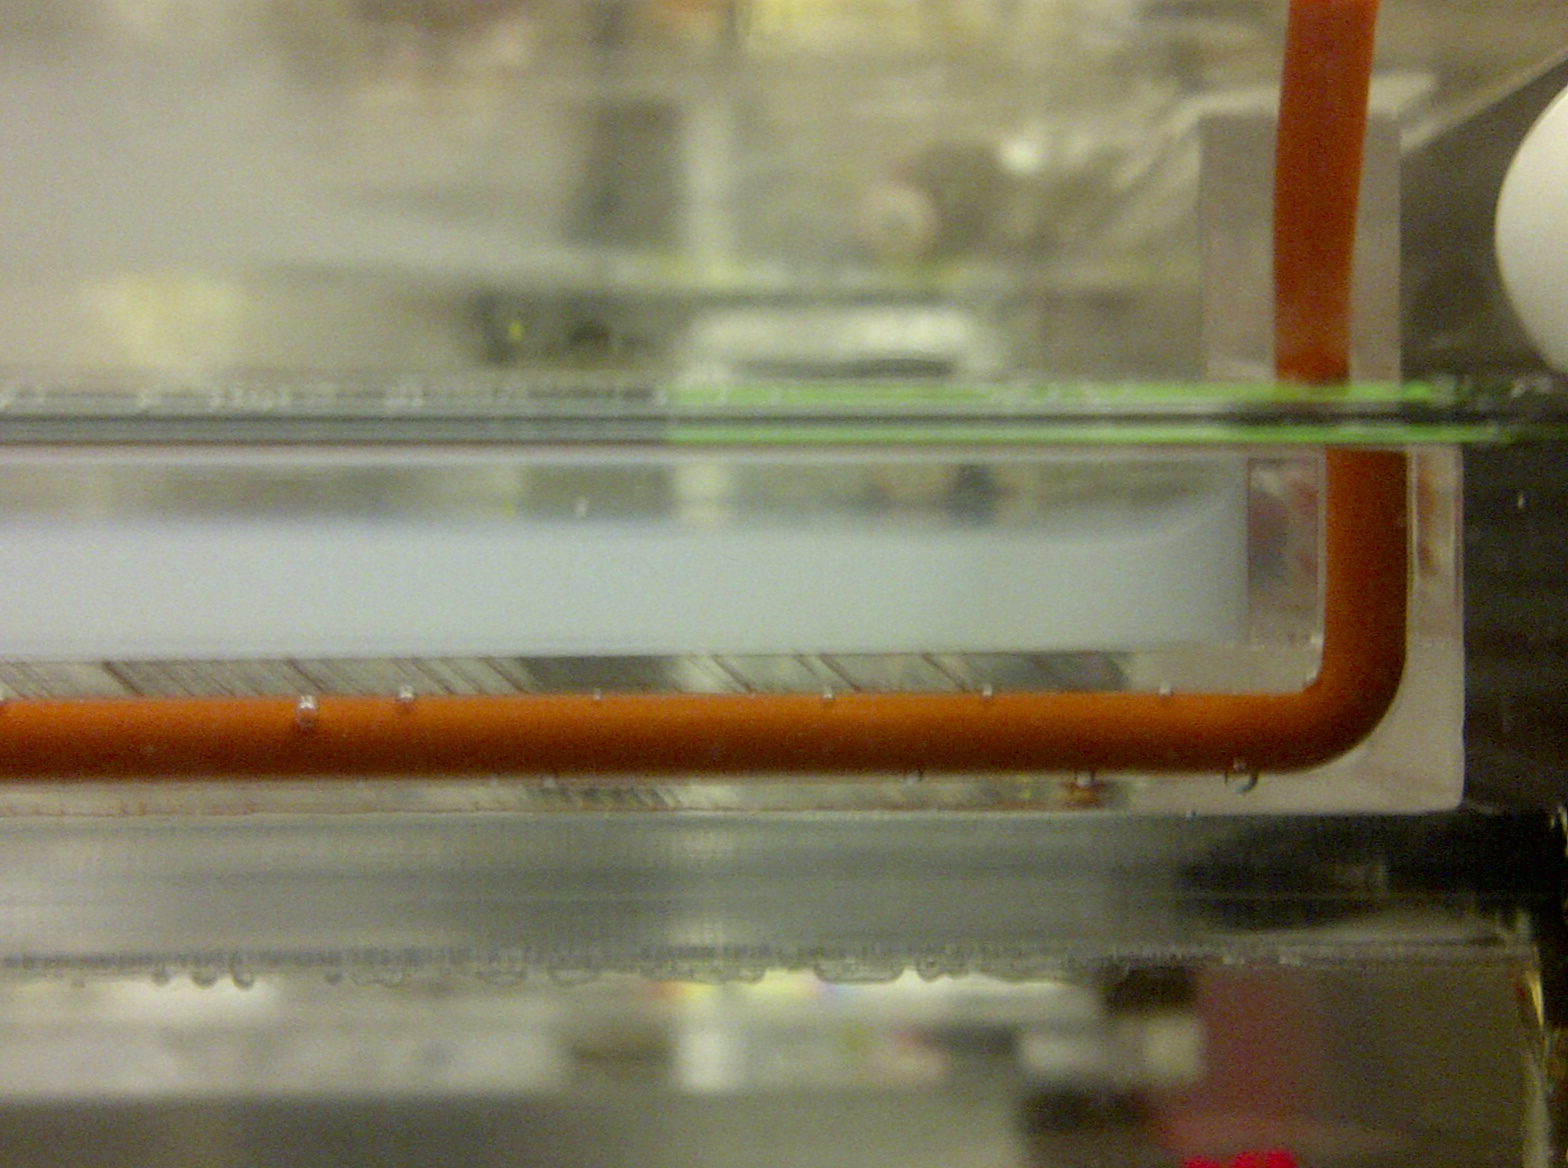
| + | Another problem that came up last week is the failure of inducing pBad (Bba_I13453) with arabinose. I previously tried the induction by adding 10uM arabinose into the liquid cultures of GFPc (Bba_E0240), YFPc (Bba_E0430), and RFPc (Bba_J23100) under the pBad promoter. But the liquid cultures autofluoresce under the UV light because the cultures have a yellow hue by themselves. So I tried a new induction protocol this time, in which 500 mL was aliquoted from each liquid culture 8 times. Using 4 of these aliquots, I pelleted and resuspended the cell in 1x PBS (pH = 7.4). PBS was used because it did not have any color, thus preventing any possibility of autofluorescence. I then add the following to both the LB and PBS tubes: 0uM, 5uM, 10uM, and 50uM of arabinose. After the arabinose have been added, these tubes were incubated for 4 hours. Then, 200uL liquid from the tubes that represent one fluorescent protein was aliquoted into a petri dish. A 2x4 grid was drawn on each petri dish to allow a better observation on the correlation between arabinose concentration and the fluorescent intensity. Despite such efforts, nothing was observed under the UV light. | ||
|} | |} | ||
| - | {| style="width:800px;background:# | + | {| style="width:800px;background:#F5F5F5;text-align:justify;font-family: helvetica, arial, sans-serif;color:#333333;margin-top:5px;" cellspacing="18" |
|style="font-family: helvetica, arial, sans-serif;font-size:1em;color:#ea8828;"|<h3>7/25/2011-7/31/2011</h3> | |style="font-family: helvetica, arial, sans-serif;font-size:1em;color:#ea8828;"|<h3>7/25/2011-7/31/2011</h3> | ||
|- | |- | ||
| Line 78: | Line 313: | ||
|} | |} | ||
| - | {| style="width:800px;background:# | + | {| style="width:800px;background:#F0FFF0;text-align:justify;font-family: helvetica, arial, sans-serif;color:#333333;margin-top:5px;" cellspacing="18" |
|style="font-family: helvetica, arial, sans-serif;font-size:1em;color:#ea8828;"|<h3>7/18/2011-7/24/2011</h3> | |style="font-family: helvetica, arial, sans-serif;font-size:1em;color:#ea8828;"|<h3>7/18/2011-7/24/2011</h3> | ||
|- | |- | ||
| Line 97: | Line 332: | ||
|} | |} | ||
| - | {| style="width:800px;background:# | + | {| style="width:800px;background:#F5F5F5;text-align:justify;font-family: helvetica, arial, sans-serif;color:#333333;margin-top:5px;" cellspacing="18" |
|style="font-family: helvetica, arial, sans-serif;font-size:1em;color:#ea8828;"|<h3>7/11/2011-7/17/2011</h3> | |style="font-family: helvetica, arial, sans-serif;font-size:1em;color:#ea8828;"|<h3>7/11/2011-7/17/2011</h3> | ||
|- | |- | ||
| Line 109: | Line 344: | ||
<br> | <br> | ||
I ligated and transformed the ligation reaction from last week. Unfortunately, only the single cut GFP Composite (Bba_E0240) showed a single colony, despite the fact that it was supposedly the positive control. The ligation reaction for this particular plate was done on the bench top at room temperature for 30 minutes. I initially planned to verify that ligated plasmid by comparing it with uncut GFP Composite (Bba_E0240). But I decided against it because nobody was planning to do gel on that day and running just one sample seemed inefficient. We then had a discussion where we realized the following: Supercoiled plasmid can usually be transformed easily. But ligated plasmid is not supercoiled, hence its relatively large size, making such plasmid more difficult to enter the bacteria through transformation. We can now understand why our bacteria transformed BioBrick parts easily, but had problems with the ligated parts. The amount of bacteria in each reaction tube might not be enough to uptake the ligated parts. To solve this problem, we got a new E. coli batch from MIT that contains 10^2 to 10^3 more bacteria in it. One attempt at transforming ligation reaction using those new cells resulted in the two plates with very small colonies. They were almost invisible to the naked eye, but additional incubation allowed these colonies to be clearly visible. | I ligated and transformed the ligation reaction from last week. Unfortunately, only the single cut GFP Composite (Bba_E0240) showed a single colony, despite the fact that it was supposedly the positive control. The ligation reaction for this particular plate was done on the bench top at room temperature for 30 minutes. I initially planned to verify that ligated plasmid by comparing it with uncut GFP Composite (Bba_E0240). But I decided against it because nobody was planning to do gel on that day and running just one sample seemed inefficient. We then had a discussion where we realized the following: Supercoiled plasmid can usually be transformed easily. But ligated plasmid is not supercoiled, hence its relatively large size, making such plasmid more difficult to enter the bacteria through transformation. We can now understand why our bacteria transformed BioBrick parts easily, but had problems with the ligated parts. The amount of bacteria in each reaction tube might not be enough to uptake the ligated parts. To solve this problem, we got a new E. coli batch from MIT that contains 10^2 to 10^3 more bacteria in it. One attempt at transforming ligation reaction using those new cells resulted in the two plates with very small colonies. They were almost invisible to the naked eye, but additional incubation allowed these colonies to be clearly visible. | ||
| - | |||
| - | |||
Assuming that higher amount of cells can fix our ligation problem, I transformed several past overnight ligation reaction that consist of: GFP Composite + R2000, GFP Composite + pCat (I14033), GFP Composite + pTet (R0040), Positive Control (J23101), and Negative Control (E. coli on plain LB). The transformation protocol used here was quite dissimilar from the regular one because 800 uL of the new E. coli cells would be concentrated into 200 uL by centrifugation and resuspension. The heat shock would be done on the heating block for 30-45 seconds and the recovery would take place inside the shaker. After overnight incubation at 37 degree, the Positive Control and Negative Control plates contained numerous colonies. I initially though that the other plates did not contain any colony, but Traci took a look at them and realized that one of the plate (Bba_E0240 + Bba_I14033) contained small colonies. Meanwhile, plates that were made with more concentration of cells (~2 mL) had more visible colonies on it. So Traci told me and Kyle to transform some ligation reactions into 3 and 4 mL of pelleted cells, respectively. I did that with Vanessa's overnight ligation of YFP Composite + pCat (Bba_E0430 + Bba_I14033) and my quick ligation of GFP Composite + R2000. The results were still unreliable as only the latter had colonies, but at least something worked. | Assuming that higher amount of cells can fix our ligation problem, I transformed several past overnight ligation reaction that consist of: GFP Composite + R2000, GFP Composite + pCat (I14033), GFP Composite + pTet (R0040), Positive Control (J23101), and Negative Control (E. coli on plain LB). The transformation protocol used here was quite dissimilar from the regular one because 800 uL of the new E. coli cells would be concentrated into 200 uL by centrifugation and resuspension. The heat shock would be done on the heating block for 30-45 seconds and the recovery would take place inside the shaker. After overnight incubation at 37 degree, the Positive Control and Negative Control plates contained numerous colonies. I initially though that the other plates did not contain any colony, but Traci took a look at them and realized that one of the plate (Bba_E0240 + Bba_I14033) contained small colonies. Meanwhile, plates that were made with more concentration of cells (~2 mL) had more visible colonies on it. So Traci told me and Kyle to transform some ligation reactions into 3 and 4 mL of pelleted cells, respectively. I did that with Vanessa's overnight ligation of YFP Composite + pCat (Bba_E0430 + Bba_I14033) and my quick ligation of GFP Composite + R2000. The results were still unreliable as only the latter had colonies, but at least something worked. | ||
| Line 199: | Line 432: | ||
Despite the fact that we obtained colonies from transformed ligation reactions, we tried to approach this result cautiously. Some checked on the Ampicillin and Kanamycin negative control plates to verify the ability of these antibiotic infused LB plates in selectively prohibit bacterial growth (the plates are all good). Some planned to conduct ligation with the addition of CIP into the backbone to check the possibility of false positive (it was still ongoing at the time). I did a quick verification attempt with gel electrophoresis to both determine the availability of DNA and check the fragment size. I used the samples from the mini prep with the highest concentration and ran it against the backbone plasmid. This means that if I were to check on R2000_E0240, I would run the sample against R2000 because this promoter was used as the backbone/vector with the E0240 used as the insert. But only the R2000_E0240 part produced a visible on the gel so that I only prepared frozen stock for this one. | Despite the fact that we obtained colonies from transformed ligation reactions, we tried to approach this result cautiously. Some checked on the Ampicillin and Kanamycin negative control plates to verify the ability of these antibiotic infused LB plates in selectively prohibit bacterial growth (the plates are all good). Some planned to conduct ligation with the addition of CIP into the backbone to check the possibility of false positive (it was still ongoing at the time). I did a quick verification attempt with gel electrophoresis to both determine the availability of DNA and check the fragment size. I used the samples from the mini prep with the highest concentration and ran it against the backbone plasmid. This means that if I were to check on R2000_E0240, I would run the sample against R2000 because this promoter was used as the backbone/vector with the E0240 used as the insert. But only the R2000_E0240 part produced a visible on the gel so that I only prepared frozen stock for this one. | ||
| - | |||
| - | |||
In the meantime, I was quite concerned that the small DNA concentration in the gel extraction samples may mean nothing but false positive. So I ran gel electrophoresis using several samples and each well was filled with 10 uL of the samples. The resulting gel picture had extremely faint bands, so my effort to increase their visibility also caused the DNA ladder to be overexposed. But this did not concern me because I only wanted to verify the existence of DNA, not the size. Only DNA would appear as glowing bands because they could be bounded with the SIBR dye. The most important thing here is that we can now be assured that the DNA was not lost in gel extraction. | In the meantime, I was quite concerned that the small DNA concentration in the gel extraction samples may mean nothing but false positive. So I ran gel electrophoresis using several samples and each well was filled with 10 uL of the samples. The resulting gel picture had extremely faint bands, so my effort to increase their visibility also caused the DNA ladder to be overexposed. But this did not concern me because I only wanted to verify the existence of DNA, not the size. Only DNA would appear as glowing bands because they could be bounded with the SIBR dye. The most important thing here is that we can now be assured that the DNA was not lost in gel extraction. | ||
| - | |||
| - | |||
|} | |} | ||
| - | {| style="width:800px;background:# | + | {| style="width:800px;background:#F0FFF0;text-align:justify;font-family: helvetica, arial, sans-serif;color:#333333;margin-top:5px;" cellspacing="18" |
|style="font-family: helvetica, arial, sans-serif;font-size:1em;color:#ea8828;"|<h3>7/4/2011-7/10/2011</h3> | |style="font-family: helvetica, arial, sans-serif;font-size:1em;color:#ea8828;"|<h3>7/4/2011-7/10/2011</h3> | ||
|- | |- | ||
| | | | ||
| - | |||
| - | |||
| - | |||
| - | |||
| - | |||
| - | |||
| - | |||
| - | |||
| - | |||
| - | |||
| - | |||
| - | |||
| - | |||
| - | |||
| - | |||
| - | |||
| - | |||
| - | |||
| - | |||
| + | [[File: weirdplate.jpg | 200px]] [[File: LBbroth.jpg | 200px]] [[File: igemtubes.jpg | 200px]] | ||
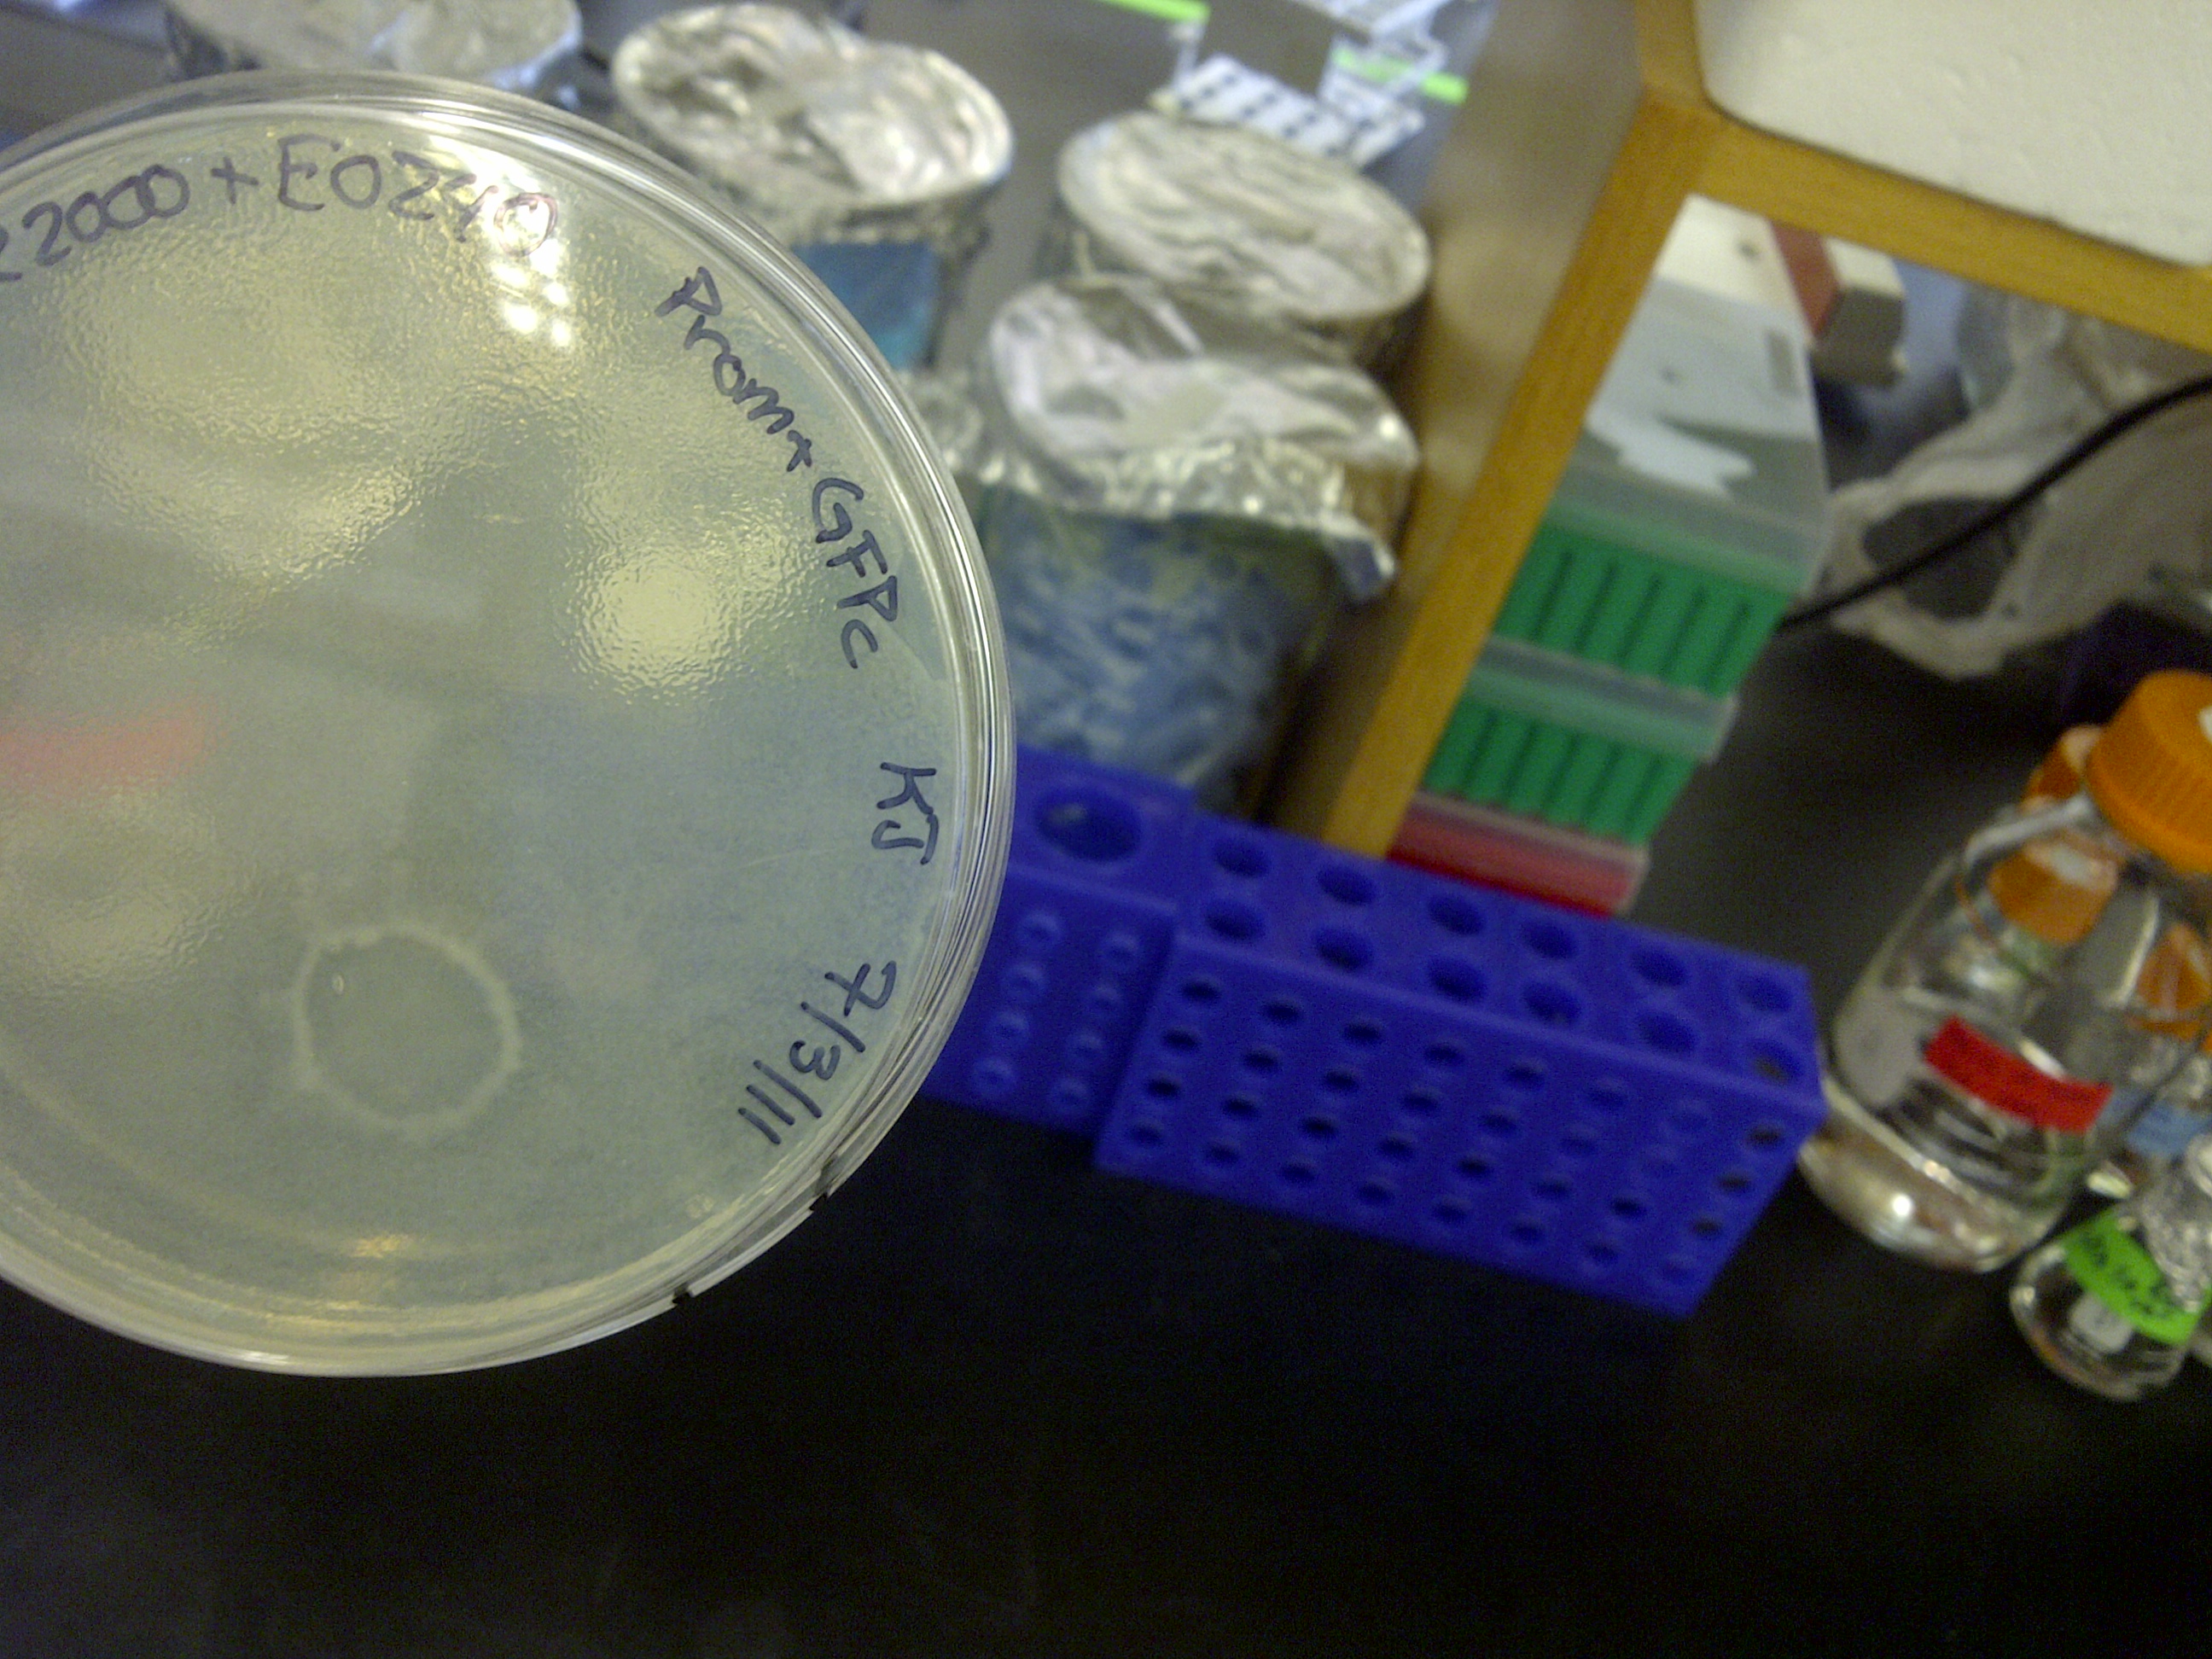
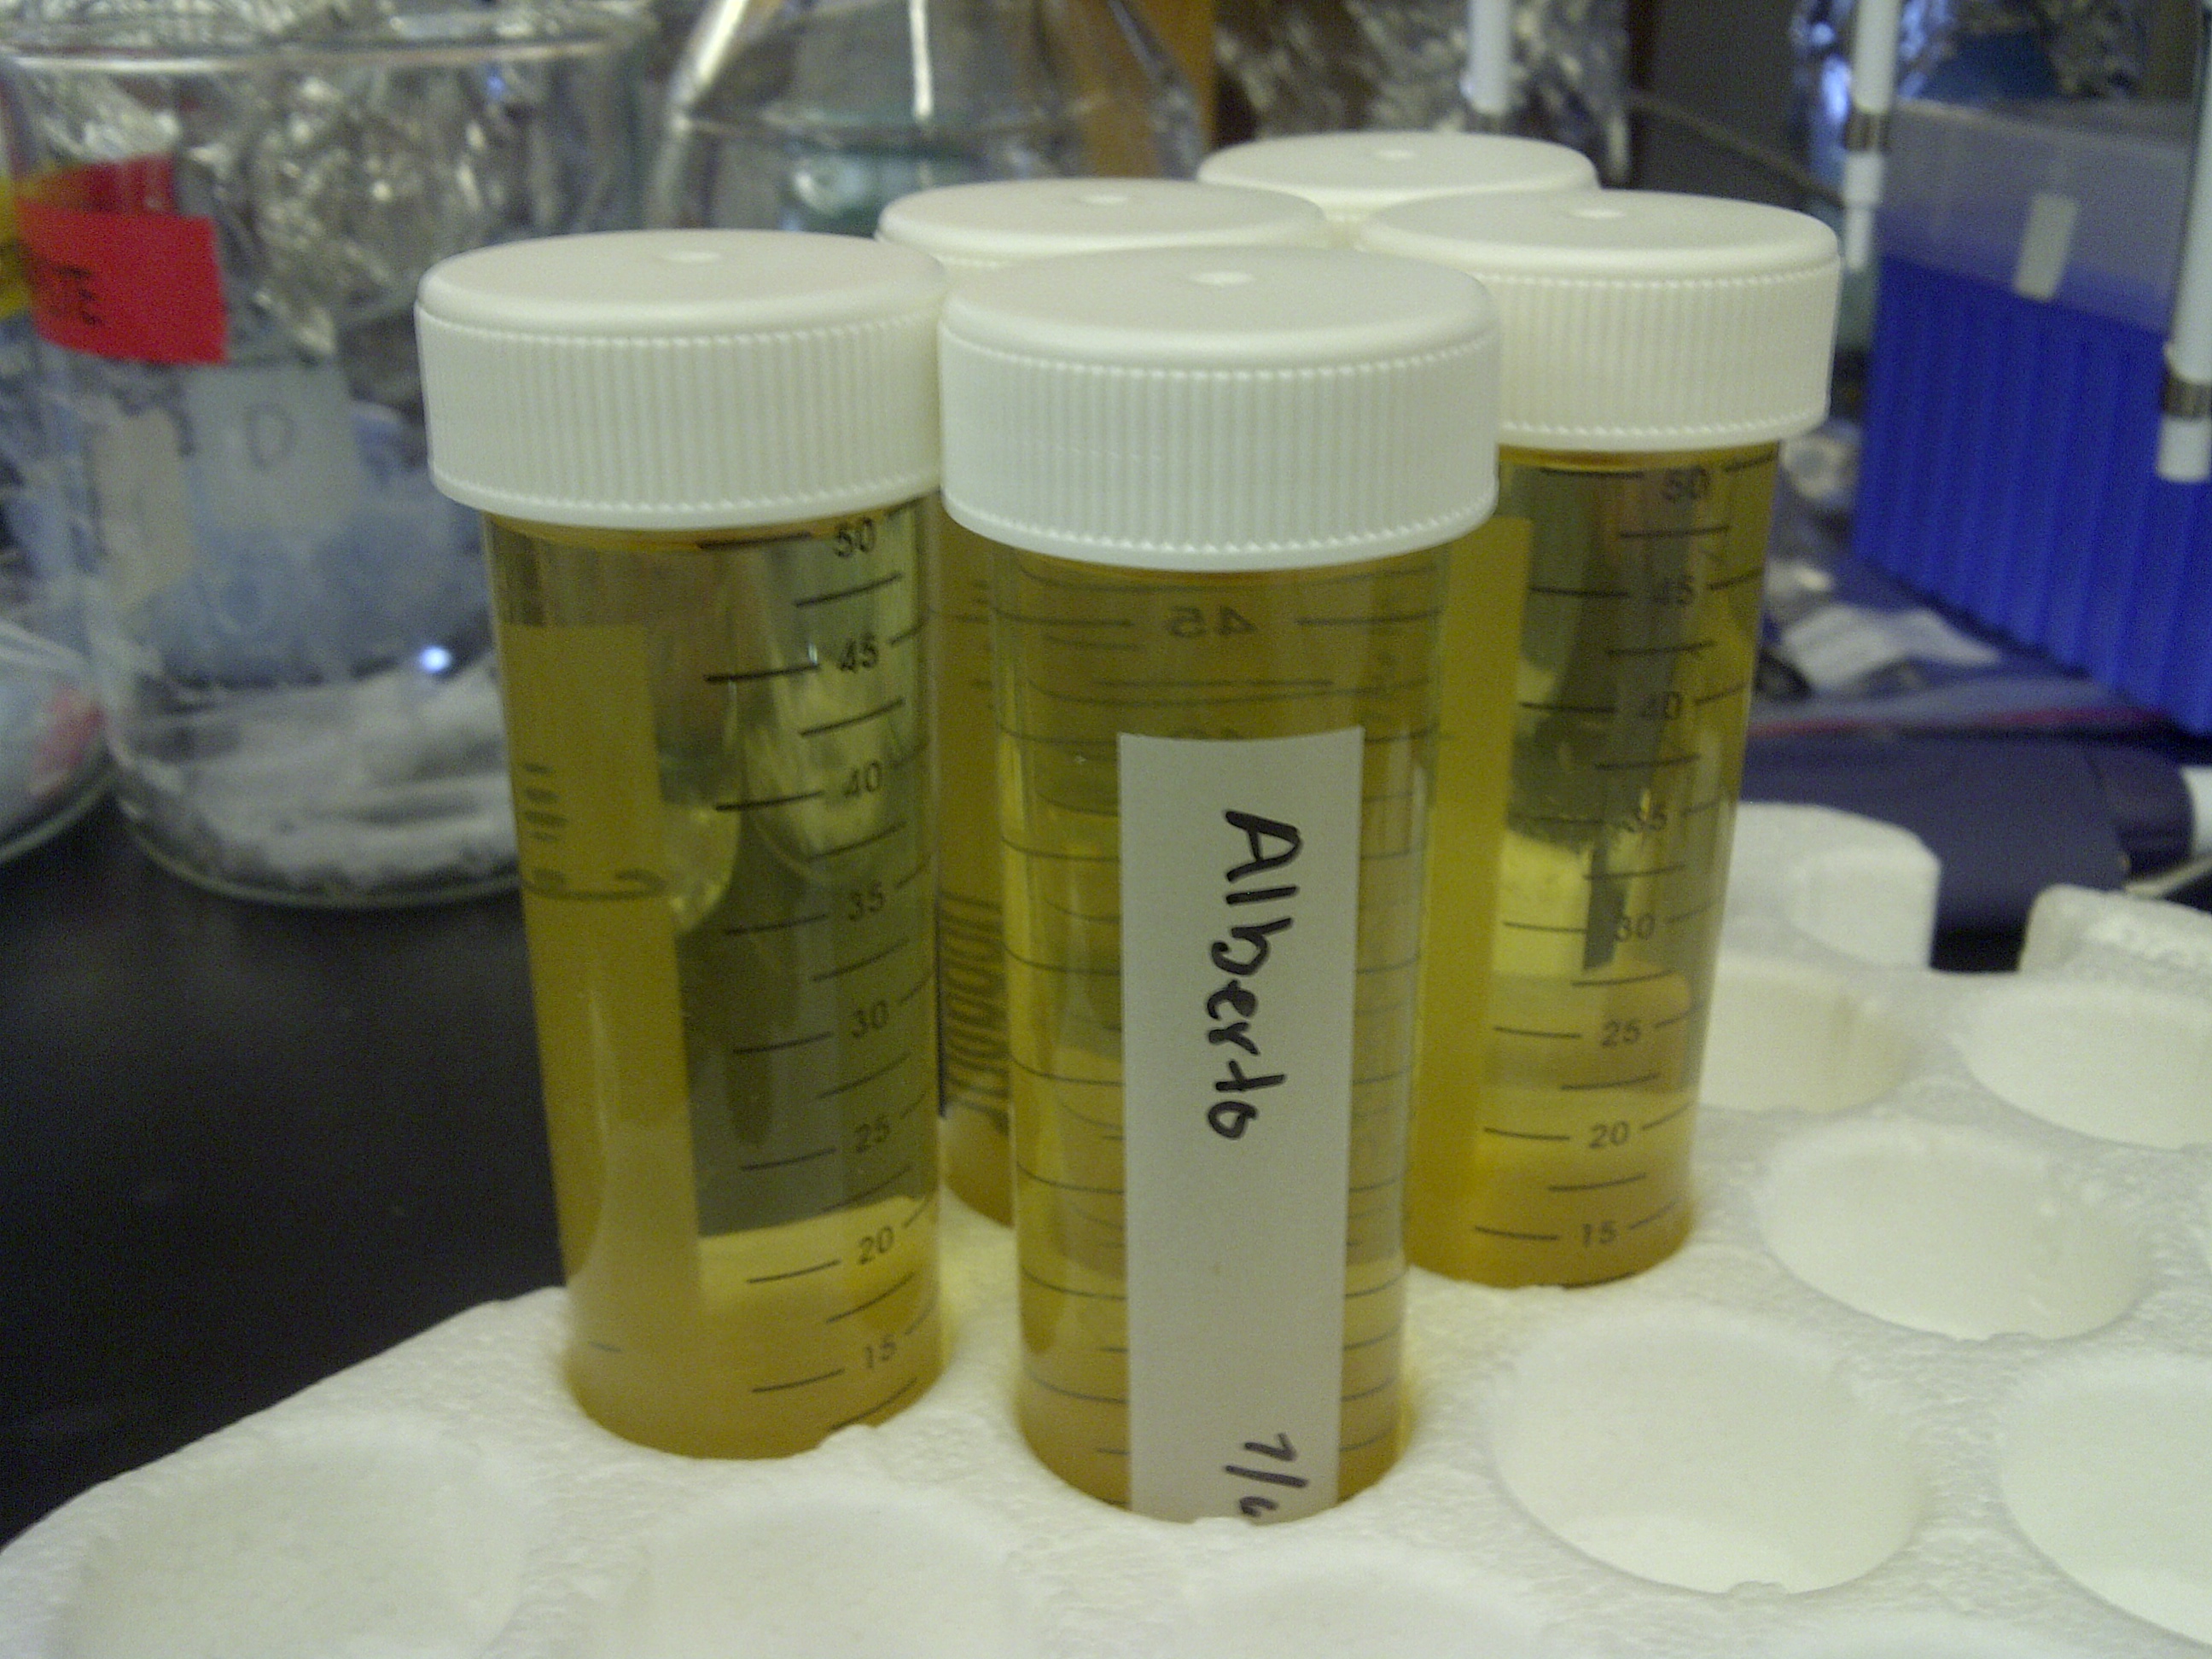
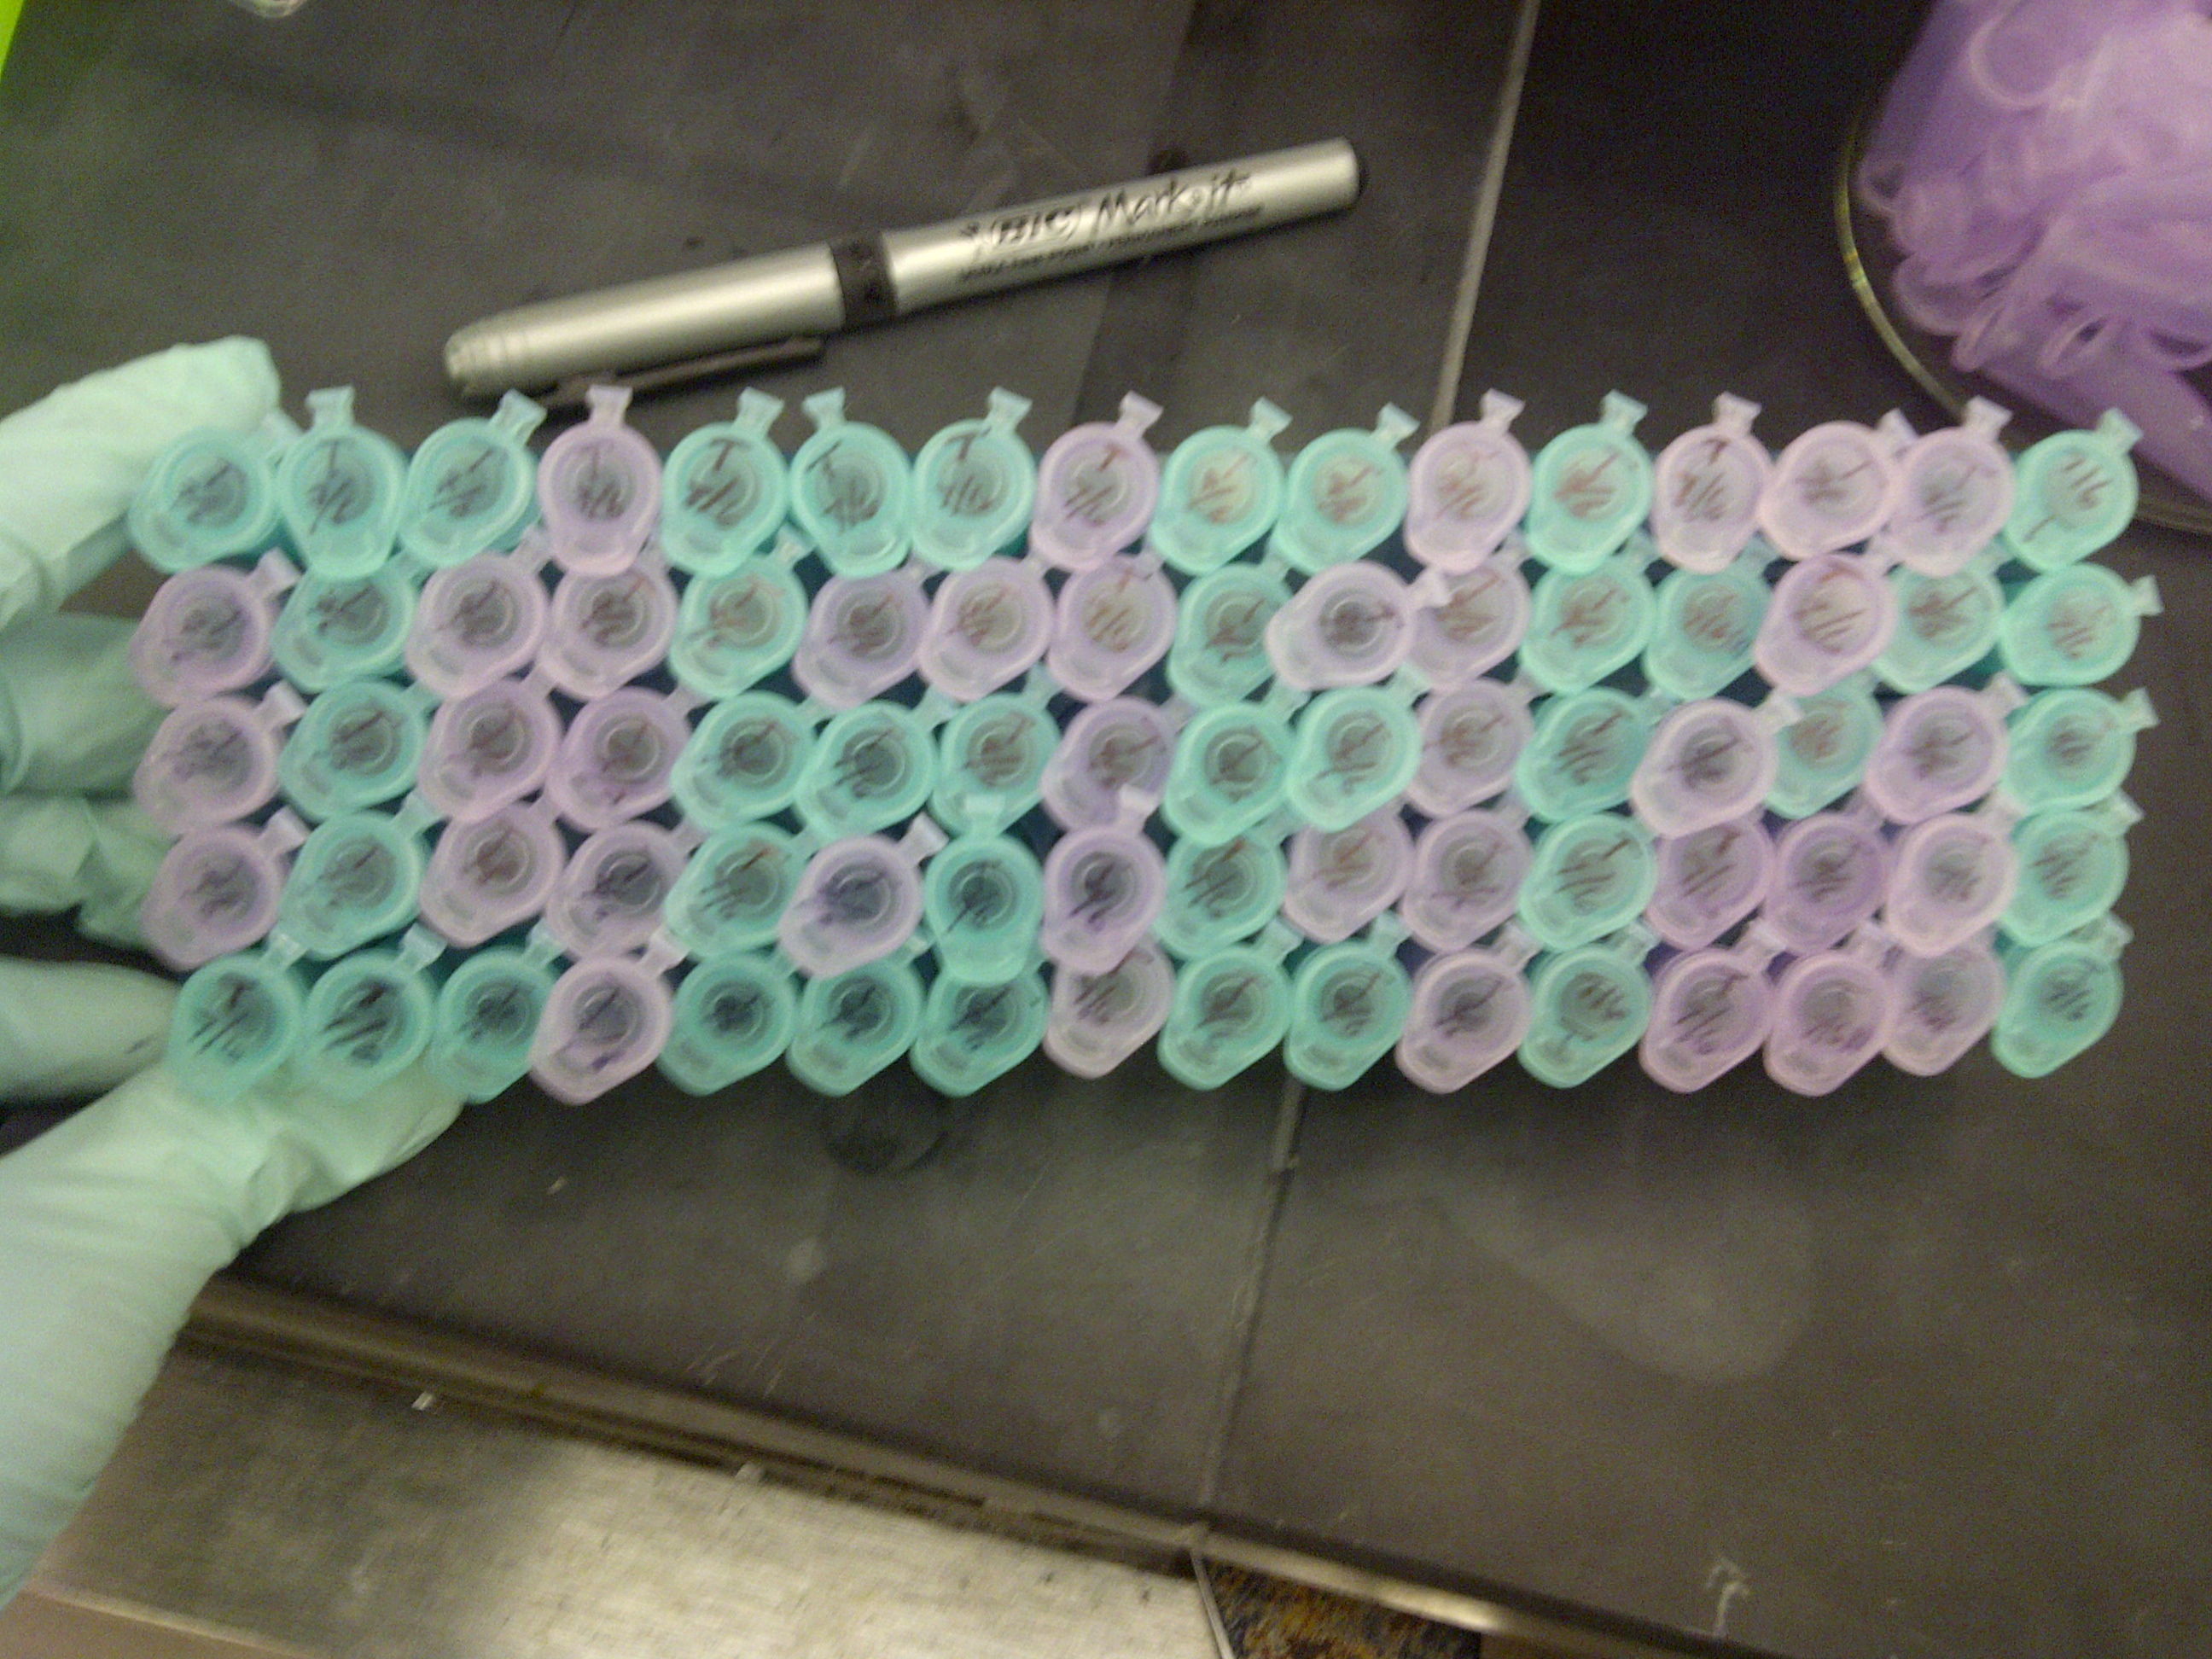
| + | The transformed plates from last week did not contain the usual colonies. Instead, each plate had a thin layer of bacteria lawn* (*= uncountable colonies, making it appears film-like) and it smells far stronger, albeit similar, to the usual E. coli culture. While we never seen a plate that contains bacterial lawn before, we found out later that it was not the transformed bacteria because of the following: First, the negative control plate also showed the same bacterial lawn growth. That means the plate was not doing its job in antibiotic-based selection. Because all the plates showed similar characteristic, the plate either lack kanamycin or it was added when the agar mixture was still hot, thus degrading the antibiotic. Second, the plasmid prep did not show any growth, meaning that the bacteria did not prefer 37 degree Celsius (unlike E. coli). This problem appeared suddenly because we just made the kanamycin plate the previous day. Another problem also appeared when Shannon was about to transform several more bench top ligation reaction when Kyle realized that the LB broth was contaminated. There was a yellow/transparent clump of spore-like materials lying at the bottom. This is bad because another set of ligation was transformed with that LB broth on the previous Sunday, meaning that its quality would be compromised as well. We found out later that these plates did not grow either. In order to avoid such problem, we decided to remake the LB broth along with the plates. We did negative control on the new Ampicillin and Kanamycin plates and they turned out fine. I then divided the LB broth into several aliquotes, each for one team member. This is done not only to improve efficiency (no need to transfer broth from big flask to the small one every time) but also to reduce the risk of contamination. | ||
In terms of our overall progress, everything tended to work well up until ligation. While we could not verify the condition of our ligation, they did not transform well. So Traci decided to prepare a new batch of E. coli cells, especially because our stock has been running out as well. Some other people decided to prepare a new set of plasmid prep by either using old plates or streaking new plates. In such cases, transformation never became a problem for us. So we figured out that the problem should be caused by ligation. Traci then ordered a package of Quick Ligation. I also tried doing ethanol precipitation for the gel extraction samples with extremely low DNA concentration, which supposedly compress the DNA into an extract of smaller amount but higher concentration. But it did not work either. | In terms of our overall progress, everything tended to work well up until ligation. While we could not verify the condition of our ligation, they did not transform well. So Traci decided to prepare a new batch of E. coli cells, especially because our stock has been running out as well. Some other people decided to prepare a new set of plasmid prep by either using old plates or streaking new plates. In such cases, transformation never became a problem for us. So we figured out that the problem should be caused by ligation. Traci then ordered a package of Quick Ligation. I also tried doing ethanol precipitation for the gel extraction samples with extremely low DNA concentration, which supposedly compress the DNA into an extract of smaller amount but higher concentration. But it did not work either. | ||
| Line 238: | Line 450: | ||
On my own personal attempt at creating a device using GFP composite, I had not been able to progress further either due to ligation problem. So with all the new tools in hand (cells, plates, LB broth), I decided to start from the beginning – get new mini prep samples, digest the plasmid, and tried different ligation method. In this case, I limited myself to only use GFP Composite (Bba_E0240) and the suitable promoter (Bba_R2000). I also tried to learn more about the ligation problem by cutting both GFP composite and R2000 Promoter with only one restriction digest enzyme, X and S respectively. They will serve as a "positive control", because they are supposed to be easy to ligate. I prepared 3 ligation reactions for one type of sample, each reaction is done through either one of the following ligation protocol: 16 C for one hour, room temperature/bench top for 30 minutes, or bench top using quick ligase for 5 minutes. The insert to vector ratio used was 1 to 3 and the heat inactivation step would be skipped here. | On my own personal attempt at creating a device using GFP composite, I had not been able to progress further either due to ligation problem. So with all the new tools in hand (cells, plates, LB broth), I decided to start from the beginning – get new mini prep samples, digest the plasmid, and tried different ligation method. In this case, I limited myself to only use GFP Composite (Bba_E0240) and the suitable promoter (Bba_R2000). I also tried to learn more about the ligation problem by cutting both GFP composite and R2000 Promoter with only one restriction digest enzyme, X and S respectively. They will serve as a "positive control", because they are supposed to be easy to ligate. I prepared 3 ligation reactions for one type of sample, each reaction is done through either one of the following ligation protocol: 16 C for one hour, room temperature/bench top for 30 minutes, or bench top using quick ligase for 5 minutes. The insert to vector ratio used was 1 to 3 and the heat inactivation step would be skipped here. | ||
| - | [[File: 7811RDN.jpg | 350px | + | [[File: 7811RDN.jpg | 350px]] |
| - | + | ||
| - | + | ||
| - | + | ||
| - | + | ||
| - | + | ||
| - | + | ||
| - | + | ||
| - | + | ||
| - | + | ||
| - | + | ||
| - | + | ||
| - | + | ||
| - | + | ||
| - | + | ||
| - | + | ||
| - | + | ||
| - | + | ||
| - | + | ||
| - | + | ||
| - | + | ||
| - | + | ||
| - | + | ||
| - | + | ||
| - | + | ||
|} | |} | ||
| - | {| style="width:800px;background:# | + | {| style="width:800px;background:#F5F5F5;text-align:justify;font-family: helvetica, arial, sans-serif;color:#333333;margin-top:5px;" cellspacing="18" |
|style="font-family: helvetica, arial, sans-serif;font-size:1em;color:#ea8828;"|<h3>6/27/2011-7/3/2011</h3> | |style="font-family: helvetica, arial, sans-serif;font-size:1em;color:#ea8828;"|<h3>6/27/2011-7/3/2011</h3> | ||
|- | |- | ||
| Line 272: | Line 460: | ||
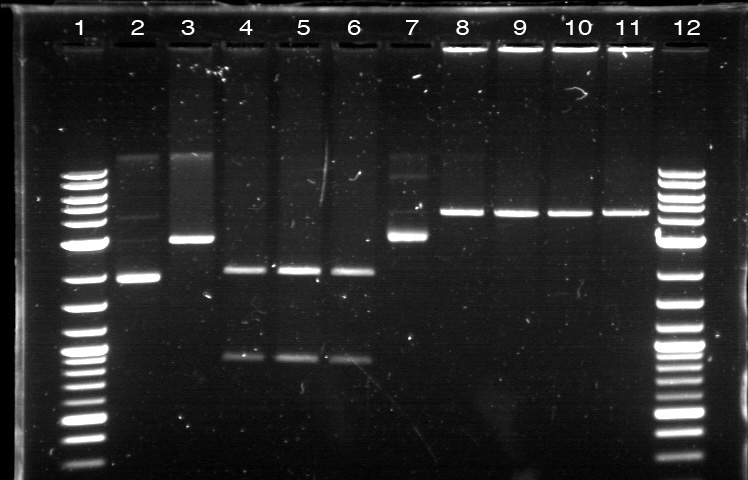
Utilizing the digested plasmid from last week, I ran gel electrophoresis to separate the fragments of the digested plasmids from last week. It was apparent that the GFP composite had been successfully cut, which means that we had solved the problem with restriction digest. | Utilizing the digested plasmid from last week, I ran gel electrophoresis to separate the fragments of the digested plasmids from last week. It was apparent that the GFP composite had been successfully cut, which means that we had solved the problem with restriction digest. | ||
| - | [[File:62711RD.jpg | 350px | + | [[File:62711RD.jpg | 350px]] |
1. DNA Ladder | 1. DNA Ladder | ||
| Line 294: | Line 482: | ||
|} | |} | ||
| - | {| style="width:800px;background:# | + | {| style="width:800px;background:#F0FFF0;text-align:justify;font-family: helvetica, arial, sans-serif;color:#333333;margin-top:5px;" cellspacing="18" |
|style="font-family: helvetica, arial, sans-serif;font-size:1em;color:#ea8828;"|<h3>6/20/2011-6/26/2011</h3> | |style="font-family: helvetica, arial, sans-serif;font-size:1em;color:#ea8828;"|<h3>6/20/2011-6/26/2011</h3> | ||
|- | |- | ||
| Line 306: | Line 494: | ||
I tried to do the same thing for the second time with larger volume, because Traci told us that the nanodrop quantification result from the extracted gels could be improved by using more sample instead of the constant ~10 uL that we had been using all this time. The pictures of the result can be seen below. We were still unable to see any separated band for the cut YFP and GFP composite part. Some promoters and terminators were successfully cut, but our previously made GFP+Terminator composite parts did not seem to produce the expected band and the same thing happened with the parts that encode fluorescent proteins. | I tried to do the same thing for the second time with larger volume, because Traci told us that the nanodrop quantification result from the extracted gels could be improved by using more sample instead of the constant ~10 uL that we had been using all this time. The pictures of the result can be seen below. We were still unable to see any separated band for the cut YFP and GFP composite part. Some promoters and terminators were successfully cut, but our previously made GFP+Terminator composite parts did not seem to produce the expected band and the same thing happened with the parts that encode fluorescent proteins. | ||
| - | [[File:AP62211RD1.jpg | 350px | + | [[File:AP62211RD1.jpg | 350px]] |
Restriction Digest 1: | Restriction Digest 1: | ||
1. DNA Ladder | 1. DNA Ladder | ||
| Line 327: | Line 515: | ||
18. DNA Ladder | 18. DNA Ladder | ||
| - | [[File:AP62211RD2.jpg | 350px | + | [[File:AP62211RD2.jpg | 350px]] |
Restriction Digest 2: | Restriction Digest 2: | ||
1. DNA Ladder | 1. DNA Ladder | ||
| Line 343: | Line 531: | ||
|} | |} | ||
| - | {| style="width:800px;background:# | + | {| style="width:800px;background:#F5F5F5;text-align:justify;font-family: helvetica, arial, sans-serif;color:#333333;margin-top:5px;" cellspacing="18" |
|style="font-family: helvetica, arial, sans-serif;font-size:1em;color:#ea8828;"|<h3>6/13/2011-6/19/2011</h3> | |style="font-family: helvetica, arial, sans-serif;font-size:1em;color:#ea8828;"|<h3>6/13/2011-6/19/2011</h3> | ||
|- | |- | ||
| Line 363: | Line 551: | ||
|} | |} | ||
| - | {| style="width:800px;background:# | + | {| style="width:800px;background:#F0FFF0;text-align:justify;font-family: helvetica, arial, sans-serif;color:#333333;margin-top:5px;" cellspacing="18" |
|style="font-family: helvetica, arial, sans-serif;font-size:1em;color:#ea8828;"|<h3>6/6/2011-6/10/2011</h3> | |style="font-family: helvetica, arial, sans-serif;font-size:1em;color:#ea8828;"|<h3>6/6/2011-6/10/2011</h3> | ||
|- | |- | ||
| | | | ||
| + | |||
| + | [[File:Startnotebook.jpg| 350px]] | ||
*BFP2 | *BFP2 | ||
Latest revision as of 05:01, 29 September 2011
Alberto's Notebook
Contents
|
Timeline
8/22/2011-8/29/2011 |
|
Summary
xFPc = fluorescent protein composite (+RBS +terminator) part From the restriction mapping, it appears that the use of BBa_I0500 in constructing the AraC-pBad device do not yield the expected device due to self-ligation. The use of BBa_I13458 seems to produce fragments with the correct size, even though the size similarity between the backbone and insert (approx. 2000 bp) prevent us from seeing the cut part. Because the pC+AraC+pBad+GFPc (BBa_I13458_I13453_E0240) and the pC+AraC+pBad+RFPc (BBa_I13458_I13453_J23101) seem to produce the correct DNA fragments, I decided to proceed with induction using them. 1. DNA Ladder 2. I0500_E0240 (uncut) 3. I0500_E0240 (double cut) 4. I0500_E0240 (single cut) 5. I13458_I13453_E0240 (uncut) 6. I13458_I13453_E0240 (double cut) 7. I13458_I13453_E0240 (single cut) 8. I0500_E0430 (uncut) 9. I0500_E0430 (double cut) 10. I0500_E0430 (single cut) 1. DNA Ladder 2. I13458_I13453_E0430 (uncut) 3. I13458_I13453_E0430 (double cut) 4. I13458_I13453_E0430 (single cut) 5. I0500_J23100 (uncut) 6. I0500_J23100 (double cut) 7. I0500_J23100 (single cut) 8. I13458_I13453_J23101 (uncut) 9. I13458_I13453_J23101 (double cut) 10. I13458_I13453_J23101 (single cut) A new method was then used to induce these AraC-pBad devices by having the overnight cultures dilute 200-fold into 1 mL solution. I also added various arabinose concentrations: 2.5 uM, 10 uM, 100 uM, 1 mM, and 5 mM. It was expected that overnight incubation would result in the induced fluorescence, but no such behavior was observed under the UV light on the next day. Note: I left on 8/24 evening for my summer break and nothing seemed to work. But a few days later I heard that (thanks to Traci and Evan!) the induced fluorescence from these devices could be detected using the FACS machine. Maybe the produced fluorescence was simply too sensitive and therefore could not be seen under the UV light. I put the characterization for my inducible genetic devices and I plan on submitting these parts to Parts Registry. Check out our iGEM wiki page for more information! Anyway, it's been a great summer. Thanks for reading my lab notebook! - Alberto |
8/15/2011-8/21/2011 | ||||||||||||||||||||||||||||||
|
Summary
From analyzing the transformed plates, it appeared that the transformed plates for I0500_E0240 and I0500_E0430 devices were filled with colonies. In contrast, the colonies that grew on the transformed plates for I13458-equipped devices were very sparse. Nobody knew for sure if this represented an inherent problem with the part itself and whether this would affect the subsequent steps (restriction digest, ligation, etc). Some overnight cultures were then prepared using these transformed colonies so that restriction mapping could be done. Final BU iGEM Meeting: Wet Lab TeamThe main objectives for the wet lab team consist of the following:
a. Evidence collection: gel, picture, FACS data Final BU iGEM Meeting: Computational TeamThe following summary aims to mention briefly the current objectives for the computational team. The stated goals are organized based on their respective projects. Since I may not be completely familiar with the technical details presented at the meeting, please revise or change my summary to better reflect what actually happened with your project. Clotho- Eliminate bugs: Try to prevent error messages from appearing when certain buttons are pressed. The bugs should be handled with Bugzilla as soon as possible to improve the overall usability of Clotho. Trumpet- Craig has developed this application with good usability and interface Puppeteer- Resource manager: This program aims to increase the efficiency of resource allocations. While the main goal is to make it function well, its parallelism problem (i.e. how to optimally use pipet in general cases/protocols) must be solved because it needs to be ready for demonstration. The flexibility of this program also needs some improvement by removing all hard-coded information so that it can be used in other robot. Puppet Show- Database: This program houses the samples and wet lab protocols in a format that can be read by the liquid-handling robot. Each sample contains its own history that can be seen in the graph protocol format. - Prepare the written and graph protocols for restriction digest, ligation, Gibson Gateway assembly method. - Prepare the Database setup files for its deployment - Prepare the generalized version of the protocol graph and its viewer - Sample history: Allow the user to see past actions done on a specified part - Do a follow up with Avi General Objectives
|
8/8/2011-8/14/2011 |
|
Summary
Using the old protocol, I tried to induce the 3 fluorescent proteins under the pBad promoter. But this time, I added 2mM and 5mM into the 2 liquid culture from each fluorescent protein color group, while keeping 1 culture for control. It turned out that the induction still did not work. With additional research on the pBad operon and talking to Chris Anderson, I found out that AraC gene is important in allowing the DNA to form a specific conformation that can be induced with arabinose. I looked up the Parts Registry website and found 2 interesting parts: Bba_I13458 and Bba_I0500. The first one only contains the AraC gene, so I can combine it with the existing pBad devices. The second one contains both pBad and AraC, so it has to be ligated with fluorescent protein composite part. I decided to utilize both parts because I didn't know which method works the best. I conducted the typical set of protocols to isolate the biobricks from the iGEM plate. While both biobricks yielded colonies on the plate, their numbers differed by a huge margin. The plate for Bba_I0500 only contained a single colonies while the plate for Bba_I13458 was almost covered by colonies. Because there were other similar problems, in which kanamycin plate simply did not yield enough colonies, the new kanamycin plates were made with less amount of antibiotic. But further transformation attempts showed that no difference existed between those two types of plates (higher versus lower concentration of kanamycin). |
8/1/2011-8/7/2011 |
|
Summary
The ligated parts Bba_I14033_E0240 has proven to be problematic because it does not fluoresce. Furthermore, additional verification through gel electrophoresis either show a wrong band size or nothing at all. Therefore I tried to create this composite part using entirely new I14033 (pCat) and E0240 (GFPc). While this new combination ended up producing the correct band size during restriction mapping, its colonies still did not fluoresce. Additional verification was done using 1.2% agarose, where pCat_GFPc was run alongside GFPc. A higher agarose concentration was used to visualize a <100bp difference and the result successfully showed the difference between the 2 parts. I figure out that maybe pCat is simply not compatible with GFPc. During the restriction mapping for pCat_GFPc, I tried varying the digestion time (2 hours versus 4 hours) to understand its effect on ligation efficiency. I found out later that such variation did not affect restriction digest efficiency. Another problem that came up last week is the failure of inducing pBad (Bba_I13453) with arabinose. I previously tried the induction by adding 10uM arabinose into the liquid cultures of GFPc (Bba_E0240), YFPc (Bba_E0430), and RFPc (Bba_J23100) under the pBad promoter. But the liquid cultures autofluoresce under the UV light because the cultures have a yellow hue by themselves. So I tried a new induction protocol this time, in which 500 mL was aliquoted from each liquid culture 8 times. Using 4 of these aliquots, I pelleted and resuspended the cell in 1x PBS (pH = 7.4). PBS was used because it did not have any color, thus preventing any possibility of autofluorescence. I then add the following to both the LB and PBS tubes: 0uM, 5uM, 10uM, and 50uM of arabinose. After the arabinose have been added, these tubes were incubated for 4 hours. Then, 200uL liquid from the tubes that represent one fluorescent protein was aliquoted into a petri dish. A 2x4 grid was drawn on each petri dish to allow a better observation on the correlation between arabinose concentration and the fluorescent intensity. Despite such efforts, nothing was observed under the UV light. |
7/25/2011-7/31/2011 |
|
Summary
After the weekend transformation of the ligation reactions (each containing GFP and a unique promoter), I found out that 2 plates (E0240_I13453 & E0240_R0040) contained numerous colonies while the other 2 plates (E0240_R2000 & E0240_I14033) only contained a few colonies. The plates with pTet (R0040) and R2000 had colonies with green tint. These colonies were then grown in liquid culture with the corresponding antibiotic added into it (plasmid preparation). Four tubes of liquid culture were prepared for four colonies from each plate. This step was done to assess if the parts were ligated correctly or if there is any false positive that results from plasmids religating to itself. In the meantime, I figured out that fluorescence protein will shine under the UV light. While you could see the green hue of the colonies, UV will allow the fluorescence to have a more intense visibility. It appeared that only GFP with pTet and R2000 fluoresced. It made sense that a device containing pBad was not supposed to fluoresce unless it was induced with arabinose. Nevertheless, the device containing the pCat constitutive promoter did not fluoresce either. At this moment, I assume that maybe pCat did not work with GFP although it worked very well with RFP. All the plasmid preps were found to be cloudy on the next day, signifying proper bacterial amplification. From the DNA nanodrop quantification, we found out that most of the preps have DNA concentration of 30 and above. Their 260/280 ratio also seemed to be within or at least close to the usual range (1.7-2.0) as well. Next, we ran these samples in gel electrophoresis. Because there were 4 samples run for each type of composite part, it would be easy to see if any of them is a false positive. From the gel picture, all bands for each device seemed to have the expected band size. But an unexpected result came out for the pCat-GFP because only 2 samples of this type have similar band size while the other 2 are both very high and very low. Because the DNA for these samples are supercoiled, it is not possible to calculate their size just by comparing them with the DNA ladder. Nevertheless, it is still possible to measure their relative size difference from each other and that is what I did to determine which pCat-GFP samples can be kept. After doing this step, I performed restriction mapping. This step is done by obtaining one sample for each device type and prepare three small samples out of it: uncut, single cut, and double cut. The uncut serves as the control. The single cut aims to confirm the overall biobrick size because the DNA won't be supercoiled and thus its size can be measured based on its position using the DNA ladder. The double cut is meant to produce the fragment containing the complete GFP device. That way, it is possible to predict the behavior for these samples after gel extraction based on the size of backbone, insert and overall plasmid. Running these samples, I found out that all samples behaved according to our expectation except for, again, pCat-GFP; its double cut did not produce any fragment at all. Further attempt to do the same thing yielded an oversized fragment. With all these results, I decided to religate GFPc (Bba_E0240) and pCat (Bba_I14033) again. All this time, I have been assuming that the pBad-GFP device worked well if it did not fluoresce as pBad is an arabinose-induced promoter. As long as it had a good band size in gel electrophoresis, I considered it to be a positive result. But it is important to see if pBad can indeed be induced with arabinose. So I prepared 3 liquid cultures from the plates containing the pBad-GFP colonies. After overnight incubation, I added 10 mM L(+) arabinose to 2 tubes and leave the other one as control. I planned to observe these tubes under the UV light every 1 hour. But because nothing showed up after 2 hours, I decided to leave them overnight and found out later that the liquid culture with arabinose still did not fluoresce. I figured out that I might have accidentally take false positive colonies from the plate. |
7/18/2011-7/24/2011 |
|
Summary:
Surprisingly, none of the ligation attempt produced any significant result - except for the 2 transformation plates that use the Alpha Select Cells. These plates contained enormous, uncountable, amount of colonies. This was indeed surprising, but then we decided to transform several ligation reactions (the leftover from what we prepared on Monday) and checked to see if the use of Alpha Select Cells will produce a consistent ligation success. On the next day, we found out that this is exactly what happened. The only problem only occurred in the fluorescence composite parts that were ligated with the R2000 promoter. They either produced a small amount of colonies or nothing at all. Because R2000 is described on the Parts Registry as working well with E0240 (GFPc), it may simply not work well with other parts. Hence, we all decided to stop using R2000 for parts other than GFPc. My recent ligation attempts involve the use of YFPc because I ran out of digested GFPc. So I prepared some more gel extraction samples of GFPc (cut with X and P) and then ligate them with different promoters: I14033 (pCat), I13453 (pBad), R0040 (pTet), and R2000 respectively. While the ligation may seem like a straightforward process, I decided to figure out several things here: First, is there any difference in behavior between part with high DNA concentration versus good 260/280 ratio? I did this because I have 2 GFPc parts, one with DNA concentration of 10.6 ng/uL and the other with 260/280 ratio of 2.13 but DNA concentration of 3.2 ng/uL. Second, does a combination between parts with different concentration produce different number of colonies? I found out on Sunday that the plates for E0240_R0040 and E0240_I13453 contained an enormous amount of colonies. The E0240 used for these ligated parts are the one with 3.2 ng/uL DNA concentration and 260/280 ratio of 2.13. The other plates only contain a small amount of colonies (5-10). These colonies appeared to be white. Nevertheless, we cannot determine anything from this since they both were done on Ampicillin plates and there was a contamination problem with the SOC. At least they worked. |
7/11/2011-7/17/2011 | ||||||||||||||||||||||||||||||||||||||||||||||||||||||||
|
Summary:
Assuming that higher amount of cells can fix our ligation problem, I transformed several past overnight ligation reaction that consist of: GFP Composite + R2000, GFP Composite + pCat (I14033), GFP Composite + pTet (R0040), Positive Control (J23101), and Negative Control (E. coli on plain LB). The transformation protocol used here was quite dissimilar from the regular one because 800 uL of the new E. coli cells would be concentrated into 200 uL by centrifugation and resuspension. The heat shock would be done on the heating block for 30-45 seconds and the recovery would take place inside the shaker. After overnight incubation at 37 degree, the Positive Control and Negative Control plates contained numerous colonies. I initially though that the other plates did not contain any colony, but Traci took a look at them and realized that one of the plate (Bba_E0240 + Bba_I14033) contained small colonies. Meanwhile, plates that were made with more concentration of cells (~2 mL) had more visible colonies on it. So Traci told me and Kyle to transform some ligation reactions into 3 and 4 mL of pelleted cells, respectively. I did that with Vanessa's overnight ligation of YFP Composite + pCat (Bba_E0430 + Bba_I14033) and my quick ligation of GFP Composite + R2000. The results were still unreliable as only the latter had colonies, but at least something worked. I prepared plasmid preps for the Bba R2000_E0240 and Bba I14033_E0240, then incubate them inside the 37 degree shaker overnight. I found out on the next morning that the plasmid preps were not as opaque as usual. They were at most 60-70% cloudy-looking, signifying that the bacterial amplification in this LB broth liquid culture was not optimal. When I did nanodrop quantification on the plasmid obtained from my plates (the first eight), Kyle's (the next four) and Vanessa's (the last one), the obtained values seemed smaller than our other plasmids.
Despite the fact that we obtained colonies from transformed ligation reactions, we tried to approach this result cautiously. Some checked on the Ampicillin and Kanamycin negative control plates to verify the ability of these antibiotic infused LB plates in selectively prohibit bacterial growth (the plates are all good). Some planned to conduct ligation with the addition of CIP into the backbone to check the possibility of false positive (it was still ongoing at the time). I did a quick verification attempt with gel electrophoresis to both determine the availability of DNA and check the fragment size. I used the samples from the mini prep with the highest concentration and ran it against the backbone plasmid. This means that if I were to check on R2000_E0240, I would run the sample against R2000 because this promoter was used as the backbone/vector with the E0240 used as the insert. But only the R2000_E0240 part produced a visible on the gel so that I only prepared frozen stock for this one. In the meantime, I was quite concerned that the small DNA concentration in the gel extraction samples may mean nothing but false positive. So I ran gel electrophoresis using several samples and each well was filled with 10 uL of the samples. The resulting gel picture had extremely faint bands, so my effort to increase their visibility also caused the DNA ladder to be overexposed. But this did not concern me because I only wanted to verify the existence of DNA, not the size. Only DNA would appear as glowing bands because they could be bounded with the SIBR dye. The most important thing here is that we can now be assured that the DNA was not lost in gel extraction. |
7/4/2011-7/10/2011 |
|
The transformed plates from last week did not contain the usual colonies. Instead, each plate had a thin layer of bacteria lawn* (*= uncountable colonies, making it appears film-like) and it smells far stronger, albeit similar, to the usual E. coli culture. While we never seen a plate that contains bacterial lawn before, we found out later that it was not the transformed bacteria because of the following: First, the negative control plate also showed the same bacterial lawn growth. That means the plate was not doing its job in antibiotic-based selection. Because all the plates showed similar characteristic, the plate either lack kanamycin or it was added when the agar mixture was still hot, thus degrading the antibiotic. Second, the plasmid prep did not show any growth, meaning that the bacteria did not prefer 37 degree Celsius (unlike E. coli). This problem appeared suddenly because we just made the kanamycin plate the previous day. Another problem also appeared when Shannon was about to transform several more bench top ligation reaction when Kyle realized that the LB broth was contaminated. There was a yellow/transparent clump of spore-like materials lying at the bottom. This is bad because another set of ligation was transformed with that LB broth on the previous Sunday, meaning that its quality would be compromised as well. We found out later that these plates did not grow either. In order to avoid such problem, we decided to remake the LB broth along with the plates. We did negative control on the new Ampicillin and Kanamycin plates and they turned out fine. I then divided the LB broth into several aliquotes, each for one team member. This is done not only to improve efficiency (no need to transfer broth from big flask to the small one every time) but also to reduce the risk of contamination. In terms of our overall progress, everything tended to work well up until ligation. While we could not verify the condition of our ligation, they did not transform well. So Traci decided to prepare a new batch of E. coli cells, especially because our stock has been running out as well. Some other people decided to prepare a new set of plasmid prep by either using old plates or streaking new plates. In such cases, transformation never became a problem for us. So we figured out that the problem should be caused by ligation. Traci then ordered a package of Quick Ligation. I also tried doing ethanol precipitation for the gel extraction samples with extremely low DNA concentration, which supposedly compress the DNA into an extract of smaller amount but higher concentration. But it did not work either. On my own personal attempt at creating a device using GFP composite, I had not been able to progress further either due to ligation problem. So with all the new tools in hand (cells, plates, LB broth), I decided to start from the beginning – get new mini prep samples, digest the plasmid, and tried different ligation method. In this case, I limited myself to only use GFP Composite (Bba_E0240) and the suitable promoter (Bba_R2000). I also tried to learn more about the ligation problem by cutting both GFP composite and R2000 Promoter with only one restriction digest enzyme, X and S respectively. They will serve as a "positive control", because they are supposed to be easy to ligate. I prepared 3 ligation reactions for one type of sample, each reaction is done through either one of the following ligation protocol: 16 C for one hour, room temperature/bench top for 30 minutes, or bench top using quick ligase for 5 minutes. The insert to vector ratio used was 1 to 3 and the heat inactivation step would be skipped here. |
6/27/2011-7/3/2011 |
|
Utilizing the digested plasmid from last week, I ran gel electrophoresis to separate the fragments of the digested plasmids from last week. It was apparent that the GFP composite had been successfully cut, which means that we had solved the problem with restriction digest. 1. DNA Ladder 2. Promoter (Bba_R2000.1) 3. Promoter (Bba_R2000.1) - Cut 4. Promoter (Bba_R2000.2) - Cut 5. Promoter (Bba_R0040.1) 6. Promoter (Bba_R0040.1) - Cut 7. GFP Composite (2) (Bba_E0240.1) 8. GFP Composite (2) (Bba_E0240.1) - Cut 9. GFP Composite (2) (Bba_E0240.2) - Cut 10. GFP (BBa_J52028) 11. GFP (BBa_J52028) - Cut 12. DNA Ladder Despite our success with the restriction digest, one question still remains: why did the bands look faint, while the DNA ladder was extremely bright? We later found out that this issue was caused by using DNA ladder without diluting it first. Once we mixed the DNA ladder and water with 1:4 ratio, the bands on the gel fluoresced with the same intensity, allowing us to clearly verify their relative position according to the DNA ladder. Progressing to the next step, we found numerous problems with the ligation and we then tried to isolate the error sources systematically. We realized that we had ignored the number of base pairs for the insert and vector ratio calculation. This mean that the unexpected band size from the GFP + Terminator composite part could possibly result from bad ligation. I did ligation again with this new formula, but nothing grew. We then tried using the improved calculation method, where the vector mass were kept constant and as close to 50 ng as possible. In the meantime, Margaux successfully did the ligation, which could be verified by the red tinted colonies. From her experiment, we found out that the amount of ligase enzyme did not matter. Kyle also did ligation and found out that two ligation incubation protocols did not yield different result. Nevertheless the yield was extremely small as only 1 or 2 plates show bacterial growth. In addition, there was at most 1 or 2 colonies found on each of those plates. We then tried to do ligation with different protocol, where the ligation reaction will be incubated in 16 degrees overnight, using the 5 samples prepared with the revised calculation. One of these samples, Bba_R2000_E0240 (Promoter+GFP Composite), underwent ethanol precipitation to increase its concentration. While the concentration of its individual part was very small, ethanol precipitation can create a significantly small sample with high concentration. We expected this approach to allow a better attachment between the sticky parts, even though the small volume prohibit us from mixing the parts based on the previously established ratio. The result were transformed on Sunday and we expected the plates to be ready by next Tuesday. |
6/20/2011-6/26/2011 |
|
On 6/21, we had the first Computational + Wet Lab joint meeting where everyone presented an update on his/her progress so far. We also talked on what further improvement can be implemented and how to proceed to the next phase of the project. Based on the meeting, we realized the need to figure out how to put more media files into the online notebook, label the gel, and organize a clearer division of labor. I plan to work mostly on part/device creation, especially on part characterization and data entry for the BU Registry. Professor Densmore also mentioned that we should write basic laboratory protocols as future references for new people, verification method to determine if things are working, and troubleshooting method in case the experiment yields unusual result. But the most important thing that came from the meeting was the new objective: creating 4 biological devices for each fluorescent protein. In order to achieve that, we would like to utilize 2 different approaches. The first one is a 'Bottom Up Approach' where we will continue attaching fluorescent protein gene to terminator, then putting them together with RBS before finally combining the resulting composite part with a promoter. While this method is going to take longer time and require more effort, it will allow us more opportunity in creating a fully customizable plasmid. The second one is a 'Composite Approach' where we will obtain premade composite parts from the IGEM plate and combine them with other part to save time. The advantage from this method is the ability to create a working biological circuit in a shorter steps and reduce any possible chance of error. I plan to work mostly on the second approach, so I will try to combine several types of promoter with composite GFP gene that already has a RBS and a Terminator. On the day before the meeting, I was actually working on trying to combine a cut RBS with a composite GFP+Terminator part. Using the previously prepared GFP (BBa_J52028) + Terminator (BBa_B0015) composite part, I did restriction digest on them using the enzyme X and P. I predicted that the GFP+Terminator will be cut away from the rest of the backbone so that the gel electrophoresis will produce a ~700 bp fragment (GFP+Terminator) and a ~3000 bp fragment (the backbone). However, the gel did not produce the expected result: while a faint second band was indeed visible, it was too close to the first one, meaning that this band was too big to be a GFP+Terminator fragment. I decided to carry on this work along with the new 'Composite Approach'. I did restriction digest on YFP composite (Bba_E0430), GFP composite (Bba_E0240), promoter (Bba_R2000), terminator (Bba_B0015), and the previously prepared GFP (Bba_J52028) + Terminator (Bba_B0015) part. For some yet to be determined causes, the YFP and GFP composite were not digested properly as no second band was visible. The GFP+Terminator produce a weird result like before. I tried to do the same thing for the second time with larger volume, because Traci told us that the nanodrop quantification result from the extracted gels could be improved by using more sample instead of the constant ~10 uL that we had been using all this time. The pictures of the result can be seen below. We were still unable to see any separated band for the cut YFP and GFP composite part. Some promoters and terminators were successfully cut, but our previously made GFP+Terminator composite parts did not seem to produce the expected band and the same thing happened with the parts that encode fluorescent proteins. Restriction Digest 1: 1. DNA Ladder 2. YFP Composite - Cut 3. YFP Composite - Cut 4. YFP Composite 5. GFP Composite - Cut 6. GFP Composite - Cut 7. GFP Composite 8. Promoter 9. Promoter 10. Promoter 11. Promoter 12. Promoter 13. Terminator - Cut 14. Terminator - Cut 15. Terminator 16. Terminator - Cut 17. Terminator - Cut 18. DNA Ladder Restriction Digest 2: 1. DNA Ladder 2. GFP+Terminator - Cut 3. GFP+Terminator - Cut 4. GFP+Terminator 5. GFP - Cut 6. BFP - Cut 7. BFP 8. RFP - Cut 9. RFP 10. DNA Ladder Suma told us that she previously encountered the same problem and she pointed out that there might be problem with the restriction digest. In double digestion, where we cut the plasmid with 2 enzymes simultaneously, buffer 2 was always used since it has the highest activity in all enzymes combinations. But it turns out that this assumption may not be enough, since the website for New England Biolabs states that different combinations need different buffer and digestion time. So I repeated the restriction digest with this method and cut the following biobricks: GFP composite (Bba_E0240) and promoter (Bba_R2000 & Bba_R0040). The digestion time was 2 hours instead of the usual 1 hour in accordance to the optimization recommendation found in the NEB website. The digested plasmids were then kept in the freezer. |
6/13/2011-6/19/2011 |
The starting materials were GFP (BBa_J52028) and Terminator (BBa_B0015). Each of these biobrick underwent restriction digest to cut out the necessary part. Because the GFP gene is large enough to be separated in gel electrophoresis, it was cut out from the backbone with EcoRi and SpeI. In contrast, the terminator is too small for gel separation so it was not separated from the backbone. Instead, the backbone was cut with EcoRI and XbaI. For the first time, the gel electrophoresis yielded visible results where the cut biobrick plasmid appeared as two bands (the cut region and the leftover). Nanodrop quantification showed that the DNA concentration for each sample was very small as it was between 2-3 ng/uL. The GFP gene and the backbone, which contains the terminator, were combined through ligation reaction. Throughout these processes, three ligation reactions were made and thus three petri dishes were prepared for each of them. The backbone used here also contains genes that encode for both kanamycin and ampicillin resistance, so petri dishes with either antibiotic can be used for transformation. But since there had been problems with the ampicillin plate where it did not selectively inhibit the bacteria that were not transformed (this was known when the negative control in other experiment yielded positive result), kanamycin petri dishes were used. On the next day, only one out of the three dishes contained bacteria cultures (there were 4 cultures, to be exact). Plasmid prep was done and 12 hours later, the opaqueness from each tube showed that a good number of bacteria amplification had taken place. No string-like substance was found at the end of the pipet tip in each tube. Miniprep was done and the results were: 48.4 ng/uL, 260/280: 1.80, 260/230: 0.89 (composite part 1) and 14.7 ng/uL, 260/280: 1.76, 260/230: 0.91 (composite part 2). The plasmids were kept in the -20C freezer and the corresponding plasmid preps had glycerol added before being stored in 2 places.
From the recently arrived spring 2011 IGEM plate, the following parts were isolated: Bba_E0430 (RBS+YFP+Promoter), Bba_E0240 (RBS+GFP+Promoter), Bba_R2000 (Promoter that works best with the previous composite parts), Bba_E0020 (ECFP), Bba_E0032 (EYFP), and Bba_K156010 (BFP).
TAE buffer was prepared from the 50X TAE stock. Approximately 40 LB+Ampicillin agar plates were made because many of the parts contained gene that encode for Ampicillin resistance. Almost all used glasswares were autoclaved and kept for future use. Lab bench was cleaned with 70% ethanol and paper towel. QIAcube was received for demo and would stay for approximately one week from Tuesday (6/14). |
6/6/2011-6/10/2011 |
Plasmid prep were created from the BFP2 culture plate and incubated for approximately 16 hours for plasmid amplification. The resulting plasmids were isolated by miniprep and quantified with nanodrop. The DNA concentration in the two samples are 16.5 ng/uL and 14.9 ng/uL, respectively. While such values are below the normally acceptable range of 20 and above, we still run electrophoresis on them. No band was detected in the gel.
Pbad promoter biobrick was obtained from the spring 2010 IGEM plate, and transformed into E. coli bacteria. The bacteria were then plated onto agar-based LB+Ampicillin growth medium. Lots of cultures were found on the next day after the overnight transformation. Instead of uniform appearance, however, each plate was composed of both dark or light colonies. Plasmid prep was done for each of the color type (pipet tip was used instead of metal loop) and each tube was incubated for 12 hours. On the next morning, the tip in each tube was found to contain a spiral, string-like thing and most of the plasmid preps were not opaque. After the miniprep, each of the plasmid was quantified with nanodrop. Their respective concentrations were 10.0 ng/uL and 8.3 ng/uL. They were also found to be free from contaminants (based on the 260/280 and 260/230 values). But none of the samples appeared on the gel after electrophoresis. In order to understand the problem that had been plaguing our work, we went to a biology lab to view the plasmid preps under compound microscope and conduct gram staining analysis. All plasmid preps seemed to be contaminated with either another type of bacteria (due to differences in shape and size) or unidentified string-like compound. Many of the plasmid preps contain purple-colored bacteria, even though E. coli bacteria are supposed to be pink since they are gram-negative. Based on these observations, we plan to improve on the lab cleanliness and avoid contamination. One important decision here was to autoclaved all of the pipet. This was done not only to avoid the possibility of contamination in daily experiments but also to ensure that the plasmid preps will properly amplify the plasmid-containing bacteria. |
Others
Clotho
[http://www.clothocad.org/ Clotho]
[http://wiki.bu.edu/ece-clotho/index.php/Main_Page Clotho Help/Wiki]
Wet Lab Protocols
External Links
[http://twitter.com/BU_Wellesley Follow BU_Wellesley IGEM Team on Twitter!]
[http://partsregistry.org/wiki/index.php/Main_Page Registry of Standard Biological Parts]
BU_Wellesley IGEM Lab Notebook
 "
"

