Team:Macquarie Australia/Notebook
From 2011.igem.org
(→Colony PCR) |
(→TEAM PCR) |
||
| Line 16: | Line 16: | ||
* Step 1) We diluted the primer stock down to a concentration of 100uM. We did this by taking the weight of the primers and multiplying them by 100 and then adding this amount of water to the stock. | * Step 1) We diluted the primer stock down to a concentration of 100uM. We did this by taking the weight of the primers and multiplying them by 100 and then adding this amount of water to the stock. | ||
| - | ::: So, for example, if our amount of Oligo = 38. | + | ::: So, for example, if our amount of Oligo = 38.3nmol, we add 383ul of water (which gives us a concentration of 100uM) |
* Step 2) We performed a second dilution (1:10) to produce a concentration of 10uM for each primer. | * Step 2) We performed a second dilution (1:10) to produce a concentration of 10uM for each primer. | ||
Revision as of 21:43, 8 September 2011
Contents |
Notebook
12/8/2011
TEAM PCR
Today, we started the PCR process in order to amplify our T7 promoter, HO1, At, Dr.
- Step 1) We diluted the primer stock down to a concentration of 100uM. We did this by taking the weight of the primers and multiplying them by 100 and then adding this amount of water to the stock.
- So, for example, if our amount of Oligo = 38.3nmol, we add 383ul of water (which gives us a concentration of 100uM)
- Step 2) We performed a second dilution (1:10) to produce a concentration of 10uM for each primer.
- So, 100uM --> 10uM
- Step 3) A master-mix was made containing:
Reactants Volume Water 41.4ul 5x buffer 16ul 10mM DNTP 1.6ul Taq poly 1ul
- Step 4) Mix was spun for a couple of seconds. This master mix as divided up into 4 15ul aliquots [you can take out 3 lots of 15ul and keep the final 15ul in the mastermix tube and use that as a housing].
- Step 5) To these 15ul aliquots, we add into each:
Primers/Template (steps 1-2) Volume Forward 2ul Reverse 2ul Template [Ho, Dr etc] 1ul
- What we end up with is 4 reaction tubes with our plasmid template with the primers in the correct dilution.
- Step 6) We set up the PCR machine with the following protocol:
- Initial denaturation – 94oC for 2 minutes
- Denaturation – 94oC for 30 sec
- Annealing – 60oC for 30 seconds ] 10 cycles in total
- Extension – 72oC for 2min 30sec
- THEN
- Denaturation – 94oC for 30 sec
- Annealing – 52oC for 30 seconds ] 15 cycles in total.
- Extension – 72oC for 2min 30sec
- Final extension – 72oC for 10 min
- Hold period – 4oC for 2 minutes
- We’ve labelled the protocol ‘330’ and it’s the same as last years’ protocol with a few additions. Note that we made a mistake during our 15 cycle stage - it should be at 72oC. Our bad. We have fixed this - the protocol has been corrected.
- Step 7) We conducted our PCR! It took 2 hours and 13 minutes to complete.
- Step 8) With our PCR complete, we then set about preparing the Chloramphenicol vector [which is the one we need to submit for any medal] as well as the clean up protocol.
Rectants Volume DPN1 1ul Xba1 + Spe1 1ul + 1ul 100x BSA 1ul Template DNA - Ch vector 20ul 10x NEBuffer 4 5ul Water 21.5ul Total 50.5ul
- Clean up prep:
- Sigma GENELUTE PCR clean up kit has the protocol
- Step 9) We set up the nanodrop to determine the quality of our PCR results:
PCR product Concentration T7 1.1ug [23ng/ul] HO 870ng [17.4ng/ul] Agro 500ng [10.4ng/ul] Dino 1.8ug [36.1ng/ul]
- Step 10) Cleaned PCR products were diluted with water [20ul PCR product + 30ul water] and were then double digested using X + S [1ul each] in 5ul of 10x buffer and 1ul of BSA.
TEAM LIGATION
Preparation of ligation mix 1. 11 uL H2O in PCR tube 2. 1.2 uL plasmid 3. Digests (in separate PCR tubes): i. 0.42 uL of T7 ii. 7.76 uL of D iii. 26.92 uL of AT iv. 4.60 uL of HO 4. 2 uL of 10 x T4 DNA ligase Reaction buffer (vortex to make sure precipitate goes into solution) 5. 1 uL of T4 DNA ligase 6. Mix well – centrifuge for a few seconds Incubation 1. Incubate at room temperature for 10 mins 2. Incubate at 80oC for 20 mins in water bath (preheat water-bath)
TEAM COMPETENT CELLS
-Competent Cell Method Modified from Inoue et al. 1992- Colonies isolated and inoculated to 150ml of SOB medium and grown to an A600 of between 0.2-0.8 at room temperature overnight (18-22 C) with vigorous shaking (200-250 rpm), then place on ice for 10min. The culture was transferred to a 15 ml centrifuge tube and spun at 2500 x g for 10 min at 4 C. Cells pelleted by spinning the tubes at ~2,500 g for ~7 min at 4oC in the Sigma centrifuge. Supernatant removed, and immediately the tube was placed on ice. Cells were resuspended in 1-5 ml of ice-cold TB buffer by gently pipetting up and down with a 1 ml pipette. Ice-cold TB buffer was added to bring the volume up to ~1/5th of the original culture volume, and mixed by gently inverting. Tube was incubated on ice for 10 min. Centrifugation step repeated, supernatant poured off and cells gently resuspend in ~1/20th of the original culture volume of ice-cold TB buffer. 930 l of your cell suspension added to 1.5 microcentrifuges. 70 l of DMSO added to each. Aliquots of 100 *l of the competent cell suspension were combined with DMSO into microcentrifuge tubes. Competent cell aliquots where then frozen in liquid nitrogen. In order to prepare and transform competent E.coli cells various nutrient broths, such as LB, LB agar, SOC and SOB medium, were prepared.
MEDIA PREP
-LB media Method- Dissolve 10g tryptone, 5g yeast extract and 10g NaCl in 800 mL MilliQ water, making use of a magnetic stirrer. Once dissolved, bring volume up to 1 liter using the MilliQ water. Autoclave 500 mL of the solution (121oC, 15 min, standard liquid cycle).
-LB agar Method- Add 7.5 g Bacto agar to the remaining 500 mL of LB media and autoclave [121oC, 15 min, standard liquid cycle]. Add 250 µL of Chloroamphenicol and mix well before plating out and setting agar.
After cooling and antibiotic addition, the LB agar was plated out using aseptic technique. 14 LB agar plates were prepared and allowed to cool next to the Bunsen. After this all plates were aseptically sealed using parafilm and stored in the refrigerator.
SOC and SOB medium are known to result in higher transformation efficiencies of plasmids (1).
-SOC media (for competent cells)- A mixture of 4g 2% w/v bacto-tryptone (20 g), 1g 0.5% w/v bacto-yeast extract, 400µl 5M NaCl, 250 µl 2M KCl, 20mM MgSO4 (0.4821 g), 0.7222g 20mM glucose and MilliQ H2O to 200 mL. The adjusted quantities were combined in 1l measuring column with constant stirring and then placed in the autoclave for sterilization.
-SOB Media (for competent cells)-
Distilled H2O of volume 900ml was added with 5g Bacto Tryptone, 1.25g Bacto Yeast Extract, 0.124 grams NaCl and 0.0475 grams KCl. This was then adjust to pH 7.0 with NaOH or HCl and then to 250mL with distilled H2O. The system was then sterilized by autoclaving.
BUFFER PREP
TB buffer (for competent cells)- 2 grams of CaCl2-2H2O, 18.6 grams of KCl and 3 grams of PIPES where mixed and dissolved in ca 500ml of water with the pH adjusted to 6.7 with KOH. Then, 10.9 grams of MnCl2-4H2O, isdissolved in 300 ml of water, mixed and the solution adjusted to 1L. This is then sterilized by filtration through a pre-rinsed 0.45 µm filter unit and stored at 4 C. The solution is stable at 4 C indefinitely. All salts are added as solids. Resulting solution was colourless and unautoclaved.
TAE buffer - A total volume of 500 mL was made up as a 50x stock solution from 121 g of Tris base dissolved in water with 28.55 mL of glacial acetic acid and 50 mL 0.5 M EDTA (pH 8.0).
EDTA buffer - 18.61 g of EDTA solid, 90 mL of water, and was adjusted to pH 8.0 using 10 M NaOH.
Preparation of gel electrophoresis system
A Sub-Cell GT Agarose Gel Electrophoresis system was set up according to the manufacturer’s instructions. The tray used was 15 x 10 cm and required 120ml gel volume to achieve a 1cm thick gel size.
The 1.2% agarose gel was made up to 200ml by combining 2.4g of agarose gel powder with 200ml of previously prepared TAE buffer. This was placed in the microwave to fully dissolve the agar powder. After the gel liquid cooled to around 60°C it was poured into the UV Transparent Plastic (UVTP) tray.
During this time a GelGreen Nucleic Acid Gel Stain was prepared for post gel staining. A 0.1M NaCl solution was made up to 500ml and 150μl of 10000X GelGreen stock was added.
After the gel solidified the system was submerged in TAE buffer. The samples were loaded in appropriate wells and the system was allowed to run for 1 hour.
Following this the gel was removed and submerged in the previously prepared GelGreen stain. The gel remained submerged in the staining solution for 30min with constant agiatation.
The stained gel was finally analysed using a Gel-Doc EZ Imager for visualisation of PCR products.
REFERENCES
1. Hanahan, D. (1983) J Mol Biol 166, 557-580
2. Sambrook, J. (1989) Molecular Cloning: A Laboratory Manual, 2nd Ed ed., Plainview, NY
23/08/2011
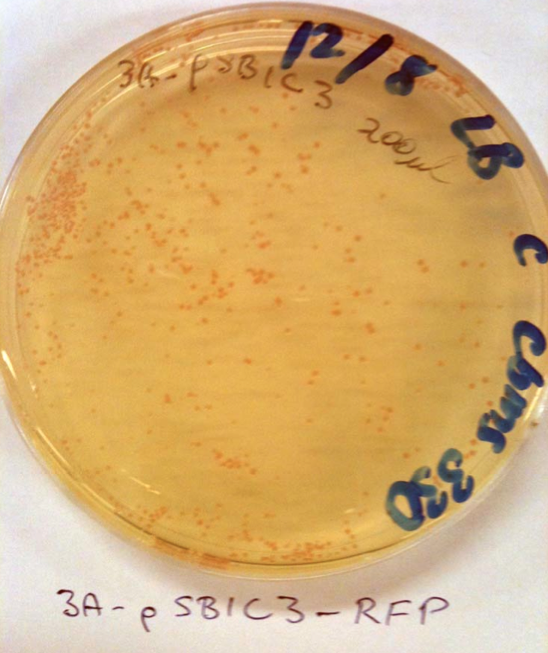
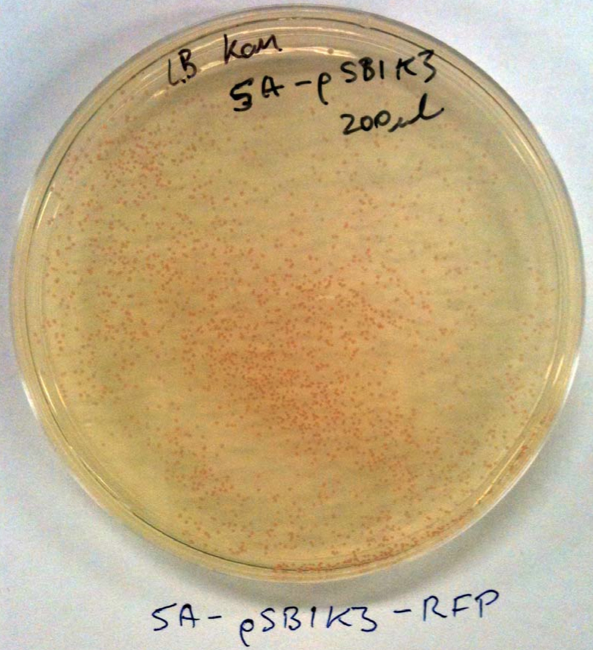
No colonies from ligation: Possible reasons. Restriction enzyme or plasmid problem. Competent cells not competent or low efficiency. However, I checked the sequences of the linearised vectors and they don’t have the SpeI or XbaI sites. This is my fault. These supplied linearised vectors can only be used in subsequent biobrick construction when they are cut with ecoRI and PstI. Checked competent cells with some pSB1C3 and pSB1K3 clones from the iGEM distribution kit (Plate 1, position 3A and 5A) that we can use instead. See the photos: This means that our competent cells are good!!! Yay. These plasmids can be used for digestion with SpeI and XbaI for your initial cloning.
The cool thing is that they express red fluorescent protein (RFP) and are red in colour when IPTG is added. When digested with SpeI and XbaI and ligated with the genes they will be white. I’ll prepare some of these plasmids so you can use these for cloning.
25/08/2011
PCR for D. radiodurans
This PCR reaction is to test the “assumed” right template for the D. radiodurans phytochrome. The materials that we have are 6 tubes (3 orange and 3 pink, labeled 1, 2 and 3 for each colour). 100ul of water was added to increase the sample volume, as per Rob’s instructions to dilute the concentration as they were PCR products. PCR was carried out as per normal.
Components Volumes 5X buffer 24ul F- primer 12ul R-primer 12ul dNTP 1.8ug [36.1ng/ul] Taq 1.2ul H2O 62.4ul Total volume (Master mix) 114ul Template 1ul X6 PCR reaction volume 20ul
PCR cycle
Initial denaturation – 98°C for 2 minutes
Denaturation – 98°C for 30 sec
Annealing – 60°C for 30 seconds ] 25 cycles in total
Extension – 72°C for 2min 30sec
4°C for 18 hours
26/8/11
Colony PCR
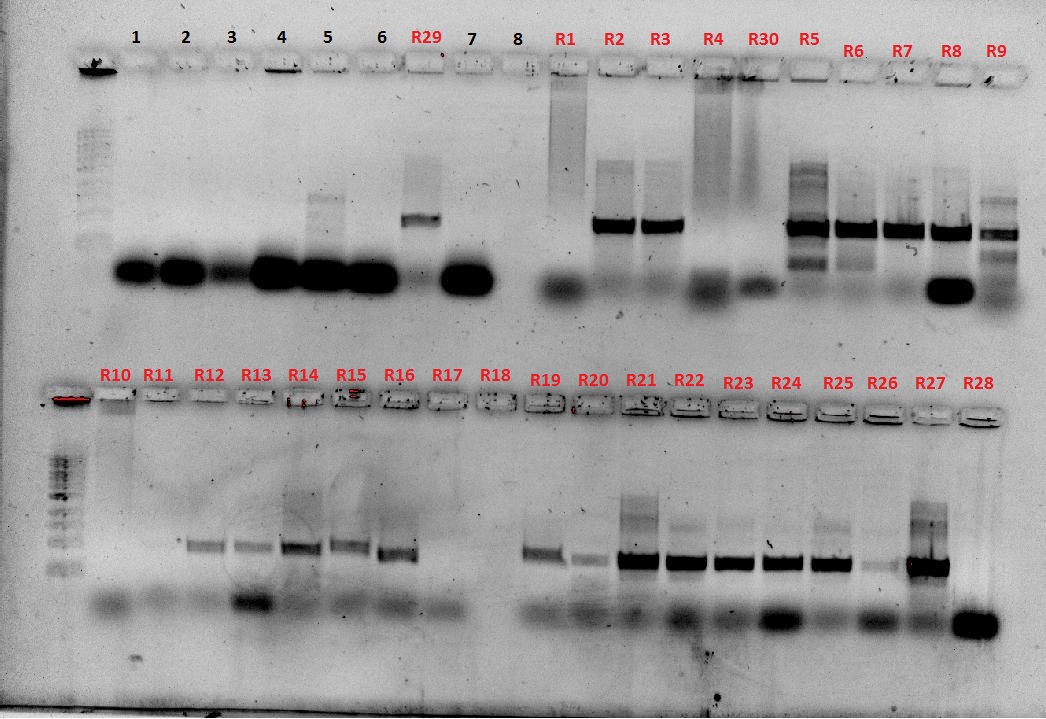
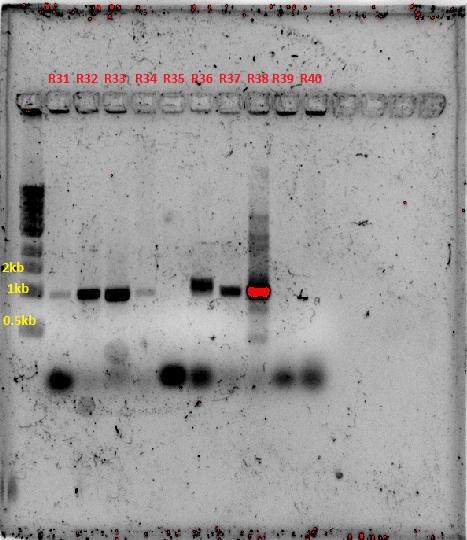
Based on the protocol on iGEM website. 3ul of colony (white) was picked off the antibiotic plates and added to 20ul of water. 3ul of the mixture was used to spot the index plate. The PCR reactions were set up as follows:
Per 10ul reaction vol. BB-fwd + BB-Rev (Cater for 50 reactions, only 48 is needed) BB-Fwd + HO-rev BB-Fwd + T7-rev 5x buffer 2 100 84 16 F-primer 1 50 42 8 R-primer 1 50 42 8 dNTP 0.2 10 8.4 1.6 Taq 0.1 5 4.2 0.8 Water 5.2 520* 218.4 41.6 Master mix Template 0.5 0.5 * 40 (HO), 0.5 * 8 (T7) 0.5 * 40 (HO) 0.5 * 8 (T7) Reaction volume 10ul 48 * 10ul 40 * 10ul 8 * 10ul
- Calculation error on my side, it should have been 260
40 tubes for HO → 20 chloramphenicol resistance, 20 kanamycin resistance
The tubes were labelled coded with a coloured circle, and numbered. Blue circles → (BB-fwd + HO-rev) for HO, no. 1 to 20 for kanamycin, 21 to 40 for chloramphenicol Red circles → (BB-Fwd + BB-Rev) for HO, no. 1 to 20 for kanamycin, 21 to 40 for chloramphenicol Black circles → (BB-Fwd + BB-Rev) for T7, no. 1 to 8 for kanamycin No circles → (BB-Fwd + T7-Rev) for T7, no. 1 to 8 for kanamycin
For T7, there were no colonies from the chloramphenicol plates.
PCR cycle conditions Initial denaturation 95°C for 15 mins Denaturation 95°C for 30s Annealing 56°C for 30s } ~30 cycles Elongation 68°C for 1 min
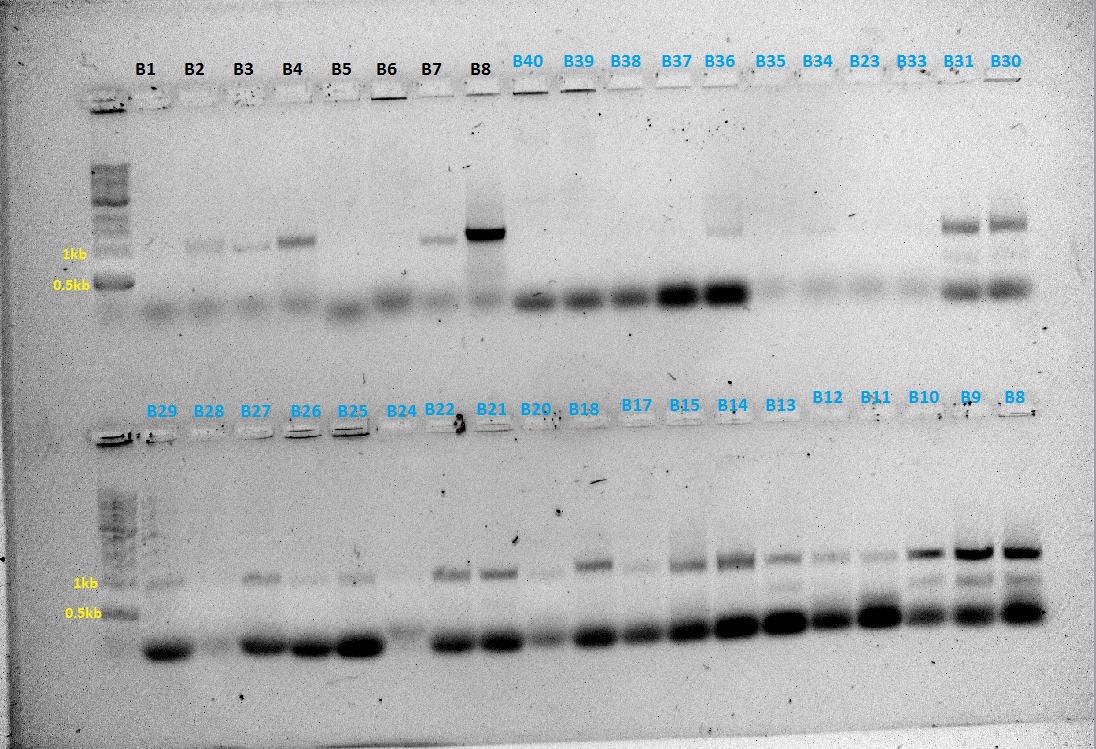
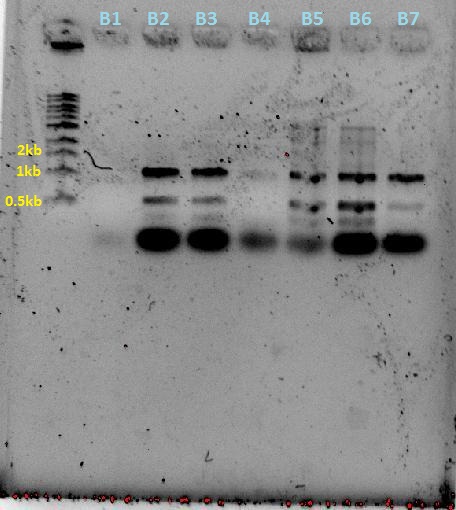
PCR products were ran on a gel
29/8/2011
Index plates results:
Chloramphenicol plate (OH) – Plate were slightly discoloured. The agar had cracks within. Colonies 1-7, 11 and 12 were white. The rest haven't really grown because of agar issue.
Kanamycin plate (OH) - A swipe of agar has been taken out, possibly due to excessive heat, however all colonies 1-20 grew. All were white except 15 and 18 which were red.
Chloramphenicol plate (T7) - Colonies 1,6,8 (and one extra un-numbered colony) were white. Colonies 2,4,5,7 were red. Colony 3 didn't grown.
Kanamycin plate (T7) - Again, plate looked discoloured in the top half and a big swipe of agar had been taken out. Colonies 3, 11, 16 were pink. Colonies 8, 13, 17, 19 were white.
All plates were sealed, labeled and refrigerated for storage.
1/9/2011
Prep for plasmid extraction
Inoculated liquid cultures from the T7 and HO PCR colony screen plates for overnight growth and prep for plasmid extraction. sequencing need to be carried out to confirm BB part is correct.
Agarose gel of ecoRI digestion of 2010 agro-BP plasmids to check plasmids are ok. Agarose gel of samples from opt PCR reaction for amplifying agro-BP (i.e. more ecoRI added). Digested plasmids will then be run on gel.
2/9/2011
TODAY
 "
"

